Daten in Zellen überprüfen
Der ONLYOFFICE Tabellenkalkulationseditor bietet eine Funktion für Datenüberprüfung, mit der die Parameter der Informationen angepasst werden, die Benutzer in Zellen eingeben.
Um auf die Datenüberprüfungsfunktion zuzugreifen, wählen Sie eine Zelle, einen Zellbereich oder eine gesamte Tabelle aus, auf die Sie die Funktion anwenden möchten, öffnen Sie die Registerkarte Daten und klicken Sie in der oberen Symbolleiste auf das Symbol Datenüberprüfung. Das geöffnete Datenüberprüfungsfenster enthält drei Registerkarten: Einstellungen, Eingabemeldung und Fehlermeldung.
Einstellungen
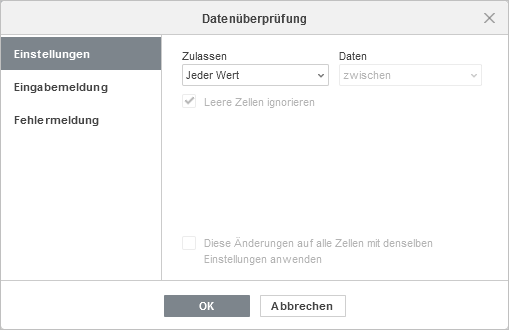
Im Abschnitt Einstellungen können Sie den Datentyp festlegen:
Hinweis: Aktivieren Sie das Kontrollkästchen Diese Änderungen auf alle anderen Zellen mit denselben Einstellungen anwenden, um dieselben Einstellungen für den ausgewählten Zellbereich oder ein ganzes Arbeitsblatt zu verwenden.
-
wählen Sie die gewünschte Option im Menü Zulassen aus:
- Jeder Wert: Keine Grenzen für den Informationstyp.
- Ganze Zahl: Es sind nur ganze Zahlen zulässig.
- Dezimal: Es sind nur Zahlen mit einem Dezimalpunkt zulässig.
-
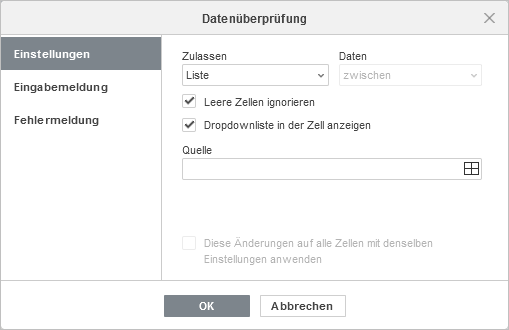
Liste: Es sind nur Optionen aus der von Ihnen erstellten Dropdown-Liste zulässig. Deaktivieren Sie das Kästchen Dropdownliste in der Zell anzeigen, um den Dropdown-Pfeil auszublenden.
- Datum: Es sind nur Zellen mit dem Datumsformat zulässig.
- Uhrzeit: Es sind nur Zellen mit dem Zeitformat zulässig.
- Textlänge: Legt die Zeichenbegrenzung fest.
- Sonstiges: Legt den gewünschten Datenüberprüfungsparameter als Formel fest.
Hinweis: Mit dem Kontrollkästchen Leere Zellen ignorieren kann die Datenüberprüfungsfunktion leere Zellen ignorieren.
-
geben Sie im Menü Daten eine Bedingung an:
- zwischen: Die Daten in Zellen sollen innerhalb des durch die Validierungsregel festgelegten Bereichs liegen.
- nicht zwischen: Die Daten in Zellen sollen nicht innerhalb des durch die Validierungsregel festgelegten Bereichs liegen.
- ist gleich: Die Daten in Zellen sollen dem in der Validierungsregel festgelegten Wert entsprechen.
- ist nicht gleich: Die Daten in Zellen sollen nicht dem in der Validierungsregel festgelegten Wert entsprechen.
- größer als: Die Daten in Zellen sollen die in der Validierungsregel festgelegten Werte übersteigen.
- kleiner als: Die Daten in Zellen sollen nicht die in der Validierungsregel festgelegten Werte übersteigen.
- größer als oder gleich wie: Die Daten in Zellen sollen größer oder gleich dem durch die Validierungsregel festgelegten Wert sein.
- kleiner als oder gleich wie: Die Daten in Zellen sollen kleiner oder gleich dem durch die Validierungsregel festgelegten Wert sein.
-
erstellen Sie eine Validierungsregel in Abhängigkeit vom zulässigen Informationstyp:
sowie auch:
Bedingung Validierungsregel Beschreibung Verfügbarkeit Zwischen / nicht zwischen Minimum / Maximum Legt den Wertebereich fest Jeder Wert / Dezimal / Textlänge Startdatum / Enddatum Legt den Datumsbereich fest Datum Startzeit / Endzeit Legt den Zeitraum fest Zeit
Ist gleich / ist nicht gleichVergleichen mit Legt den Vergleichswert fest Jeder Wert / Dezimal Datum Legt das Vergleichsdatum fest Datum Verstrichene Zeit Legt die Vergleichszeit fest Zeit Länge Legt den Wert für die Textlänge zum Vergleich fest Textlänge Größer als / größer als oder gleich wie Minimum Legt die Untergrenze fest Jeder Wert / Dezimal / Textlänge Startdatum Legt das Startdatum fest Datum Startzeit Legt die Startzeit fest Zeit Kleiner als / kleiner als oder gleich wie Maximum Legt die Obergrenze fest Jeder Wert / Dezimal / Textlänge Enddatum Legt das Enddatum fest Datum Endzeit Legt die Endzeit fest Zeit - Quelle: Gibt die Informationsquelle für den Listeninformationstyp an.
- Formel: Geben Sie die erforderliche Formel ein, um eine benutzerdefinierte Validierungsregel für den Informationstyp Sonstiges zu erstellen.
Eingabemeldung
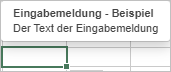
Im Abschnitt Eingabemeldung können Sie eine benutzerdefinierte Meldung erstellen, die angezeigt wird, wenn ein Benutzer den Mauszeiger über die Zelle bewegt.
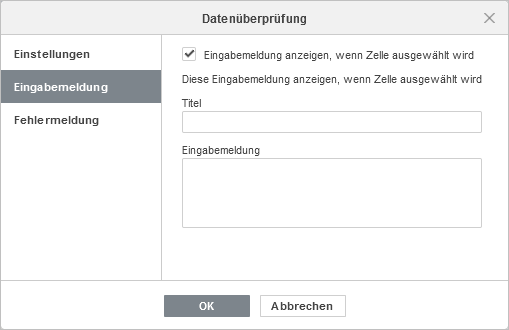
- Geben Sie den Titel und den Text Ihrer Eingabemeldung an.
- Deaktivieren Sie die Option Eingabemeldung anzeigen, wenn Zelle ausgewählt ist, um die Anzeige der Meldung zu deaktivieren. Aktivieren Sie diese Option, um die Meldung anzuzeigen.
Fehlermeldung
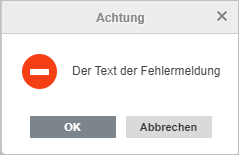
Im Abschnitt Fehlermeldung können Sie die Meldung angeben, die angezeigt wird, wenn die von Benutzern angegebenen Daten nicht den Validierungsregeln entsprechen.
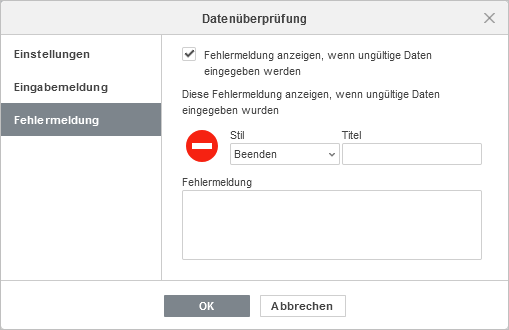
- Stil: Wählen Sie eine der verfügbaren Voreinstellungen: Beenden, Warnung oder Nachricht.
- Titel: Geben Sie den Titel der Fehlermeldung an.
- Fehlermeldung: Geben Sie den Text der Fehlermeldung ein.
- Deaktivieren Sie das Kontrollkästchen Fehlerwarnung anzeigen, wenn ungültige Daten eingegeben werden, um die Anzeige der Fehlermeldung zu deaktivieren.
Video anschauen
Datenvalidierung für Tabellenkalkulationen in ONLYOFFICE Docs
Beschränken Sie die Eingabe irrelevanter Werte in die Zellen Ihrer Tabelle mithilfe der Datenüberprüfung.