Inserting images in posted messages
Introduction
This article explains how to insert an image directly into a posted message, whether you are composing a forum post, blog entry, or comment.
Step 1. Select an existing post or create a new one
You can insert an image while creating or editing any message posted on your portal: news and announcements, blog stories, forum posts, comments or project discussions. The detailed instructions on how to create a message can be found following the links below:
To edit an item, open it, click the  icon to the right of the post title and select Edit from the drop-down list.
Step 2. Insert an image from the web
Once the message is created, click the position in the text where you want to insert the image and click the Image  icon on the Formatting Toolbar.
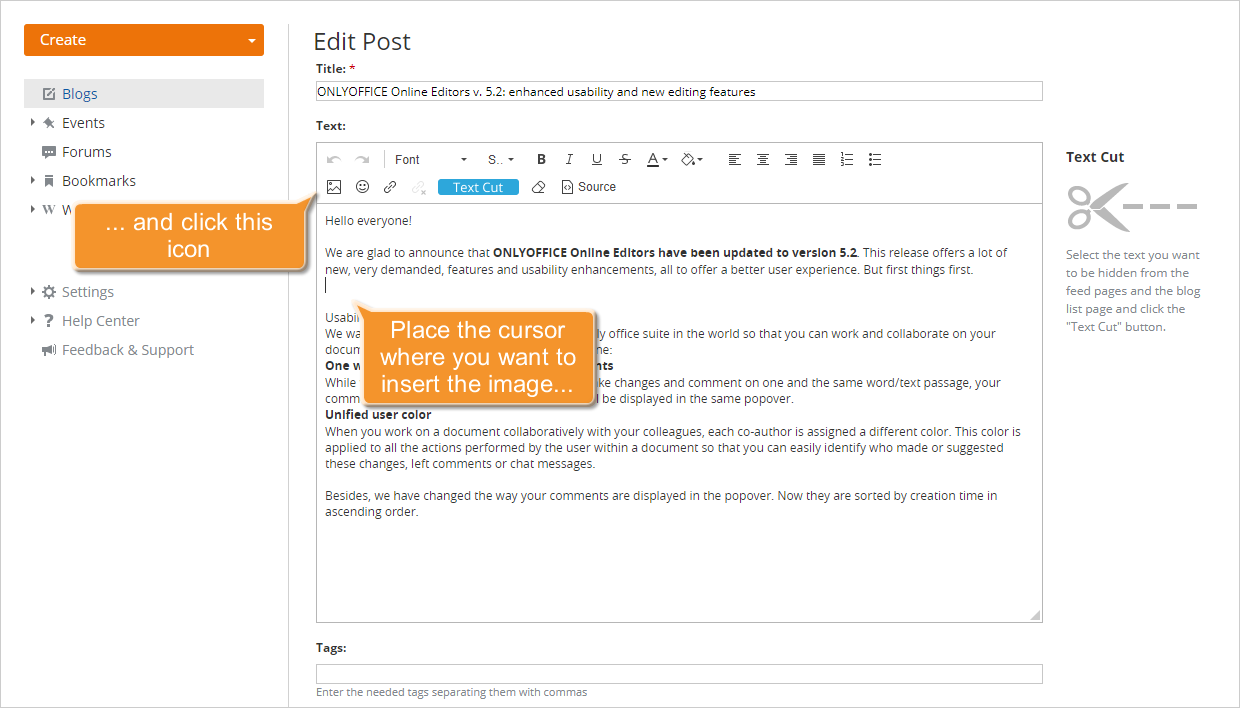
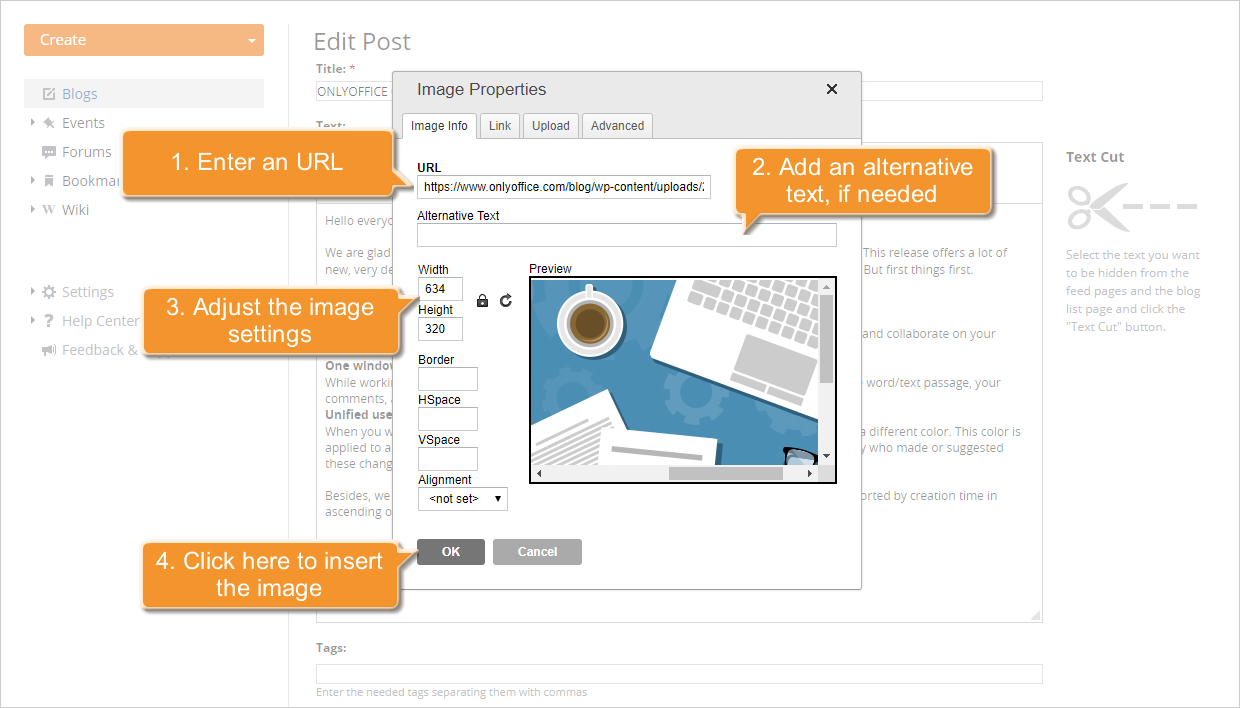
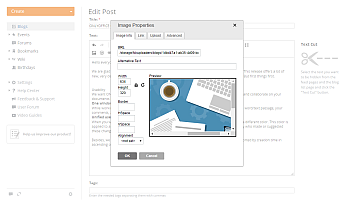
The Image Properties window will open with the Image Info tab activated.
Enter the URL of the image in the appropriate field. Enter the Alternative Text, which will be displayed in case the image is not available to the readers (for example, when the images are turned off in their browser), and adjust the image settings:
- Adjust the image size by inserting the Width or Height value. By default, the second parameter will be set automatically, preserving the original image aspect. If you need to get the image of a particular size, unlock the ratio by clicking the
 button. Note that in this case the image proportions may be affected and the image may appear distorted.
 - Set the Border size in pixels, or leave this field empty to omit the border.
- Adjust the distance from the top (VSpace) and left (HSpace) edges of the image if you align it on the left hand margin, or the distance from the top (VSpace) and right (HSpace) edges of the image if you align it on the right hand margin.
- Select one of the image alignment options: Left to align the image on the left hand margin, or Right to align it on the right hand margin.
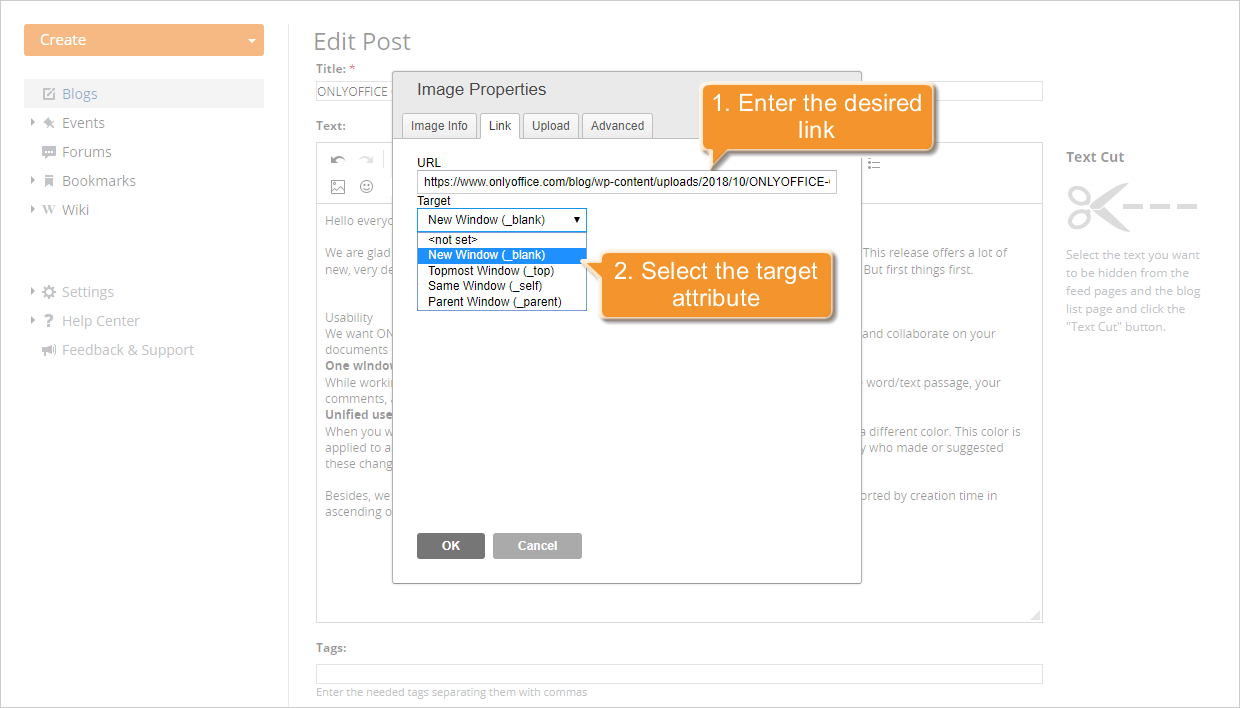
If you wish to determine the web address to which you will be redirected when the image is clicked, switch to the Link tab. Enter the URL you wish to link the image to and specify the target attribute of a link: New Window (_blank), Topmost Window (_top), Same Window (_self), or Parent Window (_parent).
To adjust the advanced image settings, switch to the Advanced tab. Here you can specify:
- Id - the ID of the inserted image.
- Language Direction - the language direction from Left to Right (LTR) or from Right to Left (RTL).
- Language Code - the code used to classify the language: de, en, es, fr, it, ru, etc.
- Long Description URL - the description of the target.
- Stylesheet Classes - the CSS class to which the image belongs.
- Advisory Title - the advisory information about the target.
- Style - the style of the inserted image. It includes all the parameters specified on the Image Info tab.
Once all parameters are set, click OK to add the image.
Step 3. Insert an image from your PC
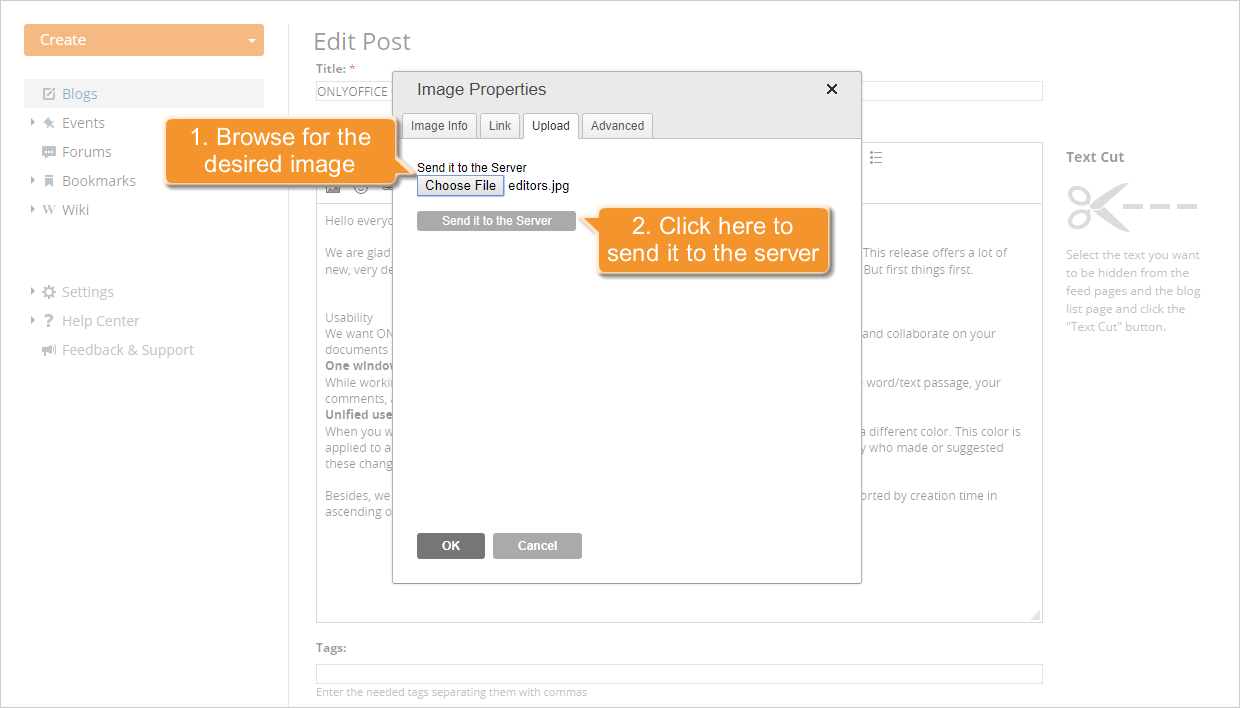
If you wish to add an image stored on your PC, in the Image Properties window (see Step 2), switch to the Upload tab. Click Browse..., locate the image on your computer, and click Send it to the Server.
Once the image is uploaded to the server, the Image Info tab will open. You will see the link to the uploaded image displayed in the URL field and its size. If necessary, type in an Alternative Text and adjust the image settings as described above (see Step 2).
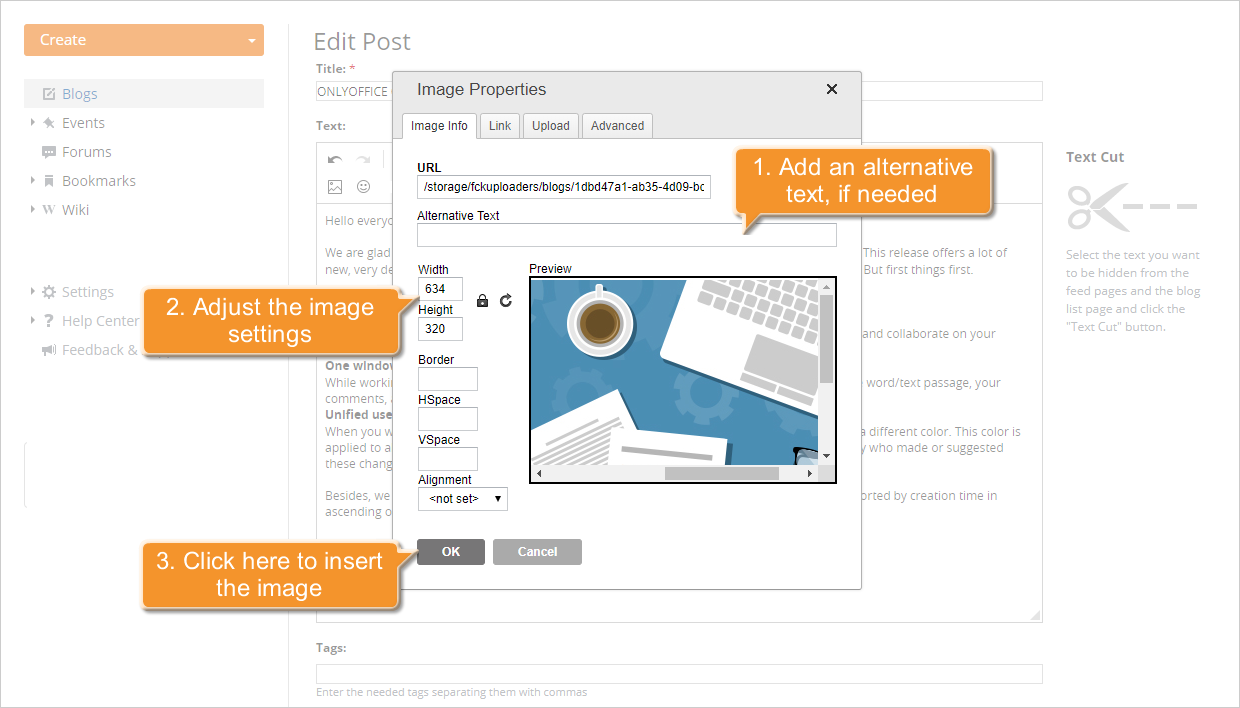
When all the parameters are set, click the OK button. The image will be inserted into your post at the location where the cursor was placed.