Workspace Enterprise Security Guide
Introduction
ONLYOFFICE provides many ways to ensure that your portal is properly protected. This guide presents all the features and tools that can enhance the security level of a portal, sensitive data, and work in the cloud and desktop editors.
SSL Certificate
An SSL certificate is a digital certificate that authenticates a website's identity and enables an encrypted connection. You can generate an SSL certificate or upload a third-party one using the Control Panel.
Certificate Generation
The Let’s Encrypt service is used to provide CA-signed certificates.
To generate a new certificate:
- open the HTTPS page in the COMMON SETTINGS section in the left sidebar,
- click GENERATE AND APPLY. A pop-up message box will appear informing you that the certificate and private key are successfully generated.
The Control Panel and portal will be restarted and become unavailable during this process. It can take up to five minutes. Once the certificate installation process is over, your portal will be available over HTTPS.
Certificate Upload
To upload a third-party certificate (e.g., Amazon or GoDaddy):
- open the HTTPS page in the COMMON SETTINGS section in the left sidebar,
- click the Plus button next to the CRT certificate field and select your
.crtcertificate to upload it, - click the Plus button next to the HTTPS key field and select your private
.keykey to upload it,Before uploading, make sure that the private key is not encrypted. If you have a password-protected .key file, you will need to decrypt it first. - once the
.crtand.keyfiles are uploaded, click APPLY at the bottom of the page.
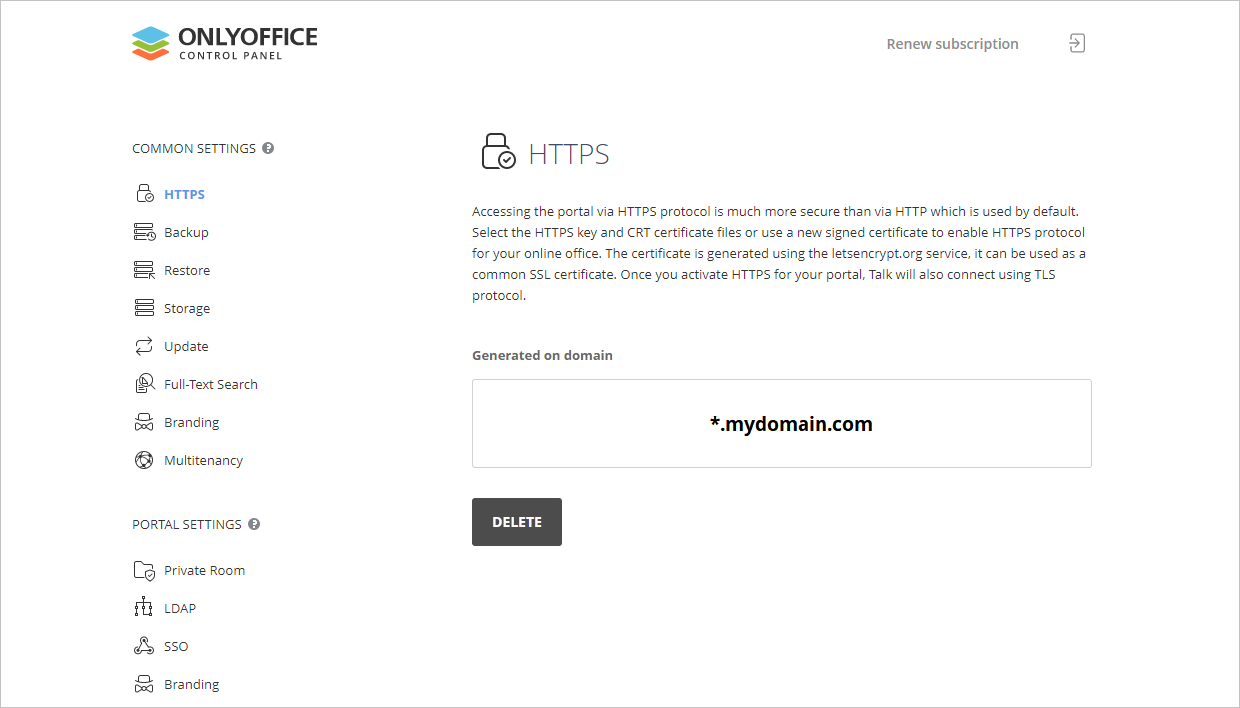
After that, your Control Panel and portal will be restarted and become unavailable during this process. It can take up to five minutes. Once the certificate installation process is over, your portal will be available over HTTPS. The domain name that your certificate was issued for is now displayed in the Generated on domain section of the HTTPS page in the Control Panel.
Once you have generated a certificate or bought one and uploaded it, you can check your security level using the SSL Labs service or another service of the same kind. Your security level must not be lower than A.
To learn more about switching to HTTPS, refer to this article.
Automatic backup
The automatic backup can be enabled in the Control Panel. It can also be a good decision to make copies of the portal using third-party services from time to time.
To enable the Automatic backup:
- go to the Backup page in the COMMON SETTINGS section in the left sidebar and find the Automatic backup section,
- click the Disabled toggle to enable the feature,
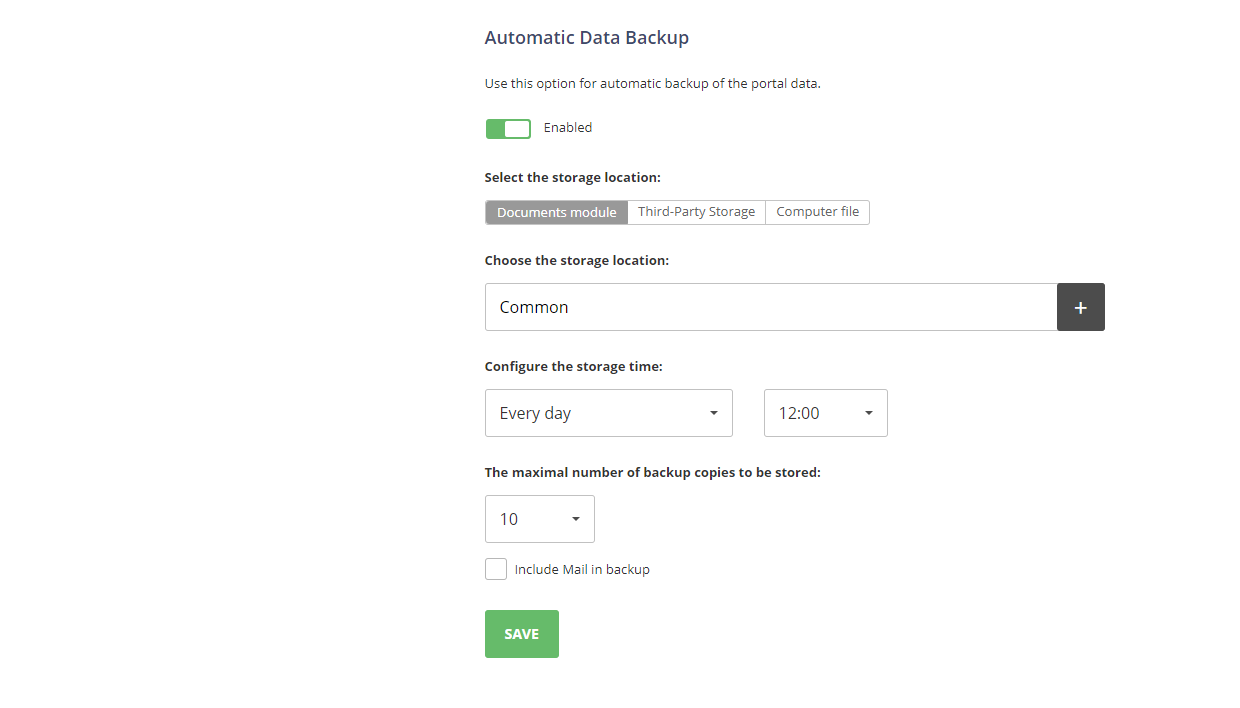
- select the Storage you need for the backup files: the available options are the Amazon AWS S3, Google, Rackspace, and Selectel cloud storage services or other WebDAV services, except for the Temporary storage, which is only available in the Data Backup section,
- specify the time interval at which backups should be created: Every day, Every week, or Every month with an indication of the corresponding part of the time period,
- set The maximal number of backup copies to be stored by selecting the value you need, from 1 to 30, from the corresponding drop-down list,
- select the Include Mail in backup checkbox if you want to back up the Mail data as well,
- click SAVE.
Backups will be created automatically with the specified periodicity.
To learn more about the backup and restore options, refer to this article.
Portal security settings adjustment
Portal access rules must be set up before adding users to the portal. This can be done via the Portal Access page. You can reach the page in the following way: Settings > Security > Portal access.
You can restrict the portal access by determining the password settings: adjusting the number of password characters and requiring the inclusion of capital letters, digits, and special characters in users’ passwords.
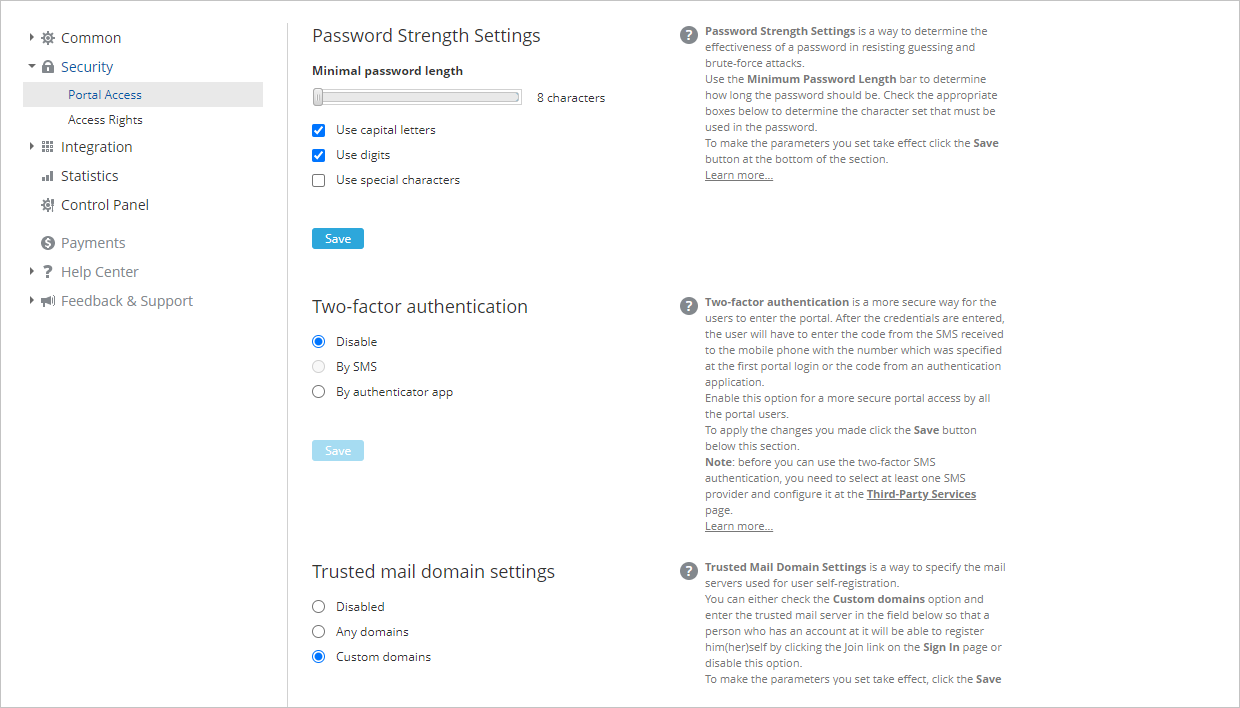
Two-factor authentication is available for portal login. It can be set to use an application, Authy or Google Authenticator; the latter is highly recommended. The other way is 2FA via SMS. To use it, you need to use smsc, Clickatell, or Twilio. You can enable these options on the Third-Party Services page of the Integration tab, using the API key of the corresponding service.
As some of the mass mail domains have known security issues, you can specify the trusted mail domains that can be used for registration. To enable this function, in the Trusted mail domain settings, you need to select the Custom domains checkbox and provide the trusted domain names in the fields that appear.
To set an allowlist for trusted users’ IP addresses, use the IP Security feature.
ONLYOFFICE Workspace also has the Session Lifetime feature. By enabling it, you can set the session duration for each user, after which the automatic sign-out will be performed.
To learn more about how to control portal access, refer to this article.
LDAP for access centralization
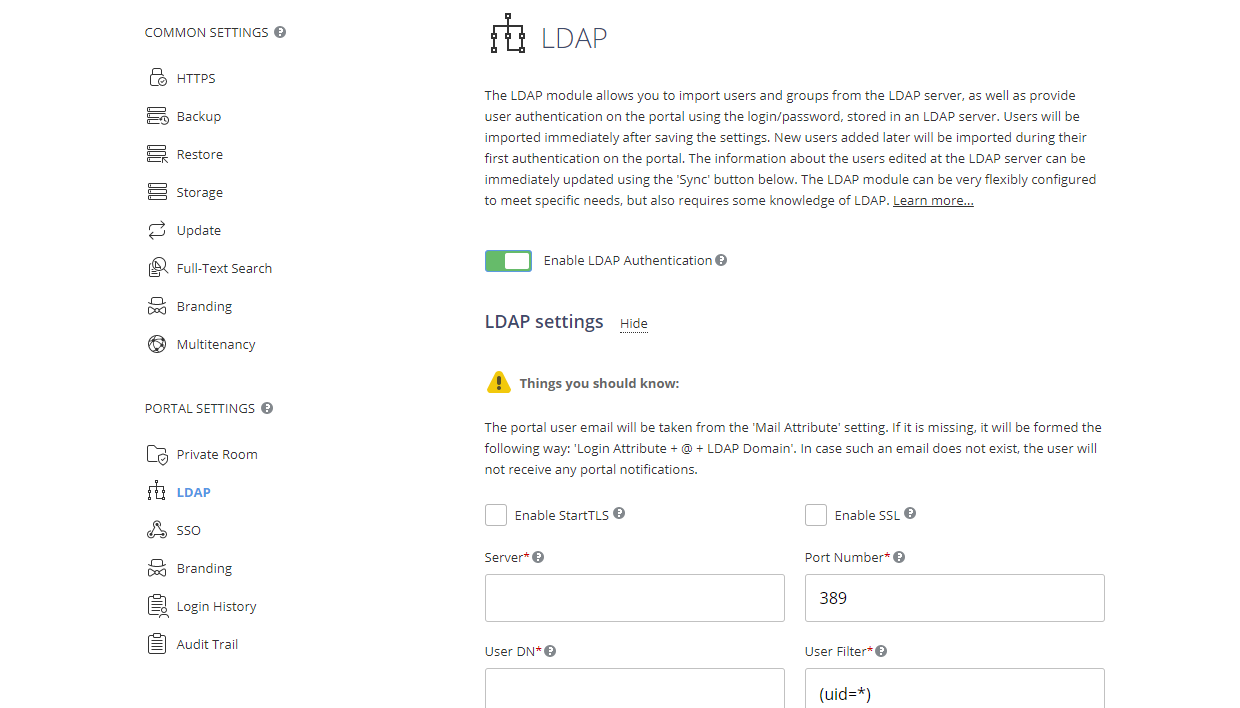
You can import user credentials from your LDAP server. This can be done via the Control Panel, in the Portal Settings section, on the LDAP page.
Enable the Enable LDAP Authentication toggle, then provide the following data:
- your server information, such as the URL address,
- the port number that is used to access the LDAP server,
- the path to the directory with user data (User DN) that you want to import,
- the user filter, if you need to import only specific users from that directory, and the login attribute value.
Importing groups is performed in the same way as importing users from your LDAP server.
You can also synchronize the LDAP server data with the ONLYOFFICE portal to make it correctly visible in user profiles.
To learn more about how to import users and groups using the LDAP Server, refer to this article.
Usage of private SMTP server
In ONLYOFFICE Workspace, the default server for user notifications (for example, about portal or community updates, document access grants, or project changes) is the ONLYOFFICE SMTP server. For higher security, we recommend using your own SMTP server so that your messages will not pass through any third-party services.
To do so, follow the instructions below:
- Open the Settings module, then in the Integration section, open the SMTP Settings page.
- Specify the SMTP server domain and port.
- Specify the login credentials.
- Specify the sender name for recipients and the sender email address for recipients.
- Optionally, for better security, if your server supports it, select the Enable SSL checkbox.
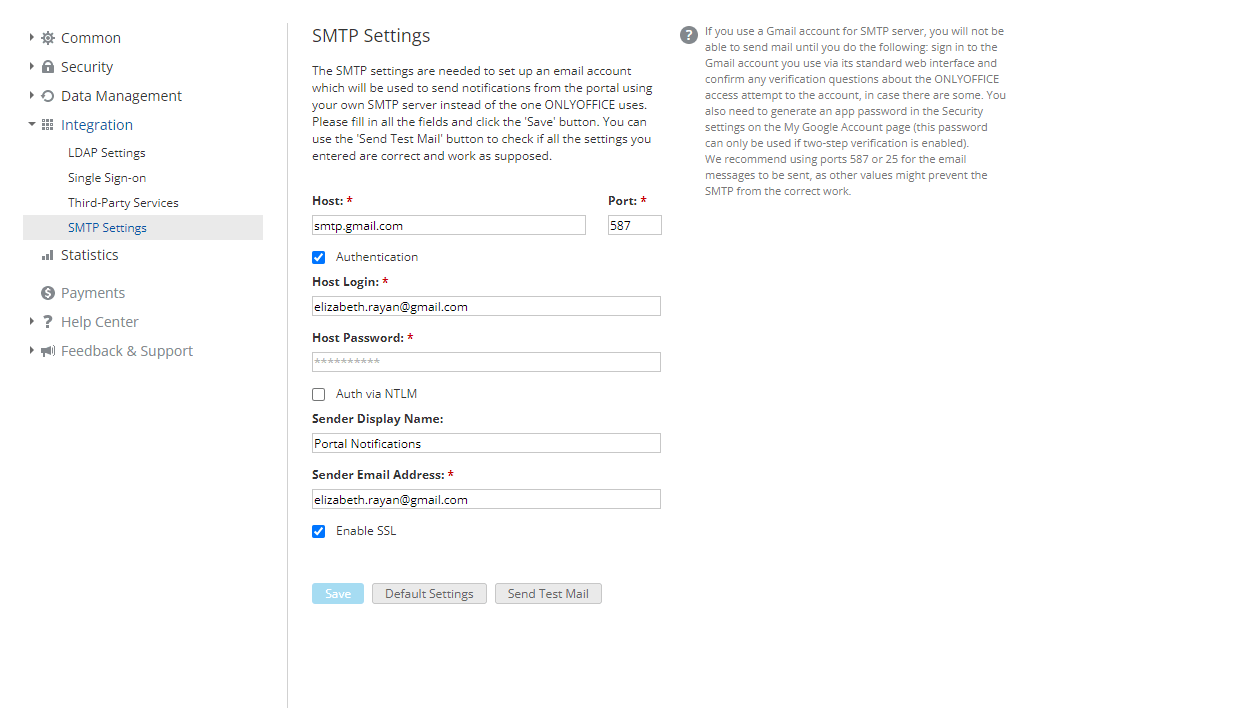
After setting up the SMTP server settings, try to send a test mail by clicking Send Test Mail. If the letter is delivered successfully, click Save.
To learn more about how to set up the SMTP server, refer to this article.
User logins and other actions monitoring
Using ONLYOFFICE Workspace, you can track user actions and logins. You can see the list of user actions and logins using the Control Panel.
The login information is kept on the Login History page:

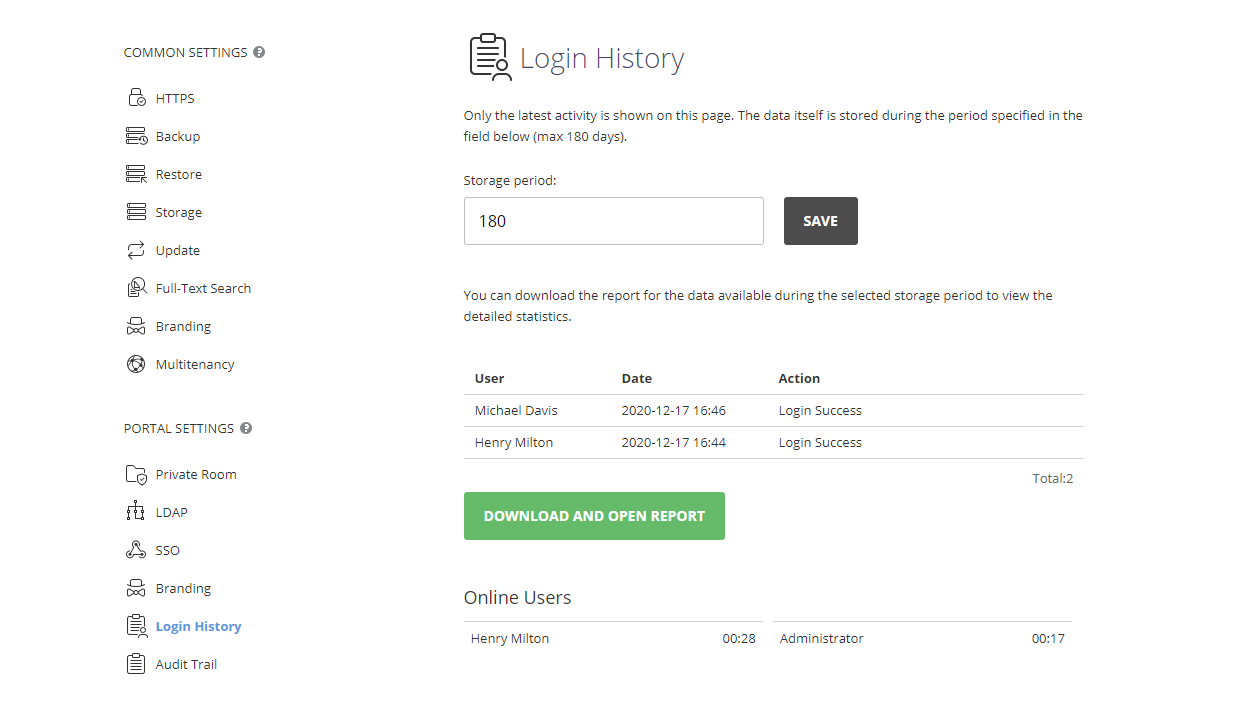
To view the detailed statistics for the last six months, click Download and open report. The report will open in an .xlsx spreadsheet (LoginHistory_ReportStartDate-EndDate.xlsx).
The login history report includes the following details: user IP address, Browser and Platform that were used when the registered event occurred, Date and time of the event, name of the User who attempted to sign in or sign out, portal Page where the action was performed, specific Action (for example, Login Fail. Associated Social Account Not Found).
The actions history is kept on the Audit Trail page:

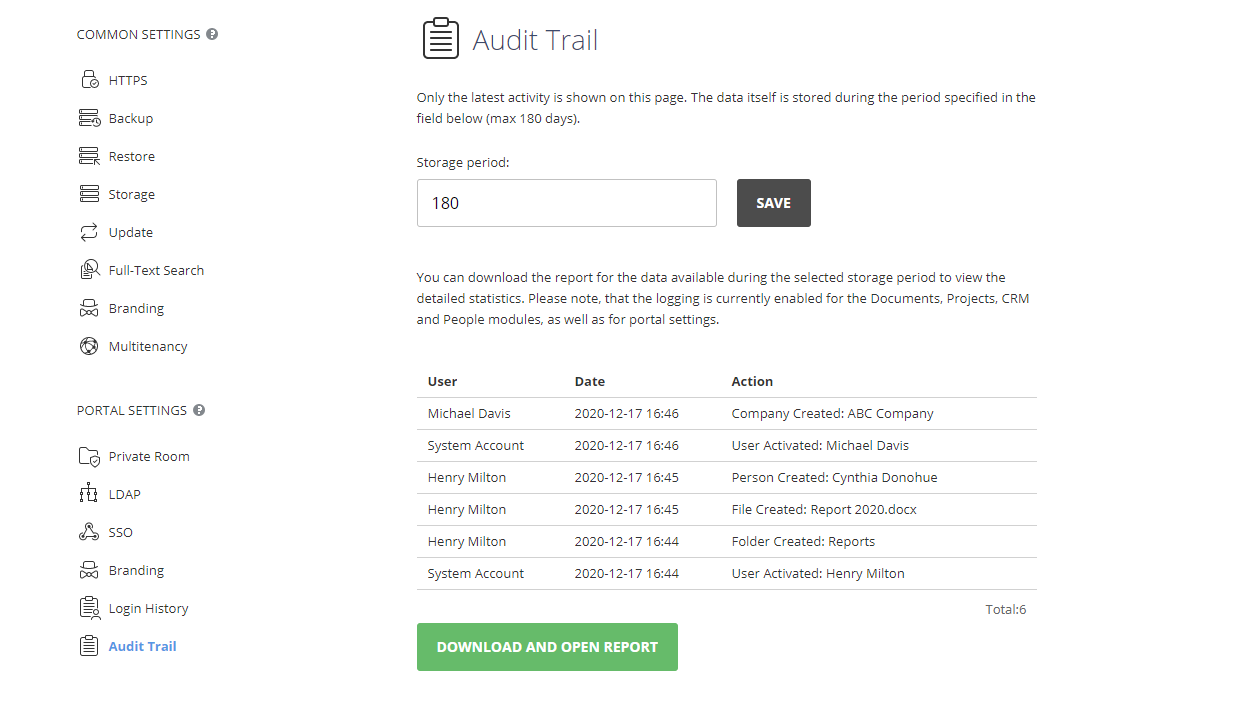
To view the detailed statistics for the last six months, click Download and open report. The report will open in an .xlsx spreadsheet (AuditTrail_ReportStartDate-EndDate.xlsx).
The audit trail report includes the following details: user IP address, Browser and Platform that were used when the registered event occurred, Date and time of the event, name of the User who performed the operation, portal Page where the action was performed, generic Action Type (for example, download, attach, updated access), specific Action (for example, Projects [Product development and promotion]. Tasks [Distribute coupons]. Status Updated: Closed ), Product and Module that the changed entity belongs to.
It is also possible to set the storage period for both the Login history and Audit trail on the corresponding pages.
Disabling root access
To avoid data leaks, it is better to disallow logging in as root, as the root user has full access to all data of the system. This can be done via the server’s terminal by setting the root login permission to No.
Closing all unnecessary ports
You should keep open only the ports you need for the portal functioning, as extra open ports can be the cause of data leaks. The list of the necessary ports for the ONLYOFFICE Workspace functioning can be found in this article.
Adjusting parameters for storing file versions
For data protection, if some of the users have a poor internet connection, you can adjust the file versioning using the Settings section of the Documents module. It is possible to keep all the intermediate versions and allow automatically creating copies of the updated files, or just update the existing files after applying changes. You can read more in this article.
Setting up document permissions and portal access rights
You should provide access to documents only to authorized members of specific working groups. You can adjust the access level by clicking the Share button next to the required document. In the window that opens, you can add users and set their access level, including:
- Read Only,
- Filling Forms,
- Custom Filter,
- Commenting,
- Reviewing,
- Full Access.
Developers can also set up the document permission levels separately and in more detail: forbid access to the document history, content copying, document downloading, etc. More information about the document access configuration parameters can be found in this article.
It is also possible to set the portal access rights. You can restrict access to specific modules for different users and groups using the Settings module. You need to open the Access Rights page from the Security section. There you can adjust administrators and change their access rights. You can also grant or deny access to specific modules lower on that page.
Private rooms for secure work with documents
In ONLYOFFICE, every user can use private rooms to create a secure workspace for working with documents. The Private Room is a section in Documents. The .docx, .xlsx, and .pptx office files in a private room are encrypted with the AES-256 encryption algorithm.
To work with private rooms:
- enable the feature in the Control Panel,
- download the desktop editors and connect them to the cloud on the application main page.
You can work within your private room on the portal using the appropriate section in the Documents module. You can share documents from your private room in the same way you usually share documents on the portal.
Data encryption protection
ONLYOFFICE has a data encryption feature that can be managed using the Control Panel in the server version.
Encryption allows converting data for confidential and secure storage. The ONLYOFFICE encryption is based on an Encrypt-then-MAC type of encryption (AES-256-CBC + HMAC-SHA256) of the entire body of data. It is compliant with the AES-256 international data encryption standard.
To prepare the portal for encryption, you need to:
- Sign in to your portal and click the Control Panel icon on the Start Page.
Alternatively, you can go to the portal Settings and select the Control Panel link on the left-side panel. - Go to the Backup section and back up your data.
- Disable the Automatic Data Backup feature.
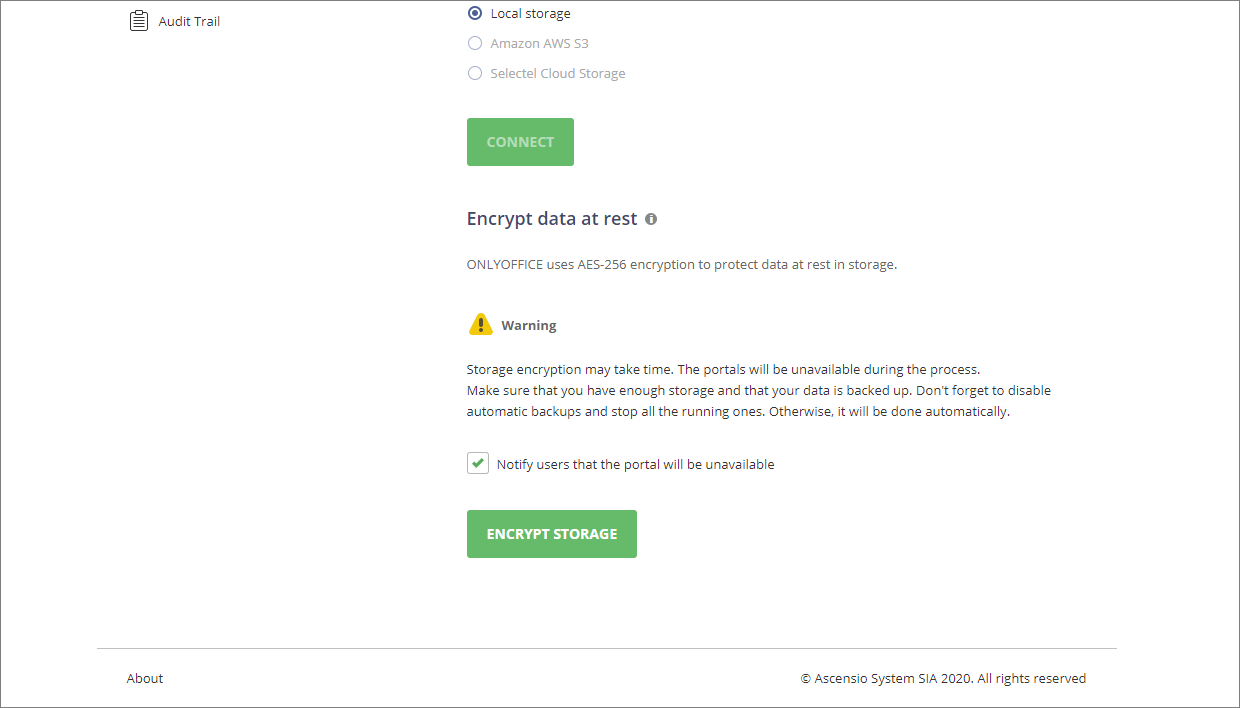
- Select the Local storage option for both Connect storage for static data and Connect storage as CDN.
- Make sure there is enough space on your hard drive.
After the preliminary steps are completed, you can proceed to the next step.
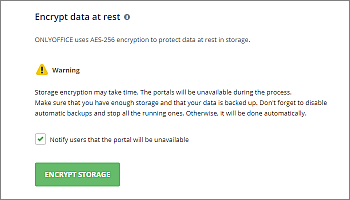
To encrypt the storage, you need to:
- Go to the Storage section in the Control Panel.
- Select the Notify users that the portal will be unavailable checkbox to notify all active users via email when the encryption process starts.
Upon the successful completion of the encryption process, all active users will also receive email notifications. If an error occurs during the encryption process, then all administrators (regardless of the Notify users option) will receive email notifications of the unsuccessful encryption process.
- Click Encrypt storage and then OK to launch the encryption process.
When encryption is enabled, a newly created backup copy of the data archive will contain decrypted files. When such a copy is restored, the files will be encrypted on the disk again.
The time required to complete the procedure depends on the data volume. All portals will be unavailable during the encryption process. As soon as the encryption is over, the portal data will be available for work.
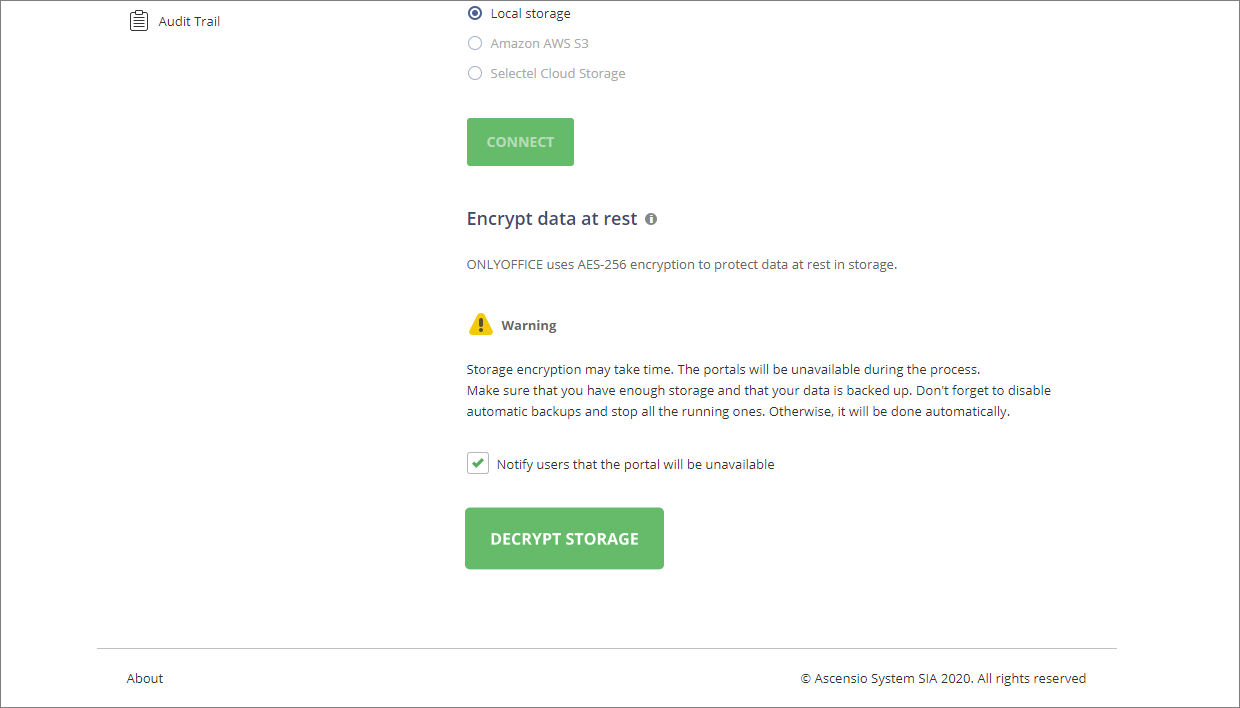
To decrypt the storage, you need to:
- Go to the Storage section in the Control Panel.
- Select the Notify users that the portal will be unavailable checkbox to notify all active users via email when the decryption process starts.
Upon the successful completion of the decryption process, all active users will also receive email notifications. If an error occurs during the decryption process, then all administrators (regardless of the Notify Users option) will receive email notifications of the unsuccessful decryption process.
- Click Decrypt storage and then OK to launch the decryption process.
The time required to complete the procedure depends on the data volume. All portals will be unavailable during the decryption process. As soon as the decryption is over, the portal data will be available for work.