Adding cell borders
Add cell borders
To add and format borders to a worksheet:
- Select a cell, a range of cells, or the whole worksheet.
- Open the Cell settings panel by
- tapping the
 Edit object icon at the top toolbar, or
 -
tapping the
 Borders icon on the bottom toolbar, or

- tapping the Cell option in the pop-up menu.
- tapping the
- Tap the
 arrow next to the Border Style section to open the border parameters panel.
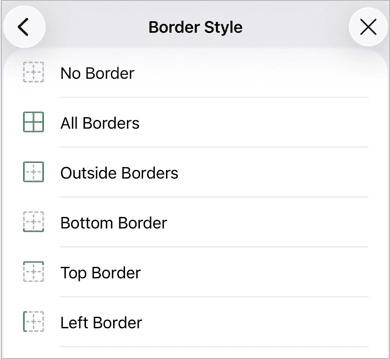
- Swipe up to see all available parameters and specify the border style you wish to apply:
- Tap the Color option and select the necessary border color from the Theme colors or Standard colors palette, or create a Custom color. Tap the
 arrow to return to the previous screen.
 - Tap the Size option and select the necessary border width: Thin, Medium, or Thick. Tap the arrow to return to the previous screen.
- Select one of the available border templates:
 No Border,
 All Borders,
 Outside Borders,
 Bottom Border,
 Top Border,
 Left Border,
 Right Border,
 Inside Borders,
 Inside Vertical Borders,
 Inside Horizontal Borders,
 Diagonal Up Border,
 Diagonal Down Border.
- Tap the Color option and select the necessary border color from the Theme colors or Standard colors palette, or create a Custom color. Tap the
To clear the border formatting, tap the  Clear icon and choose Format.
Article with the tag:
Browse all tags