Questo articolo è stato tradotto dall'AI
Google Gemini
Google Gemini è una famiglia di modelli AI avanzati sviluppati da Google, progettati per gestire testo, immagini, audio, video e codice in un unico sistema.
Questa è una guida passo-passo per installare e configurare Google Gemini per ONLYOFFICE Docs.
Connessione e configurazione dei modelli Google Gemini
- Segui questa guida per la configurazione generale.
- Una volta installato il plugin, aggiungi i modelli AI. Vai alla scheda AI e apri Impostazioni.
- Seleziona Modifica modelli AI nell'angolo in basso a sinistra della finestra e clicca su Aggiungi.
- Nella finestra che appare, seleziona Google Gemini dal menu a tendina.
- Inserisci la tua chiave API nel campo fornito. La chiave API è rilasciata dal fornitore AI e può essere generata sul sito ufficiale Google AI Studio. Clicca sul pulsante Aggiorna elenco modelli.
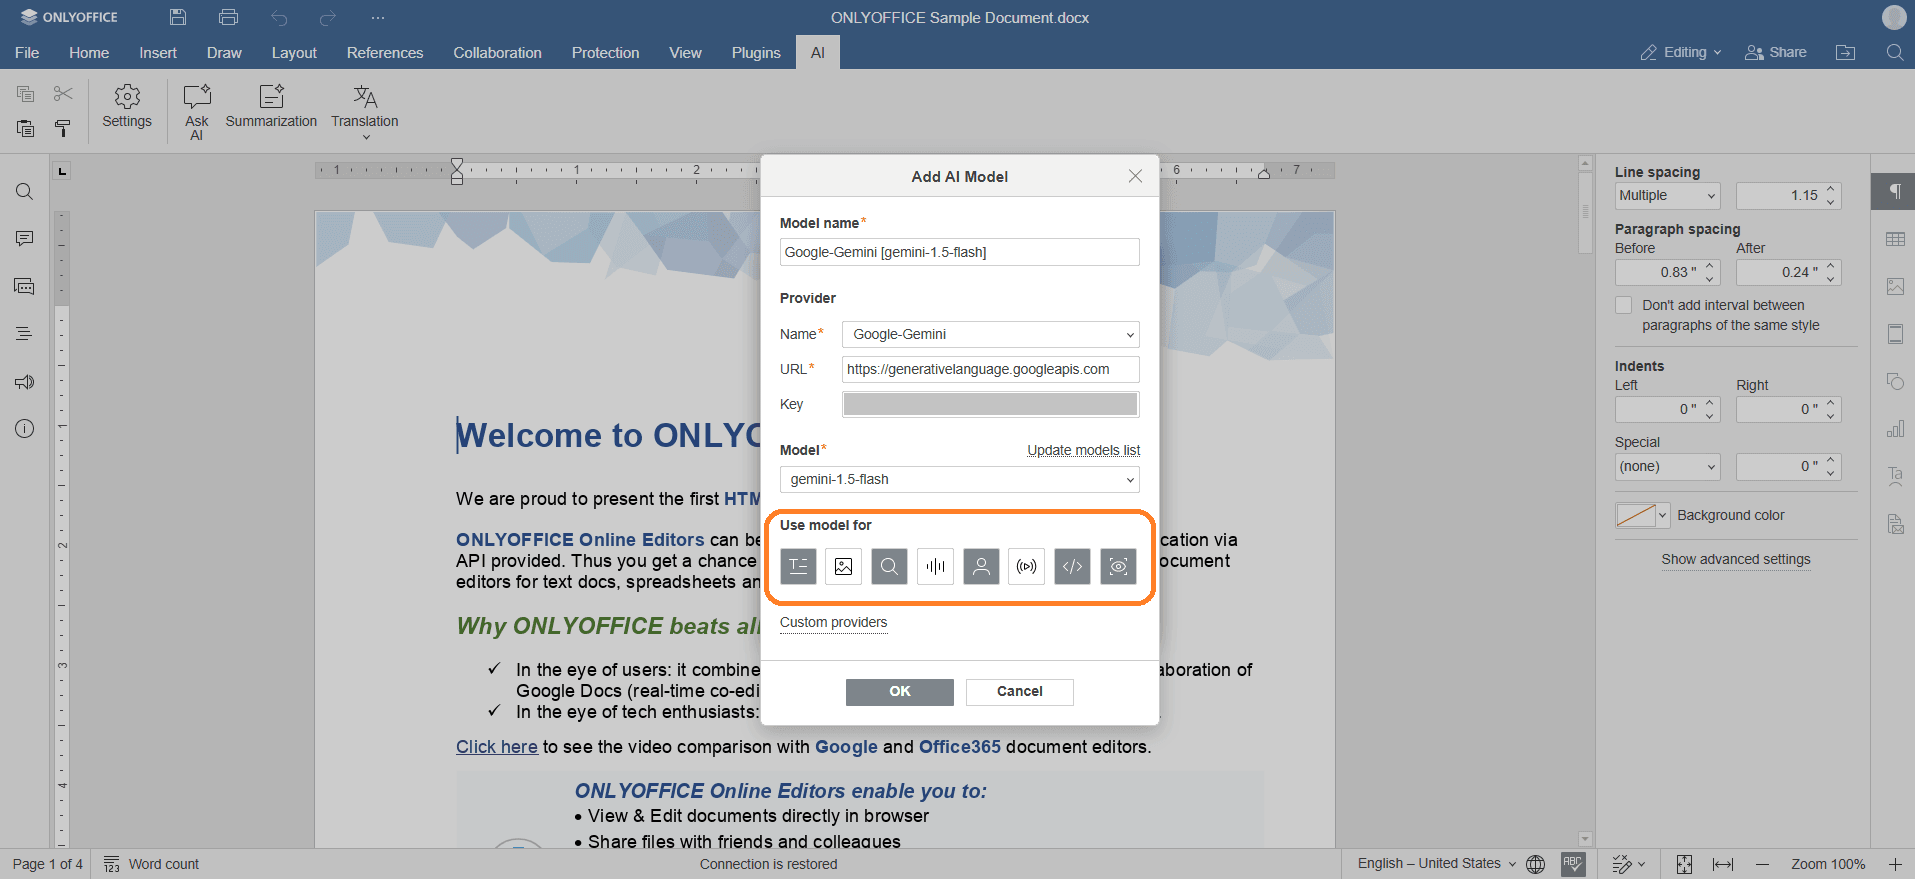
- Il primo modello nell'elenco viene selezionato automaticamente. Scegli il modello che meglio si adatta alle tue esigenze dal menu a tendina, ad esempio, gemini-2.0-flash per compiti generali.
- Nella fila di icone, seleziona il modello che verrà utilizzato per testo, immagini, embeddings, elaborazione audio, moderazione dei contenuti, compiti in tempo reale, assistenza alla codifica e analisi visiva.
- Clicca su OK. Il modello apparirà nella lista Modelli AI. Clicca di nuovo su OK.
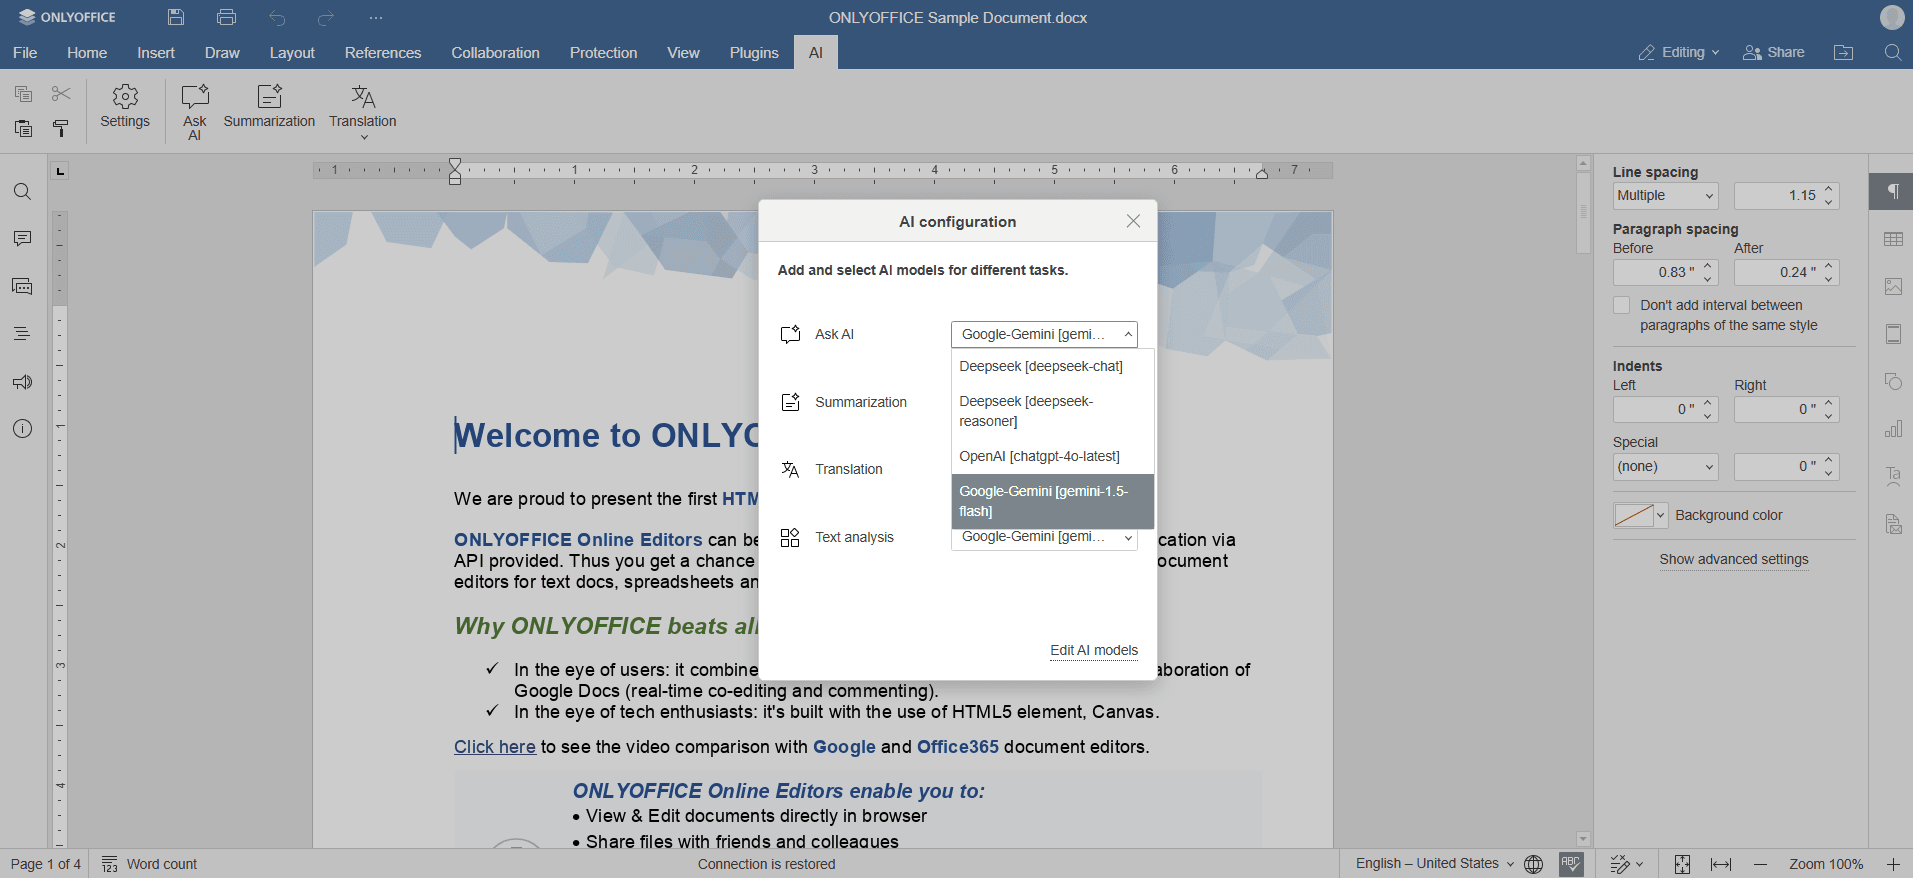
- Nella finestra di Configurazione AI, seleziona il modello che desideri utilizzare per eseguire i vari compiti.
- Accedi alle funzionalità AI tramite la scheda AI o selezionando il testo e facendo clic con il tasto destro per aprire il menu contestuale.
Voci con l'etichetta tag:
Sfoglia tutti i tag