Moodle pour DocSpace
À propos de l'intégration ONLYOFFICE DocSpace et Moodle
ONLYOFFICE propose un connecteur officiel pour une intégration harmonieuse d'ONLYOFFICE Docs et Mattermost permettant aux utilisateurs d'associer les salles par selon activité pour améliorer la collaboration. Vous pouvez télécharger le connecteur ONLYOFFICE à partir de la bibliothèque de modules complémentaires Moodle ou sur GitHub.
Connecter ONLYOFFICE DocSpace à Moodle
Installer le connecteur ONLYOFFICE DocSpace pour Moodle
Les administrateurs de Moodle peuvent installer le module complémentaire selon les instructions d'installation des modules complémentaires standards. Une fois installé, le module complémentaire s'affiche sur la page Site Administration > Plugins (Gestion du site > Plugins).
Commencer à utiliser DocSpace au sein de Moodle
Paramètres généraux
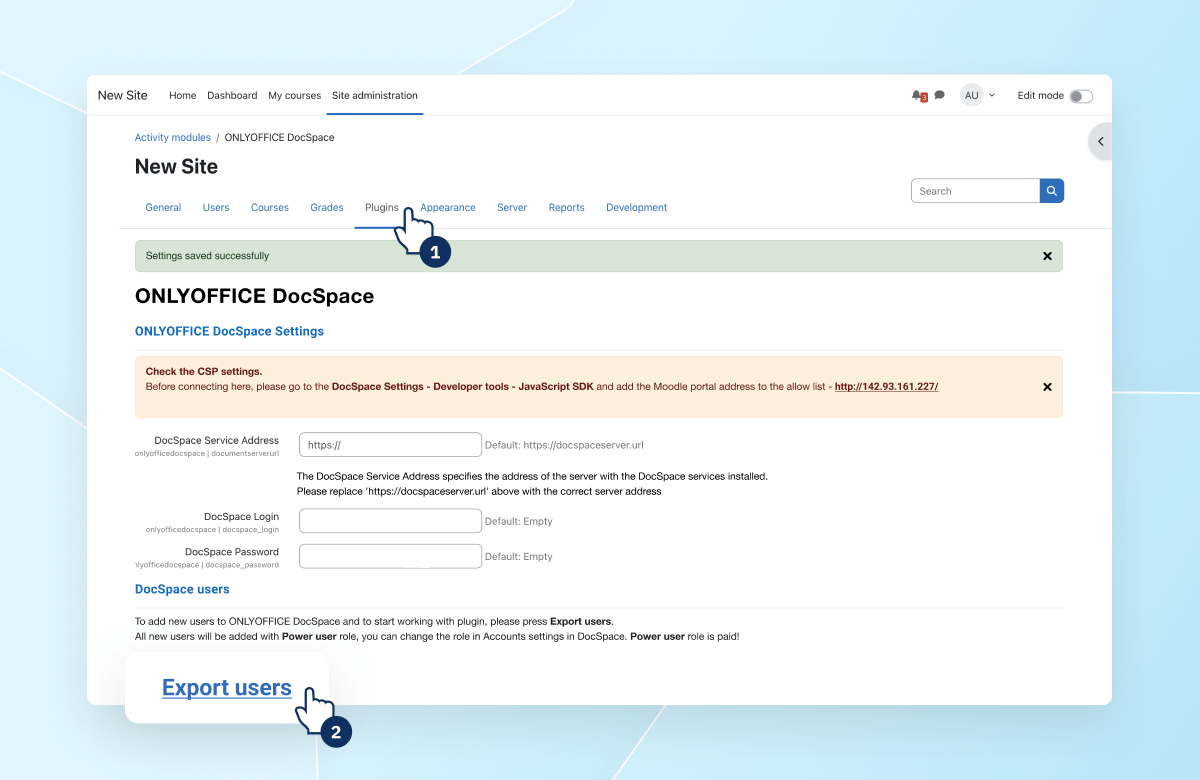
Premièrement, passez à ONLYOFFICE DocSpace > Developer Tools > JavaScript SDK (ONLYOFFICE DocSpace > Outils développeur >JavaScript SDK). Ajouté l'adresse de votre Moodle dans la rubrique Enter the address of DocSpace to embed (Saisissez l'adresse de DocSpace à incorporer).
Dans Moodle, passez à Site Administration > Plugins > Activity Modules > ONLYOFFICE DocSpace (Gestion du site > Plugins > Modules d'activité > ONLYOFFICE DocSpace). Sur la page de configuration d'ONLYOFFICE DocSpace, saisissez l'adresse URL de DocSpace, et le nom d'utilisateur et le mot de passe de l'administrateur de DocSpace.
Pour plus de détails sur le travail dans ONLYOFFICE DocSpace, veuillez consulter ces instructions.
Utiliser le module complémentaire
Le module complémentaire ajoute un nouveau type d'activité ONLYOFFICE DocSpace lors de la création d'un cours dans Moodle.
Ajouter une nouvelle activité d'ONLYOFFICE DocSpace
Le module complémentaire ajoute un nouveau type d'activité ONLYOFFICE DocSpace lors de la création d'un cours dans Moodle.
- Sur la page du cours, activez Edit Mode (Mode édition). Cliquez sur Add an activity or resource (Ajouter une opération ou un source).
- Dans la fenêtre contextuelle, sélectionnez ONLYOFFICE DocSpace.
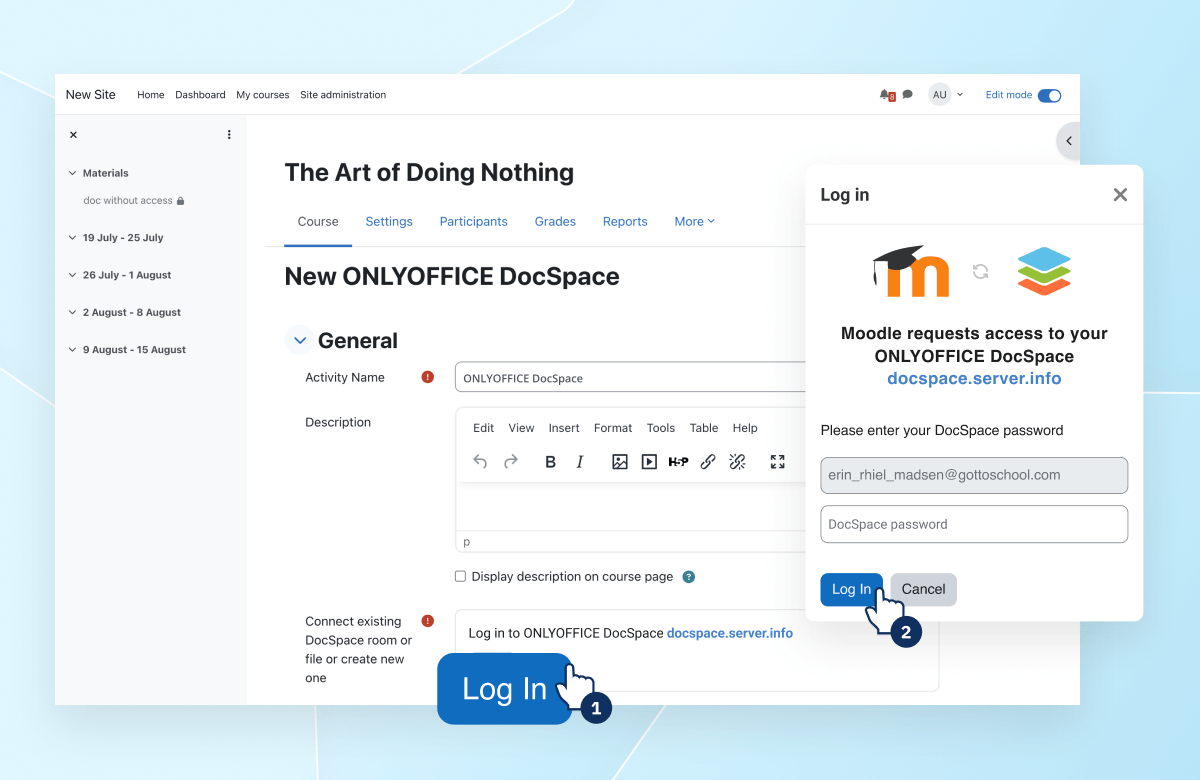
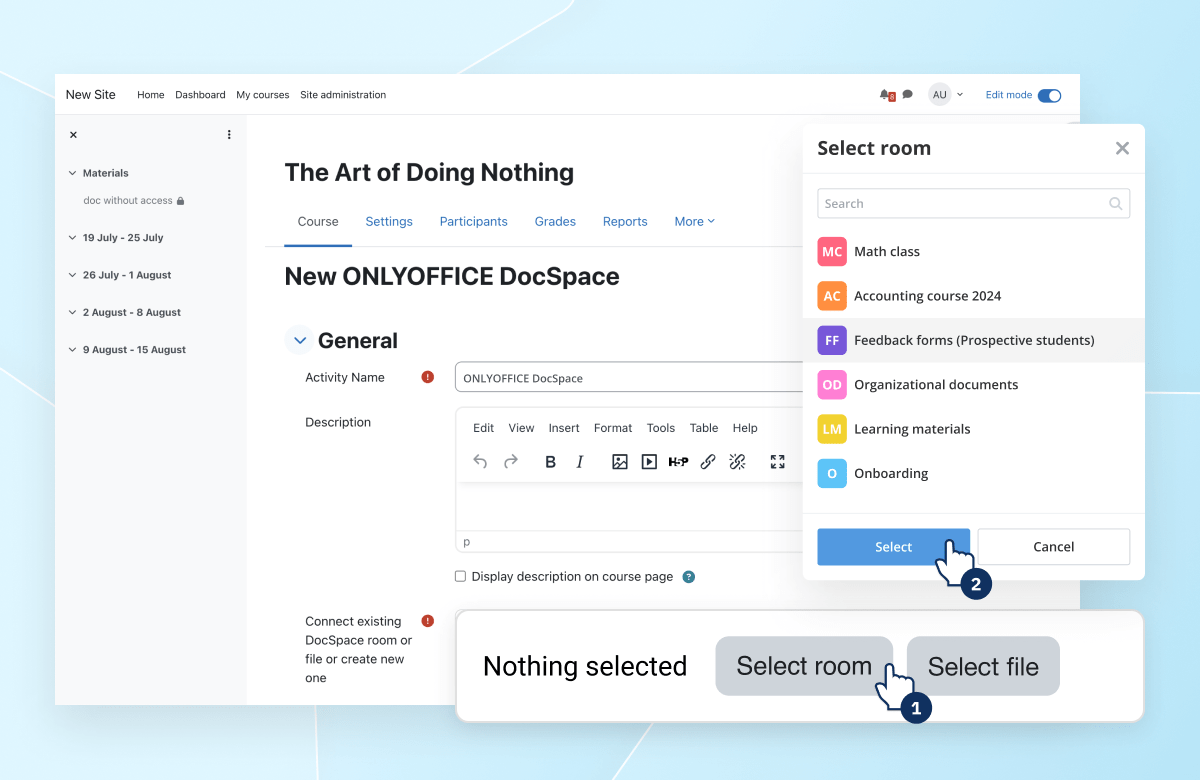
- Définissez Activity name (Nom d'activité). Dans le champ Connect existing DocSpace room field (Connecter la salle DocSpace existante), cliquez sur le bouton Select room button (Sélectionner la salle).
- Dans le sélecteur de salles, sélectionnez la salle nécessaire (pour l'instant, ce sont uniquement les salles publiques).
- Cliquez sur le bouton Save (Enregistrer). La nouvelle activité s'affichera sur la page du cours.
Travailler avec l'activité DocSpace
Pour accéder à la salle pour modifier un fichier, les conditions suivantes doivent être remplies:
- La synchronisation de l'utilisateur Moodle avec DocSpace a réussi.
- L'utilisateur est ajouté à la salle DocSpace avec les permissions appropriées.
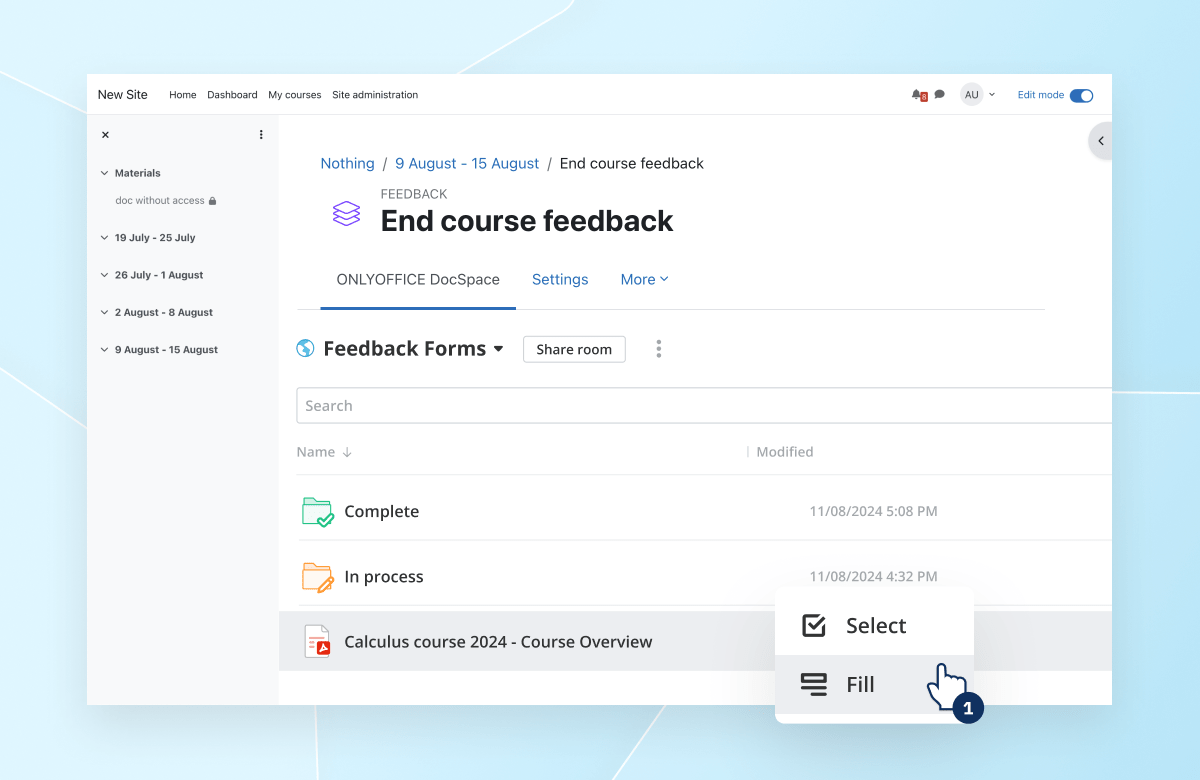
Tous les autres utilisateurs ont accès à l'espace DocSpace en lecture seule. Ainsi, par exemple Enseignant peut partager le contenu du cours avec les étudiants.