Billing
Billing
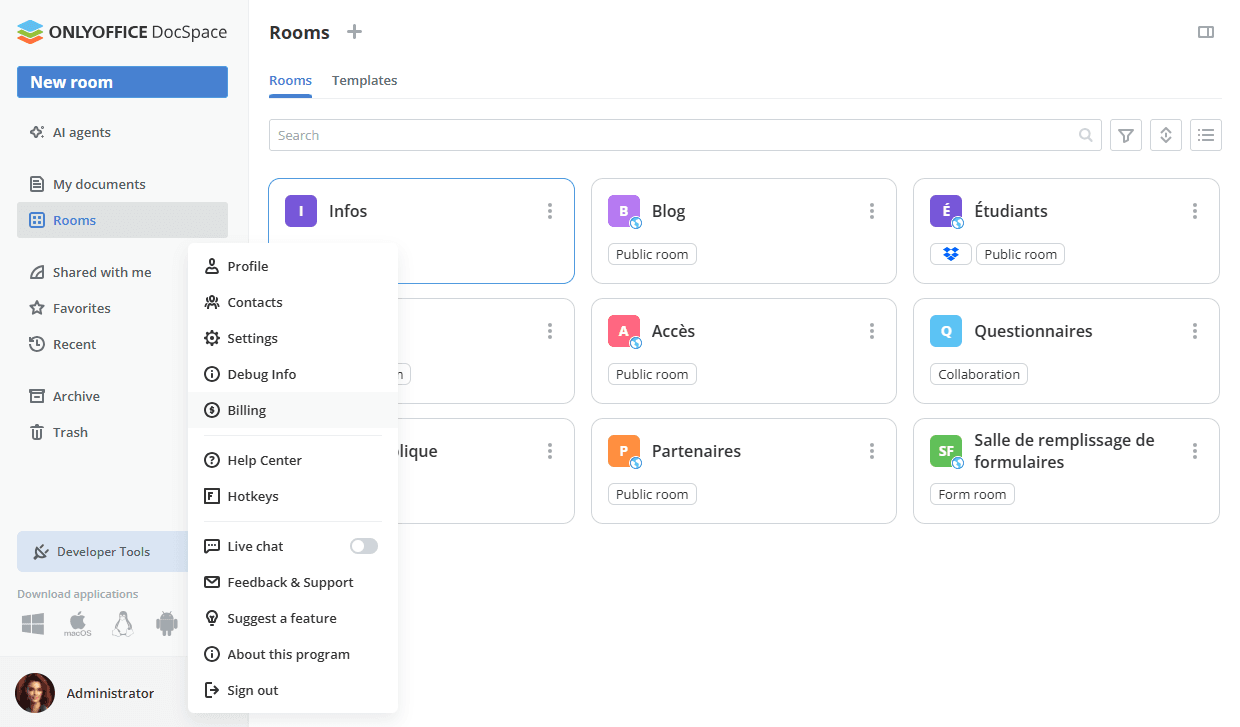
In the cloud (SaaS) version, the Billing section allows you to manage your DocSpace subscription, payment details, wallet balance, and paid services. To access it, use the  menu in the lower left corner and select Billing in the context menu, or select Settings and click Billing in the left panel.
The section is divided into four tabs: Tariff plan, Payment method, Wallet, and Services.
Tariff plan
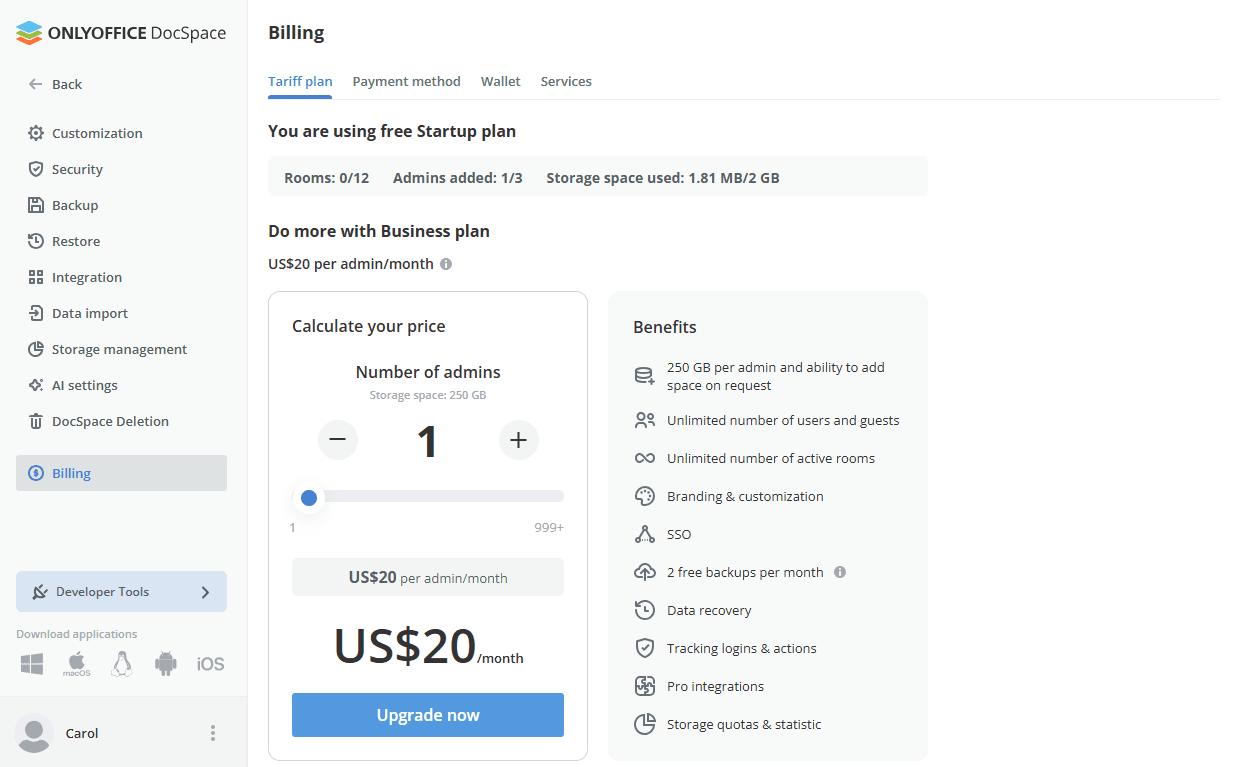
The Tariff plan tab shows your current plan, usage summary, and options to customize or upgrade your subscription.
The usage bar at the top of the page displays the current number of rooms, admins added, and storage space used.
The Calculate your price section includes a price calculator where you can adjust the number of admins using the +/- buttons or the slider. The total monthly cost updates automatically based on the selected number. Click the Upgrade now button to apply the changes.
Payment method
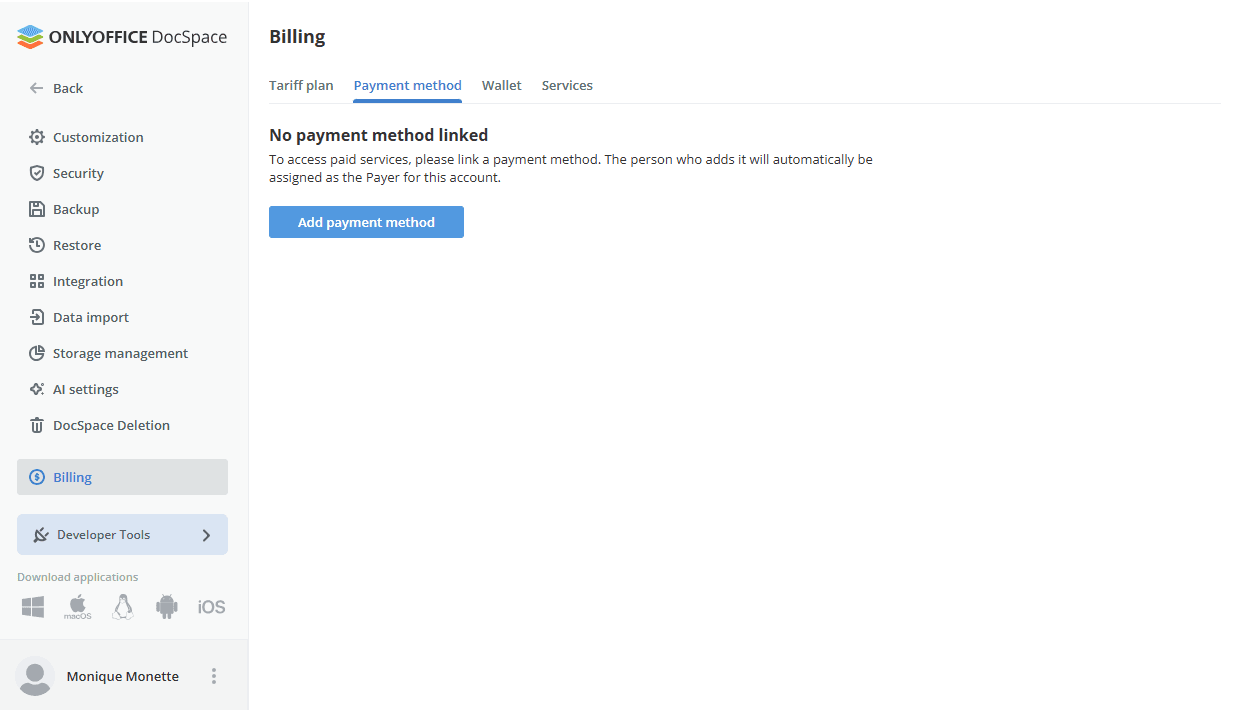
The Payment method tab shows the designated payer and the payment method.
If you are using the Startup plan, you need to link a card in Stripe. Click the Add payment method button and you will be redirected to Stripe where you can enter your card details. If you are on the Business plan, the card is already linked and all billing features are available right away.
Once a card is linked, the Linked status is displayed with a confirmation checkmark. The Payer section displays the name and email address of the person responsible for billing and payments.
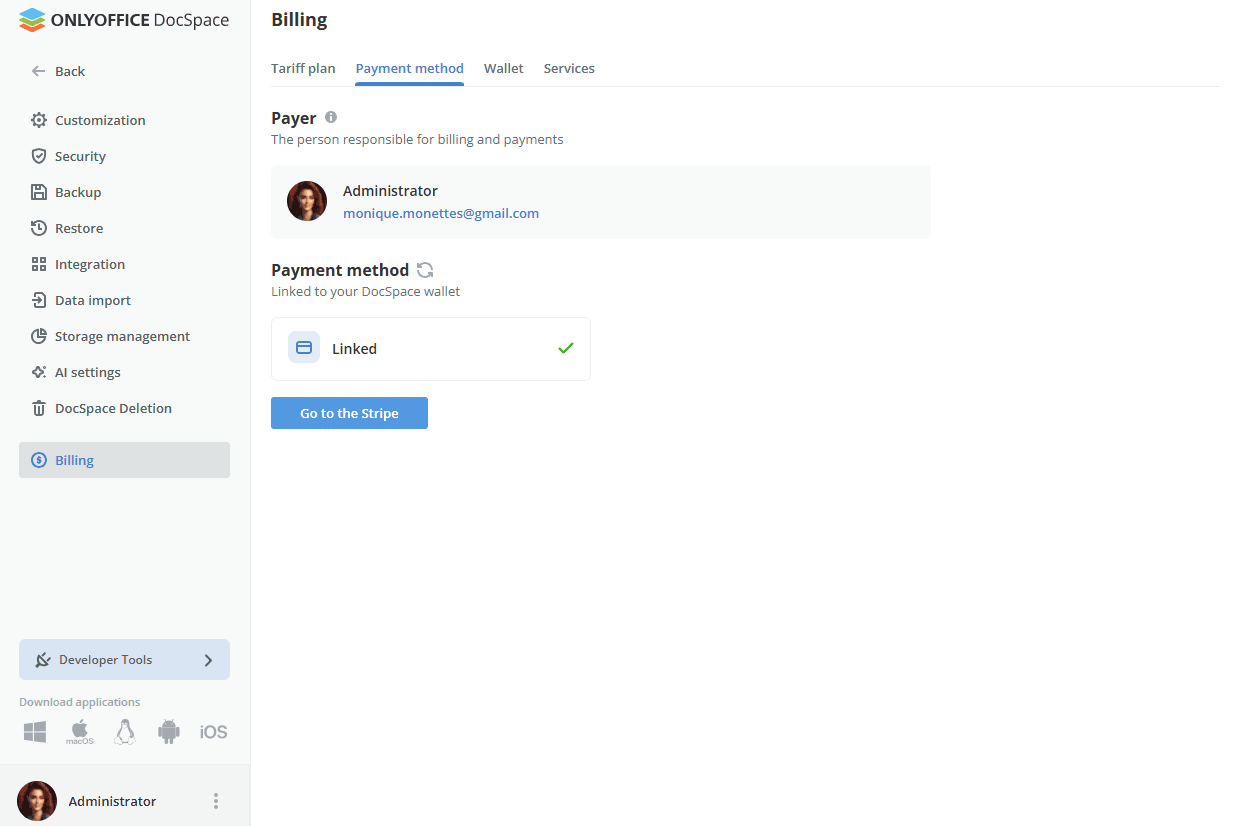
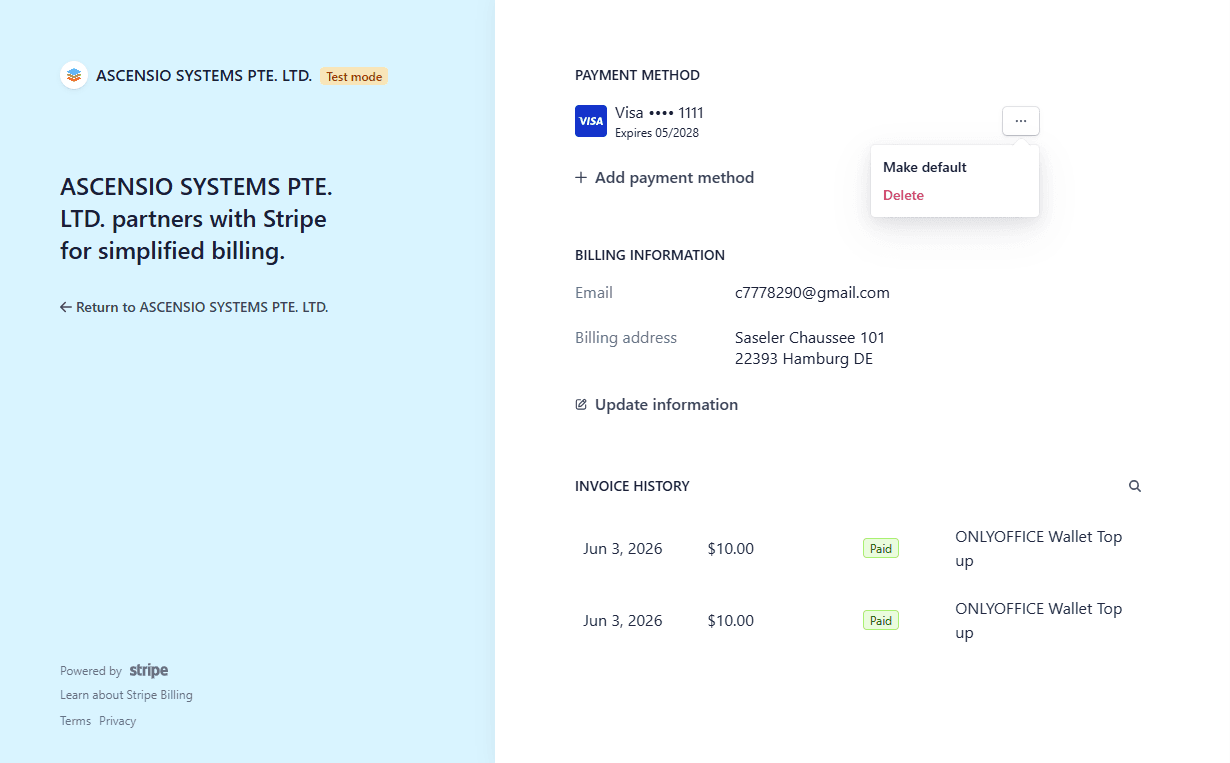
To manage your card details, click Go to the Stripe button, and you will be redirected to your Stripe customer portal.
Wallet
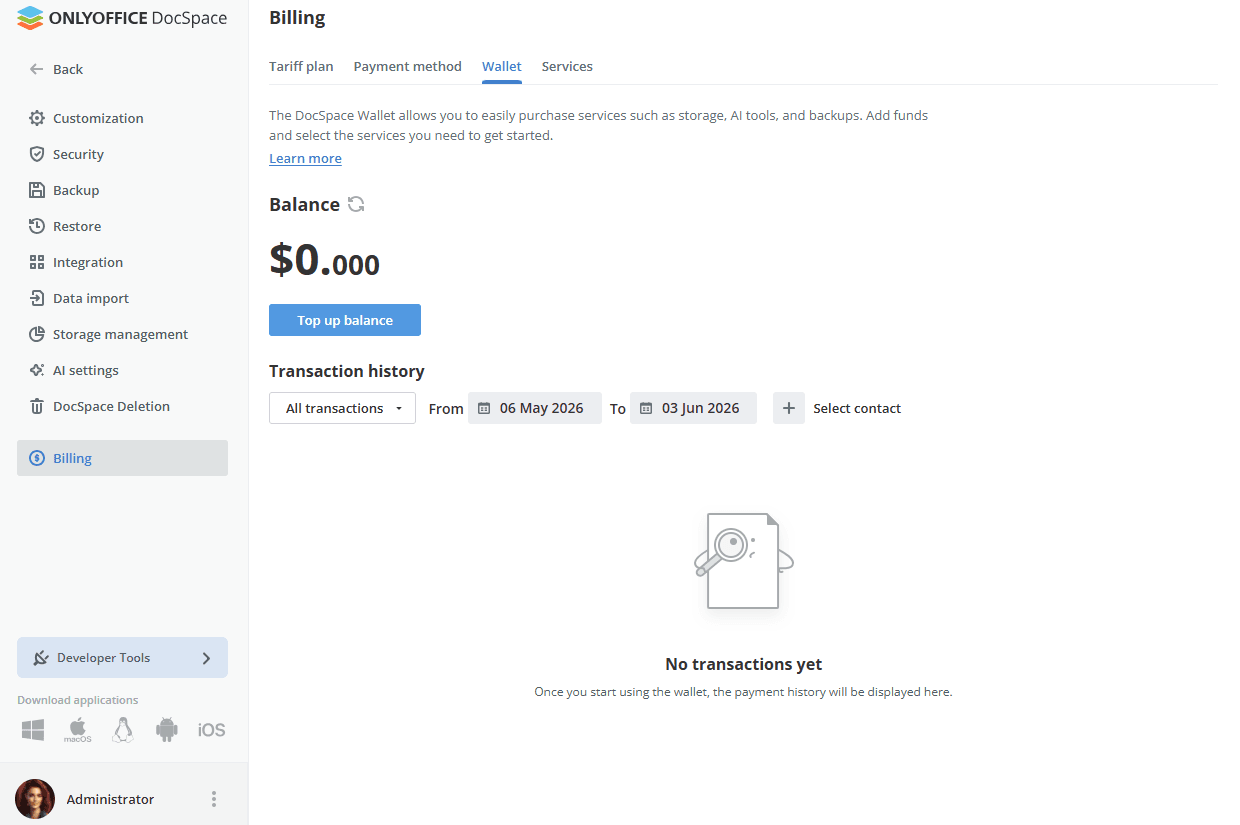
The Wallet allows you to add funds to your wallet balance and use them to activate the services you need.
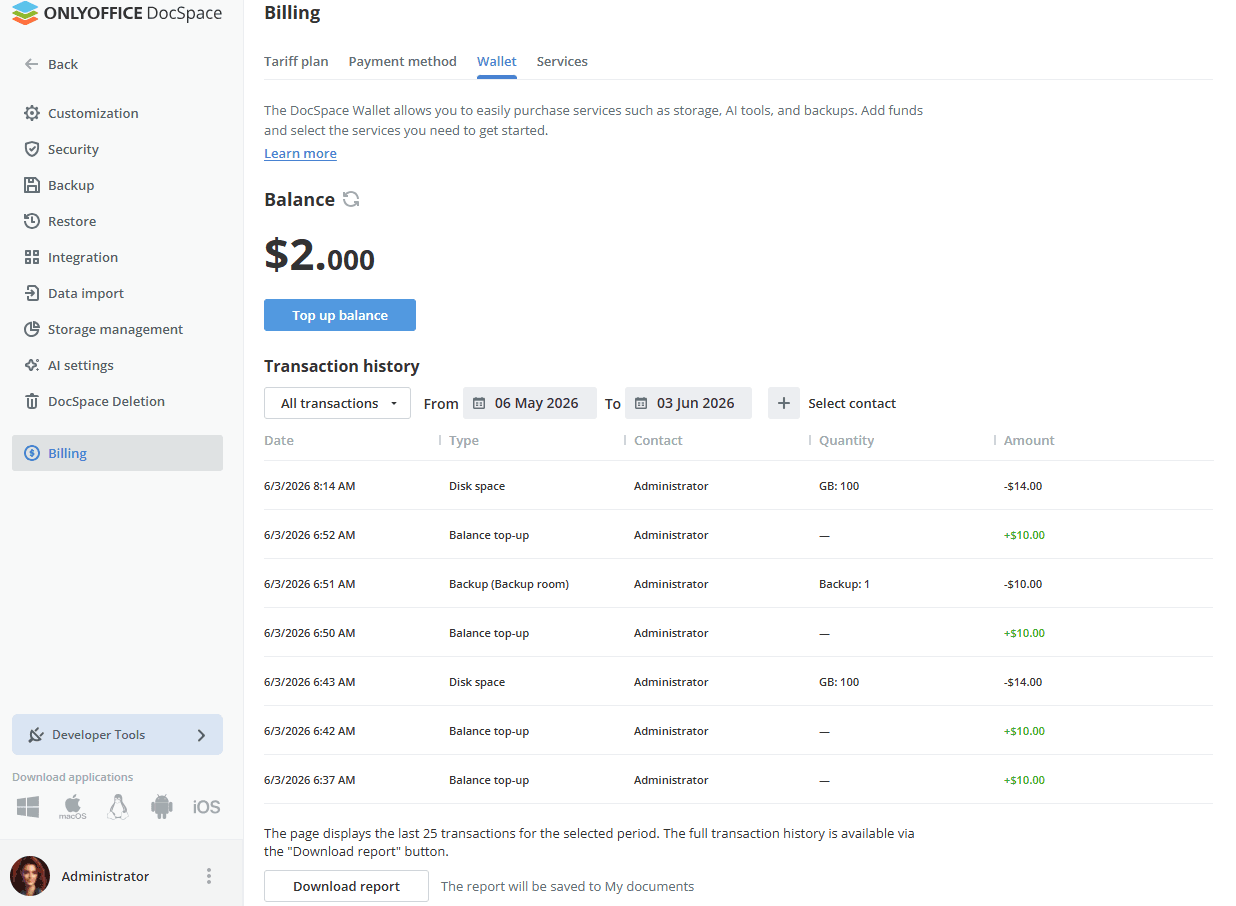
The Wallet tab displays your current balance with a refresh button to update the displayed amount. To add funds, click the Top up balance button.
If you are using the Startup plan, you need to link a card in Stripe before you can use the wallet. Click Add payment method and you will be redirected to Stripe where you can enter your card details. If you are on the Business plan, the card is already linked and all wallet features are available right away.
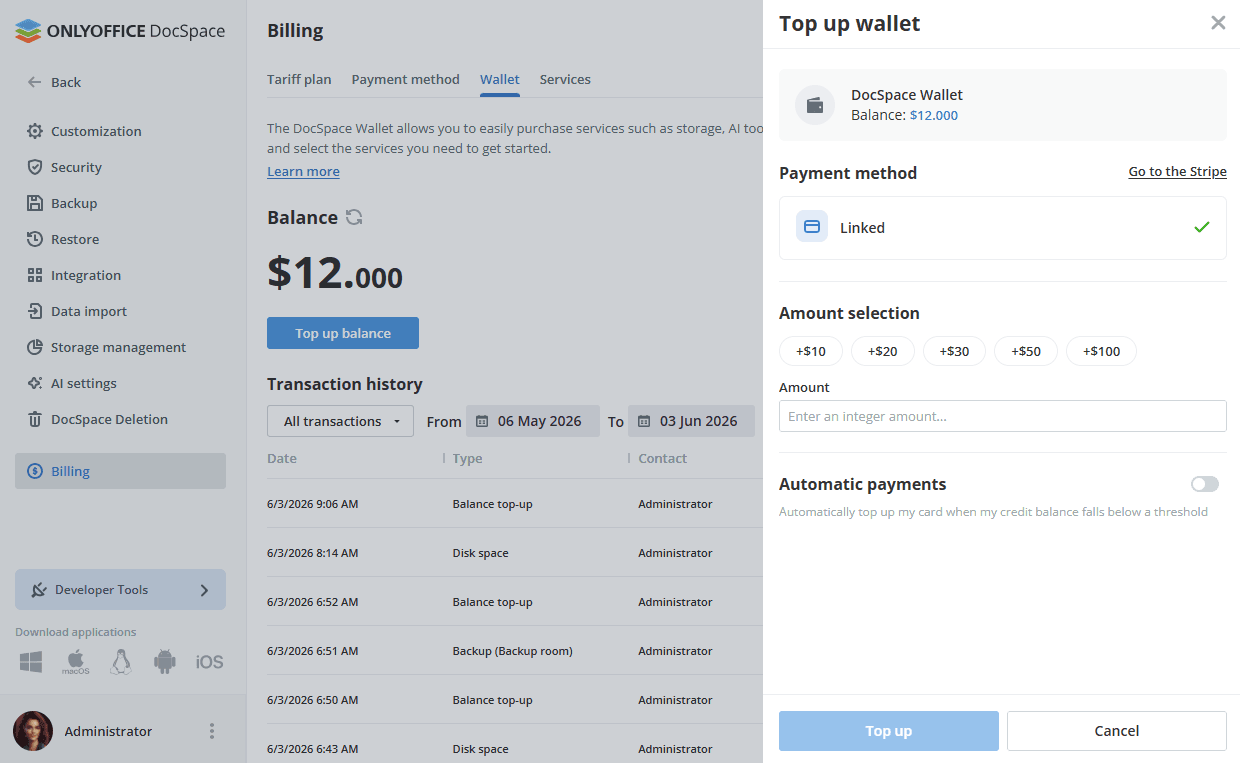
Once a card is linked, the Linked status is displayed with a confirmation checkmark. To manage your card details, click Go to the Stripe button and you will be redirected to your Stripe customer portal.
In the Amount selection, choose one of the preset amounts ($10, $20, $30, $50, or $100) or enter a custom value. Balance replenishment is only available in whole numbers. Click the Top up button to confirm. The top-up may take a moment to process.
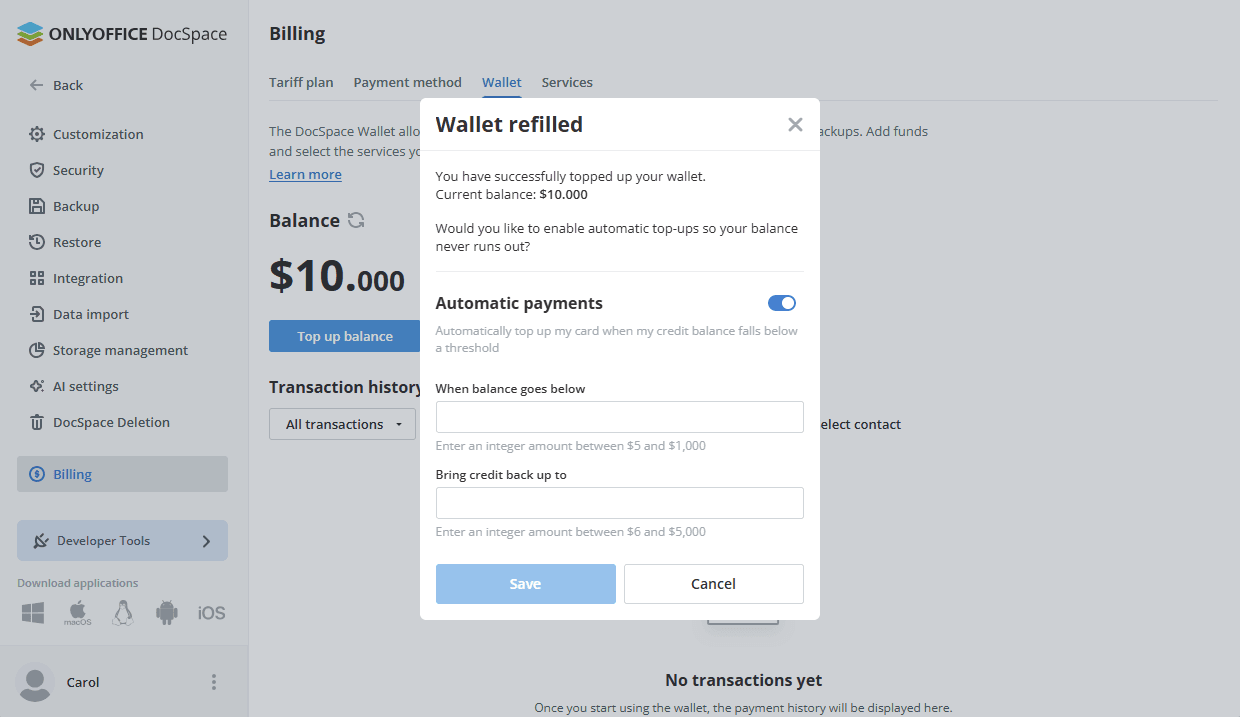
After the first successful top-up, a Wallet refilled dialog appears, confirming the new balance and offering to set up automatic payments. When enabled, the wallet tops up automatically whenever the balance drops below a defined threshold. Enable the Automatic payments option, enter the minimum balance threshold and the target amount to top up to. Click Save to apply. The same setting is available at any time from the regular Top up balance dialog.
The Transaction history section lists all wallet activity. You can filter transactions by type (All transactions, Credit, Debit), date range, and contact (the person who made the purchase). The page displays the last 25 transactions for the selected period. To retrieve the full history, click the Download report button. The report will be saved to My documents.
Services
The Services tab is used to connect and configure paid services available for your DocSpace.
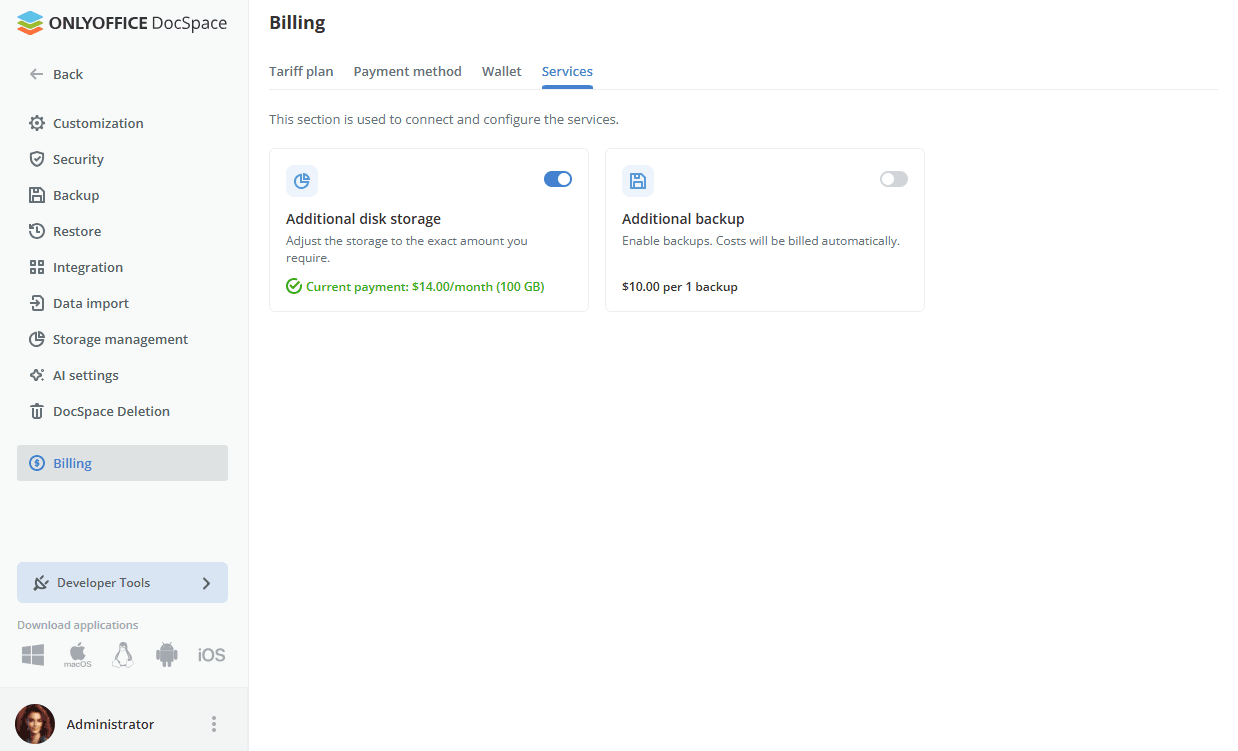
Additional disk storage
Click the toggle in the Additional disk storage card to enable the service. In the dialog, select the required storage amount using the preset options (100 GB, 200 GB, 500 GB, 1 TB) or the +/- buttons.
If your wallet balance is insufficient, click the Top up link in the dialog. If no card is linked yet, you can link one directly from the same dialog without leaving the page. Click the Topup & Upgrade button to confirm.
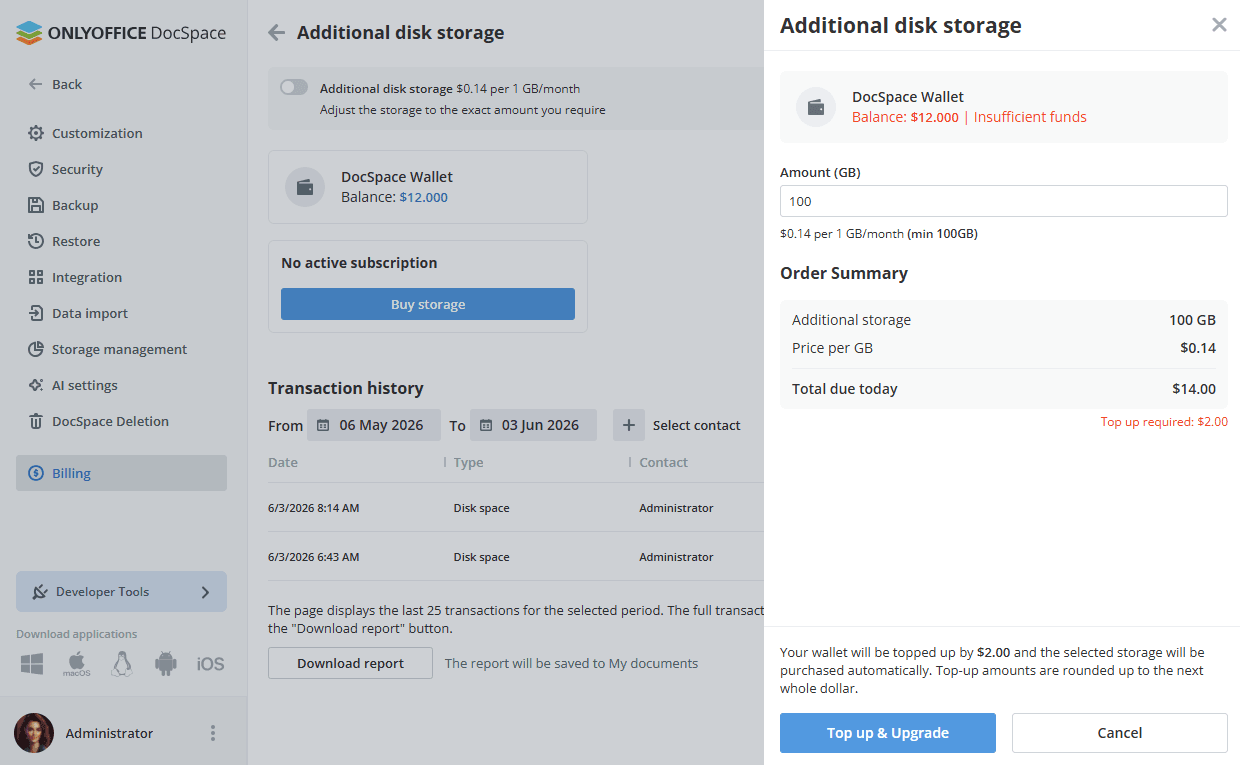
Once the service is active, clicking the Additional disk storage card opens its detail page. The page shows your current DocSpace Wallet balance, the active subscription amount and storage size, and the next auto-renewal date. To modify the subscription, click the Edit subscription button.
The Transaction history section on this page lists all disk storage charges. You can filter by date range and contact. The page shows the last 25 transactions for the selected period; to retrieve the full history, click the Download report button. The report will be saved to My documents.

If you already have an active storage subscription and want to increase it, the immediate charge will be prorated based on the remaining days in the current billing cycle. The full amount will then be charged on your regular billing date each month.
To reduce storage or cancel the subscription, click Edit subscription and set the value to 0 GB or select a lower amount. Downgrades take effect on the next billing date — make sure to reduce actual storage usage before then, otherwise the charge will reflect the space actually in use.
Additional backup
Click the toggle in the Backup card to enable the service. Charges are applied automatically each time a backup is created, as long as the wallet balance is sufficient.
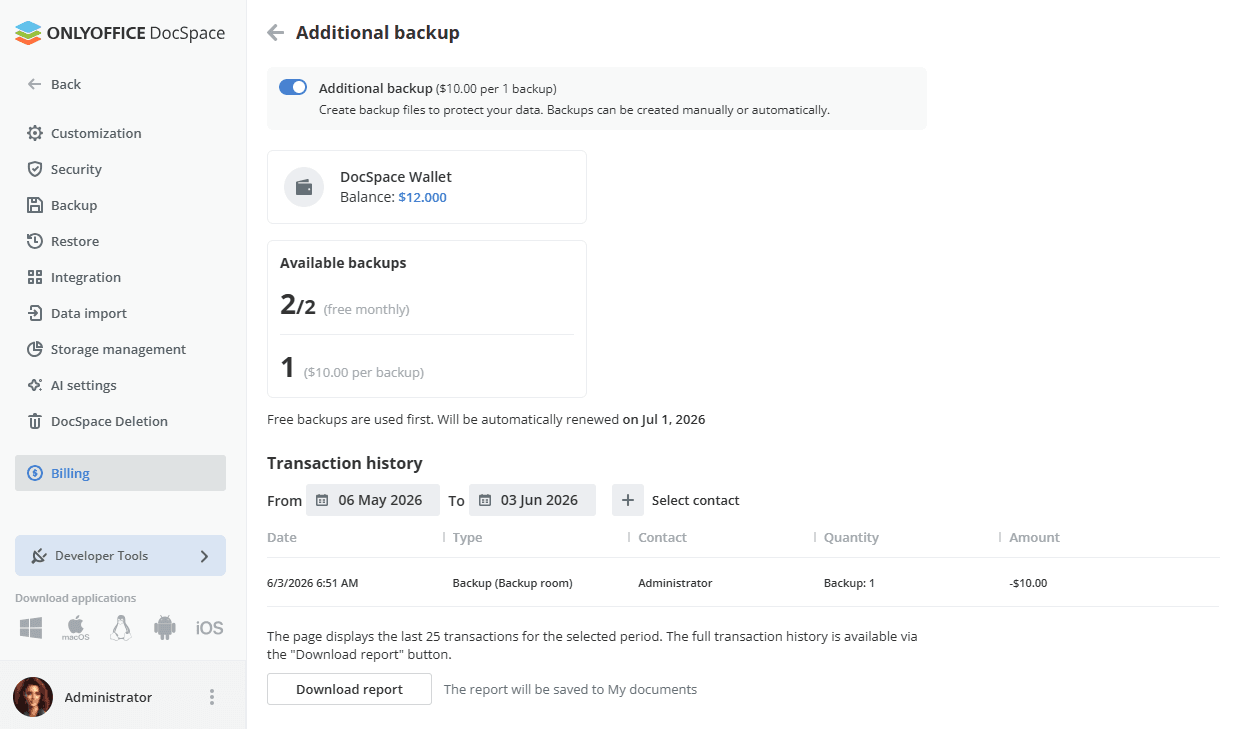
Once the service is active, clicking the Backup card opens its detail page. The page shows your current DocSpace Wallet balance and the Available backups breakdown:
- Free monthly backups — the number of free backups remaining out of the monthly allowance included with your plan (e.g. 1/2 means 1 of 2 free backups used). Free backups are always used first and renew automatically each month.
- Paid backups — the number of additional backups available based on the current wallet balance at $10.00 per backup.
The Transaction history section on this page lists all backup-related charges. You can filter by date range and contact.
Once enabled, all DocSpace administrators can create backups at any time.