Moodle
Introduction
ONLYOFFICE allows you to edit the files stored in your Moodle account and collaborate on them using ONLYOFFICE online and desktop editors. Thereby, you can use not only online collaboration tools, but also the features available in your desktop application:
- access to system fonts, the clipboard, and system printers.
To take full advantage of all these editing options, you will need to install and configure several components:
- It's supposed that you already have a Moodle server instance installed and configured.
- Install ONLYOFFICE Docs. Please note that the Moodle server and ONLYOFFICE Docs must be accessible to each other over the network. To find more detailed instructions on how to install ONLYOFFICE Docs, you can refer to our articles.
- Enable our official integration app in the Moodle administrator account. To find out more details on configuring the integration app, you can refer to the corresponding article for Moodle.
Step 1. Connect to Moodle
Launch ONLYOFFICE Desktop Editors. To connect Desktop Editors to your Moodle, perform the following actions:
- Click the Plus button
 next to the Clouds section on the left side panel.
 - Click the Moodle button, or use the Connect now link at the bottom.
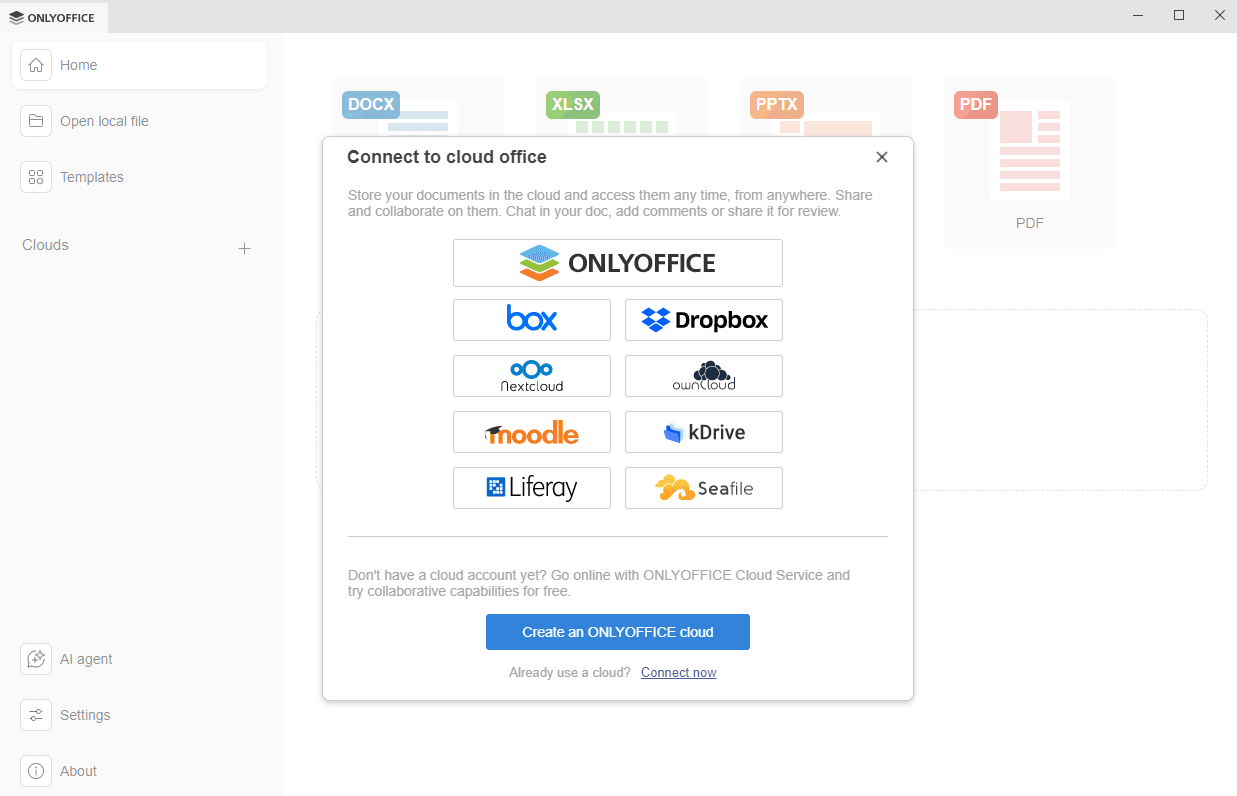
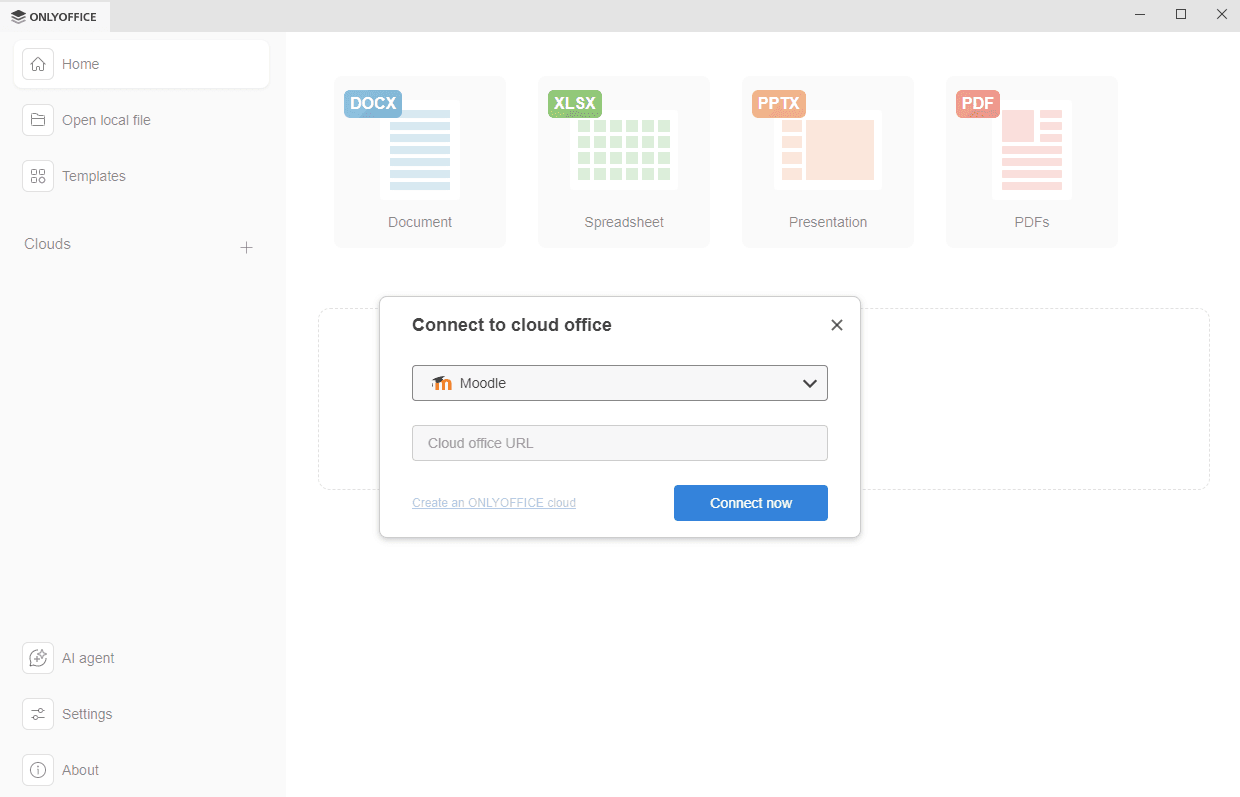
- If you pressed the Moodle service button, the Connect to cloud office window opens with the Moodle selected. If you used the Connect now link, choose the Moodle cloud storage from the drop-down list. In the Cloud office URL field, enter your Moodle server domain name or IP address. When ready, click the Connect now button.
-
The Moodle main page will open in a new tab of the Desktop Editors interface.
- if the course is set to guest access, you can use it,
- or use the internal Log in link,
-
or proceed with the course that requires extended access and log in there.
- Specify your Username and the Password you use to access your Moodle account,
- Click the Log in button.


Now you can edit your existing files and create new ones, share your documents, and collaborate on them with Moodle users using ONLYOFFICE editors, provided that everyone has corresponding access rights, as well as go to the portal Edit mode if you are an administrator.
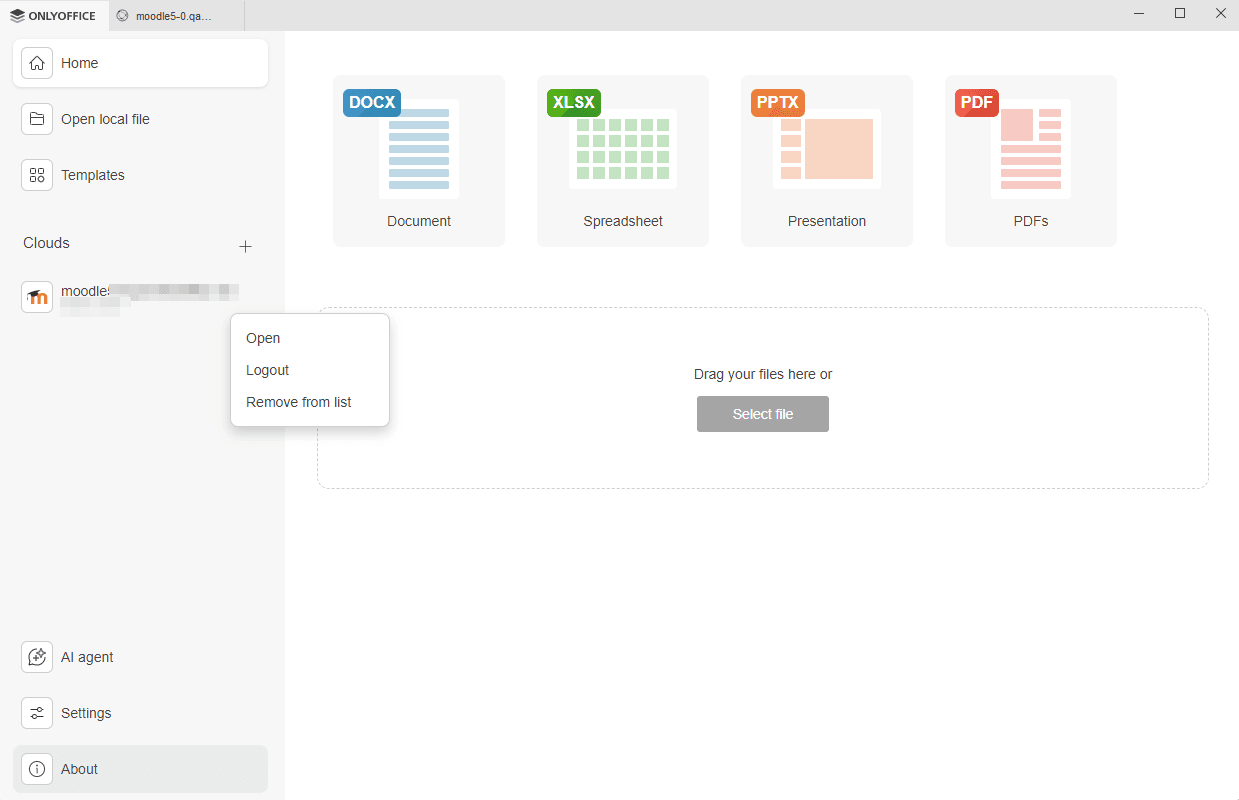
Step 2. Manage your connected accounts
Click the logo in the upper left corner of the Desktop Editors interface to return to the main program window. All the connected cloud accounts appear on the left-side panel below the Clouds section. Click the three dots  that appear as you hover the mouse over the connected cloud to access the cloud contex menu options:
- Open - to switch to the corresponding cloud storage tab if you are already logged in to this account, or to open the Connect to cloud office window if you are not currently logged in (in such a case, you will need to enter your credentials),
- Logout - to exit from your account,
- Remove from list - to disconnect the selected account and remove it from the list.
To connect several accounts or clouds, click the Plus button next to the Clouds section on the left side panel.