Managing company documentation
Introduction
Creating a well-organized storage space for your company documentation can help you save time and considerably increase the productivity and efficiency of the work.
The portal offers you a common space to store your company documentation, the Common section, and allows you to structure it as you want by creating folders and setting permissions for them.
This guide describes how to do it.
Step 1. Access the Documents
Sign in to your ONLYOFFICE portal and click the Documents link.
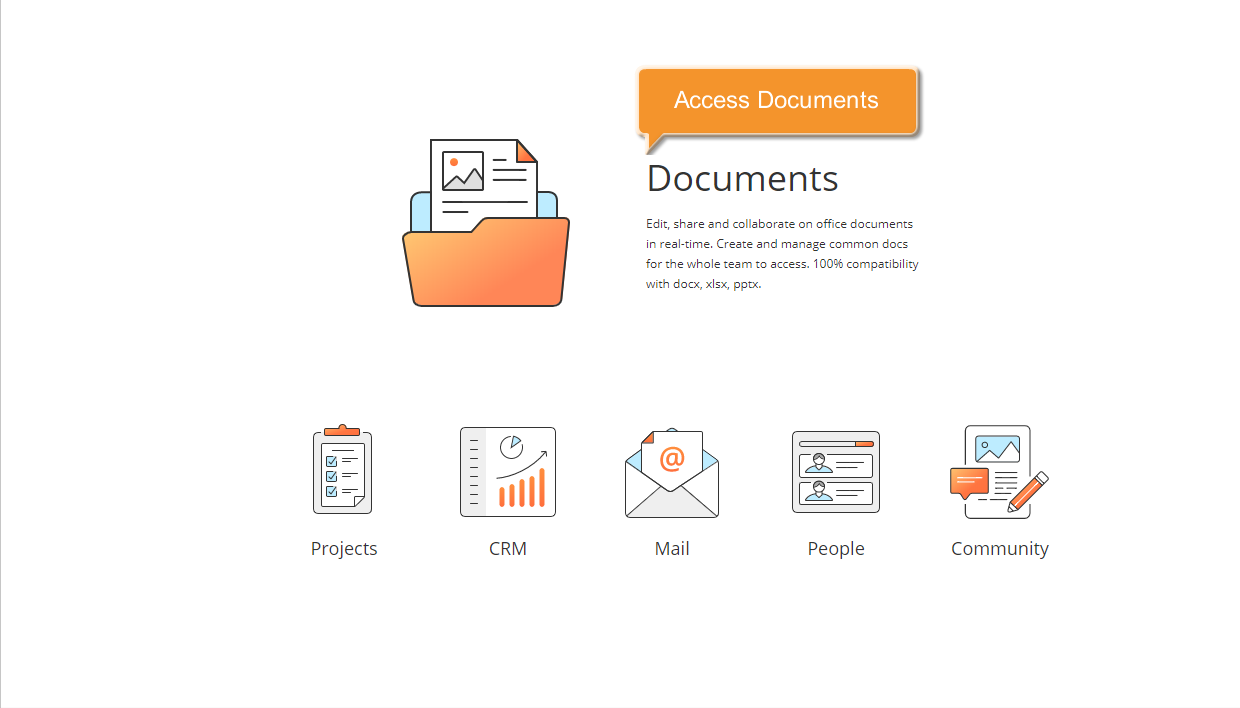
If you are already signed in and have been using the portal for some time, you can access the Documents module from any portal page: open the drop-down list in the upper-left corner of the page and select the corresponding option.
Step 2. Create a structure
The My documents folder opens.
The simplest way to structure the company documentation is to organize it by groups, creating a common directory for each company department.
Go to the Common section by clicking the corresponding link in the left-side panel. Click Create in the upper-left corner and select the Folder option from the drop-down list. Enter a name for your folder, for example, a department title, and click the Create  icon.
icon.
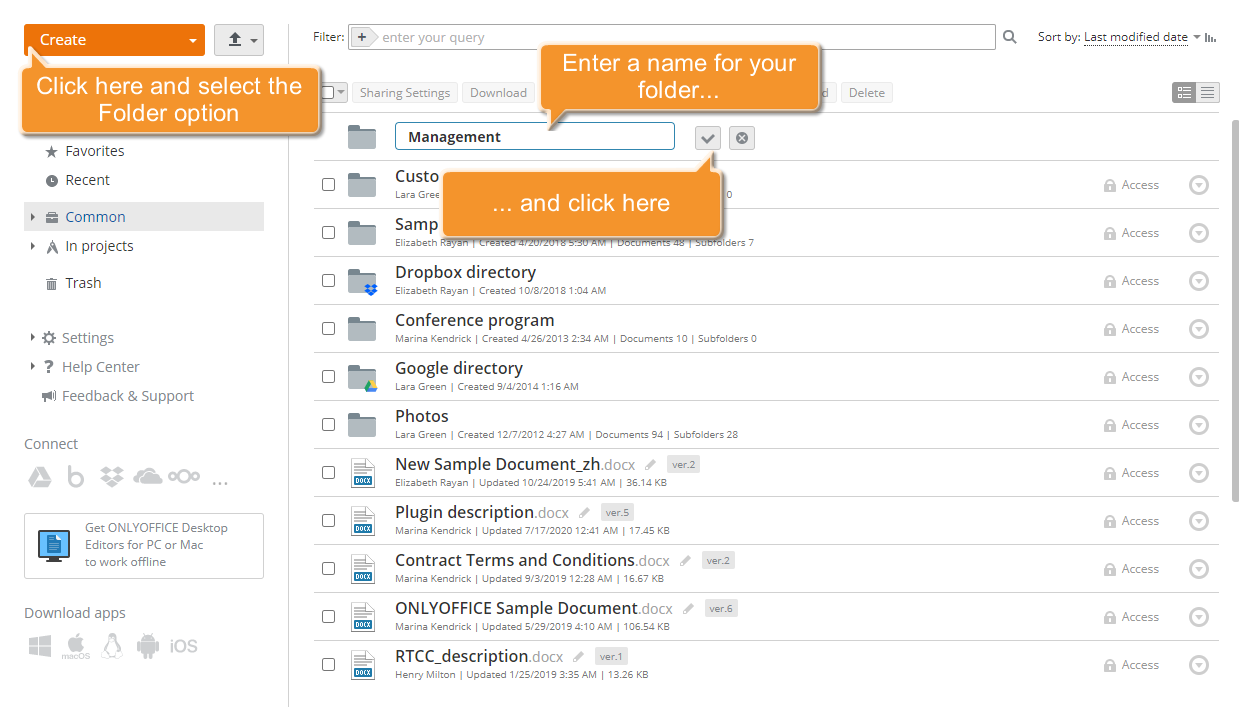
The folder with the specified name will be created in the Common section. In the same way, you can create as many folders as you want.
Step 3. Set permissions
By default, all the files and folders placed into the Common section are available to all portal users. To restrict access, set permissions for all the created folders.
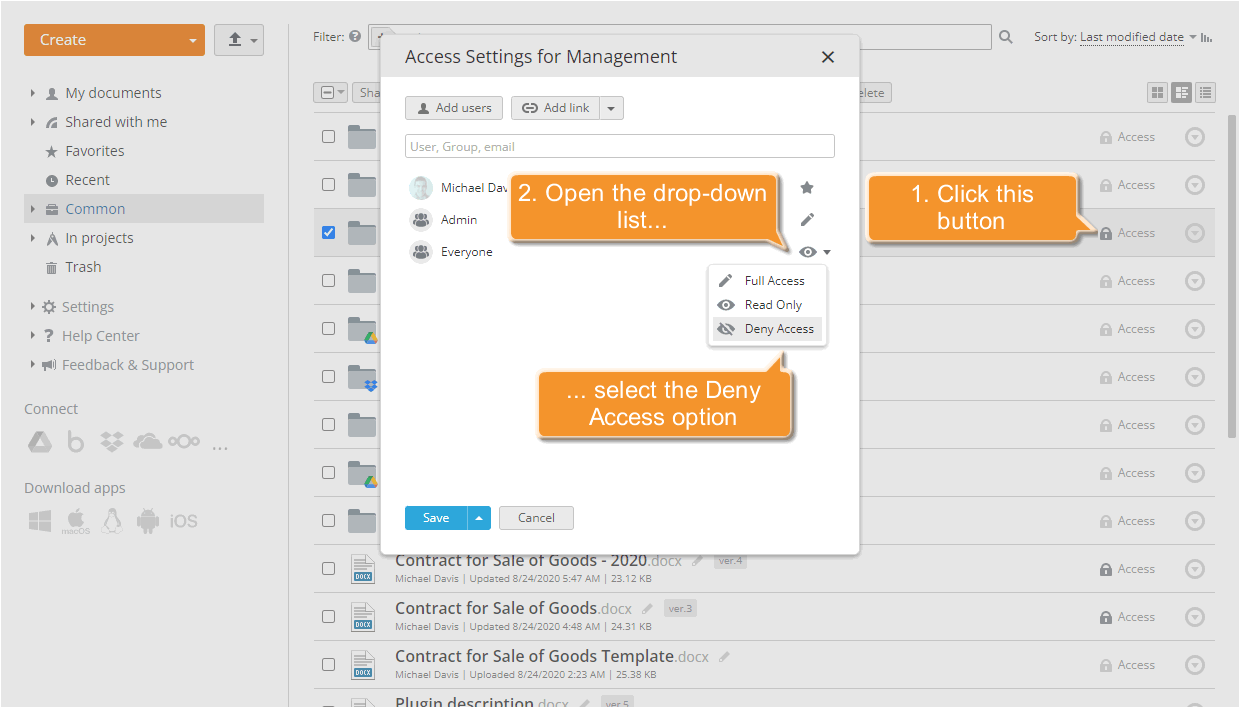
Click the Access button to the right of the folder you need, or use the Sharing Settings option from the context menu to open the Access Settings window.
First, block the Read Only access granted by default to all portal users. Point to the Everyone line, click the Read Only link, and select the Deny Access option from the list.
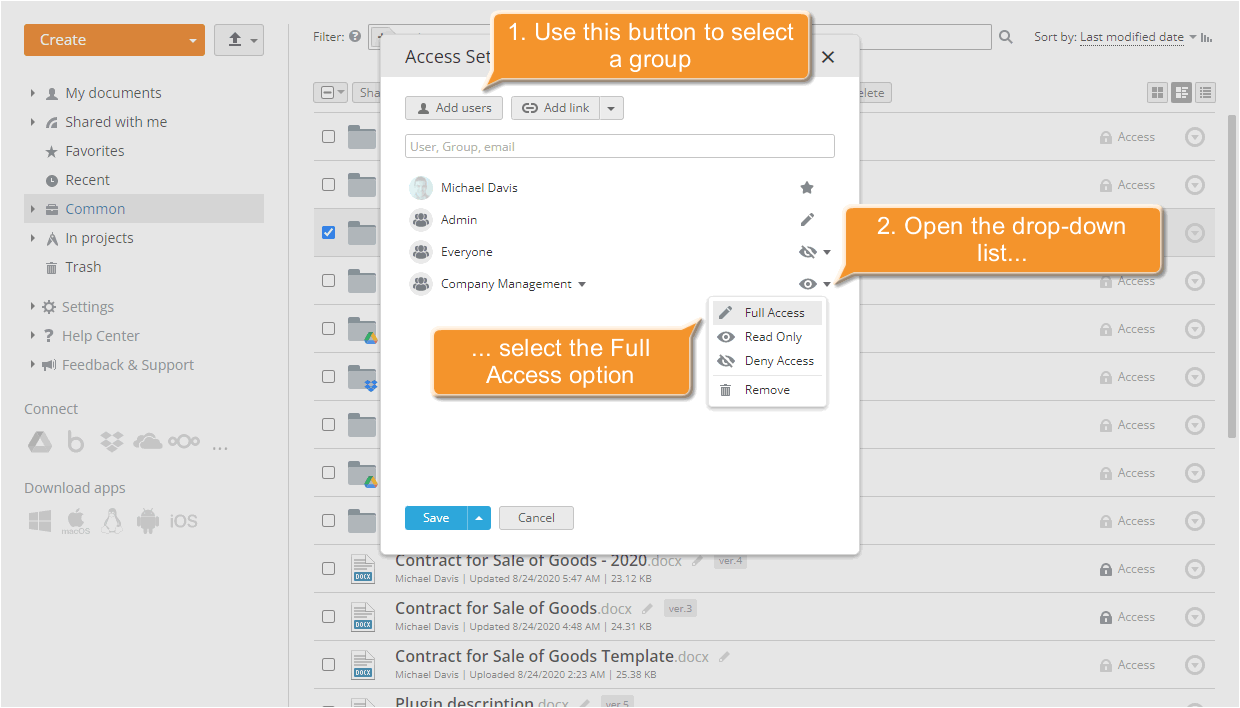
Now, to grant access to this folder to one of the company departments, click Add Users at the top of the window and select the group you need.
To grant full access, so that the users of the selected group can not only view the documents but also create and edit them, as well as upload and move files directly to this folder, click the Read Only link and select the Full Access option.
To apply the changes, click Save.
You can set permissions for multiple files or folders at once.
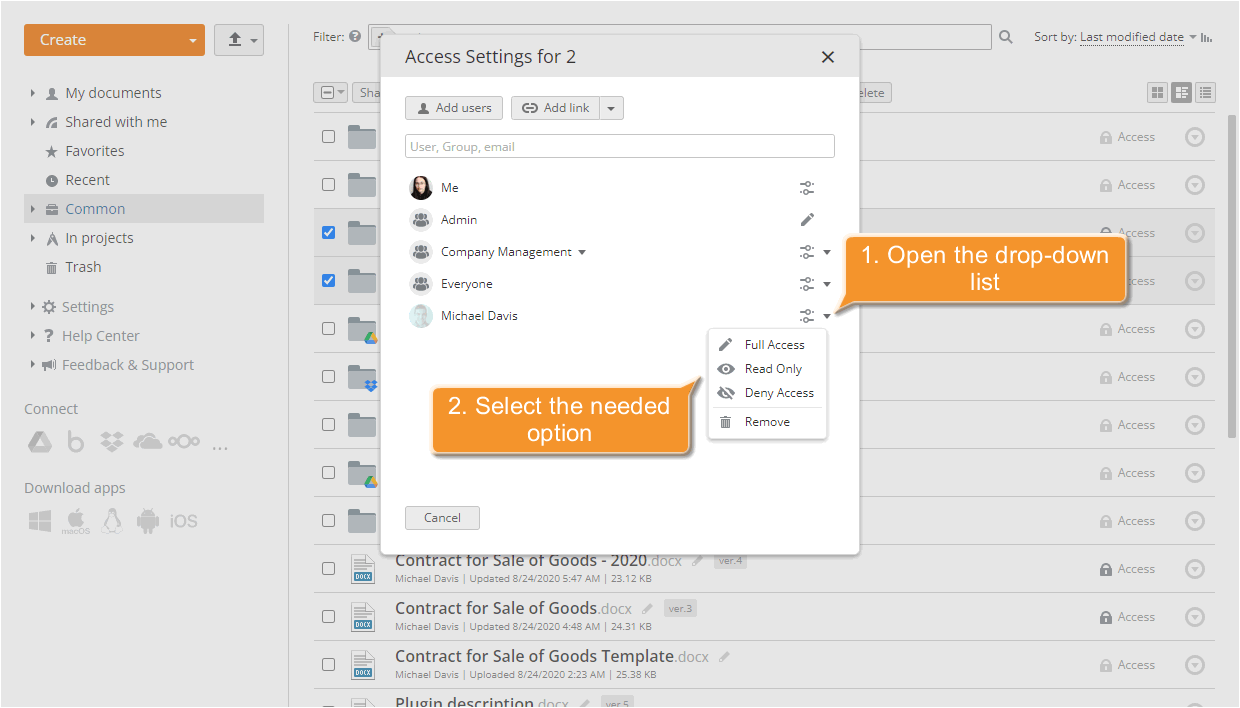
Select the items that you want to share with the portal users and click Sharing Settings. In the Access Settings window that opens, you will see all the users and groups that have access to the selected folder items. If you see the Varies link in front of the user name, it means that this user has different access levels to the selected items.
If you want to set the same access permissions to the selected folder items for a user or group, click the Varies link and select one of the available access options.
To apply the changes, click Save.
Step 4. Organize documents
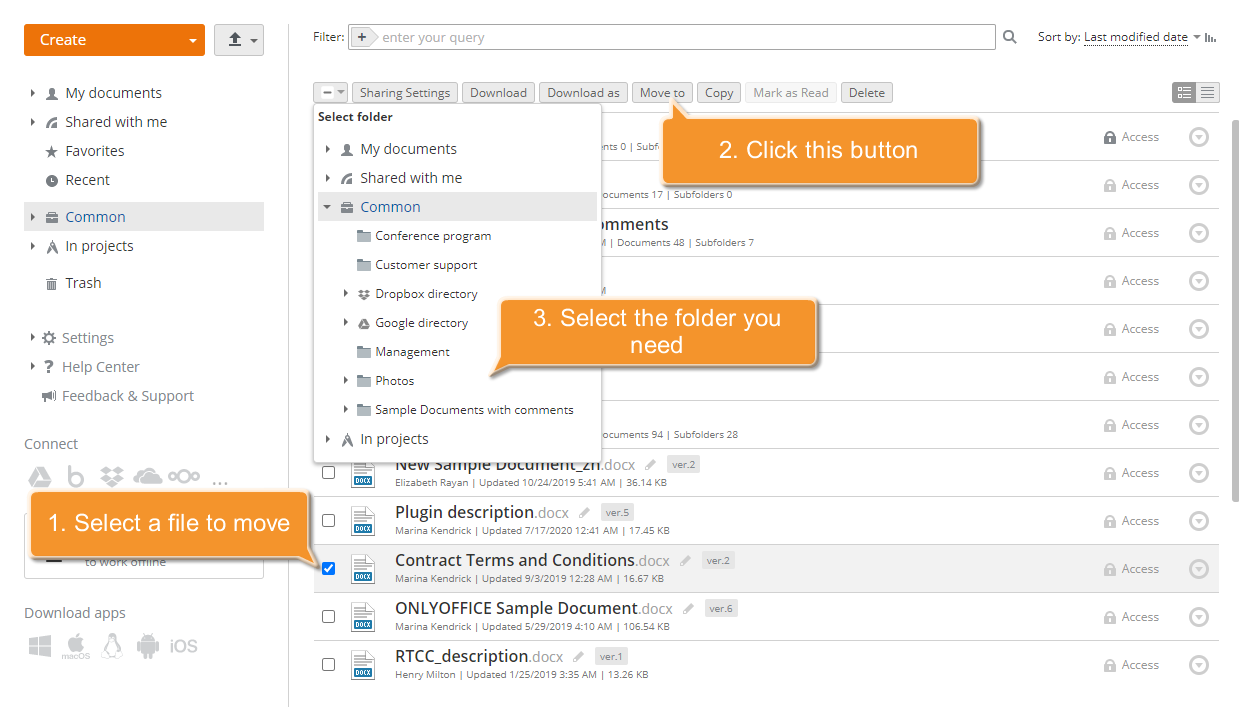
To place documents into the appropriate folders, select the checkboxes next to the documents you need, click Move to, and select the folder you want to move your documents to.
The document will be placed into the selected folder.
It is also possible to upload new files directly to the created folder by entering it and using the Upload button in the upper-left corner of the page. The rights set for the folder will be applied to all the documents placed and uploaded into it.