Liferay
Über die ONLYOFFICE- und Liferay-Integration
ONLYOFFICE bietet einen offiziellen Konnektor, um ONLYOFFICE Docs mit Liferay zu integrieren und Office-Dokumente in der Liferay Document and Media Library zu bearbeiten. Sie können den ONLYOFFICE-Konnektor vom Liferay Marketplace oder von der GitHub-Seite herunterladen. Der Konnektor wird unter der Apache-Lizenz vertrieben.
Verbinden von ONLYOFFICE Docs mit Liferay
Installieren des ONLYOFFICE-Konnektors für Liferay
Sie können den ONLYOFFICE-Konnektor mit dem App Manager oder aus dem offiziellen Liferay App Store installieren.
Um den Konnektor durch den App Manager zu installieren,
- Gehen Sie zu Control Panel (Systemsteuerung) -> Apps -> App Manager.
- Klicken Sie auf die Schaltfläche
 Options (Optionen).
 - Klicken Sie auf die Schaltfläche Upload (Hochladen).
- Wählen Sie im geöffneten Fenster die Anwendungsdatei ONLYOFFICE.
Nach Abschluss der Installation ist die Anwendung einsatzbereit.
Wenn Sie den Connector selbst erstellen, kopieren Sie einfach die kompilierte jar-Datei aus dem Ordner build\libs nach /opt/liferay/deploy. Liferay installiert sie automatisch.
.lpkg bereitgestellt. Sie können ein .lpkg-Paket entpacken, um die entsprechende .jar-Datei zu erhalten. Die extrahierte .jar-Datei kann dann über den App Manager bereitgestellt werden.Konfigurieren der Liferay- und ONLYOFFICE-Integrationsanwendung
Gehen Sie zu Control Panel (Systemsteuerung) -> Configuration (Konfiguration) -> System Settings (Systemeinstellungen). Wählen Sie im Abschnitt Platform die Kategorie Connectors (Konnektoren) und dann ONLYOFFICE aus.
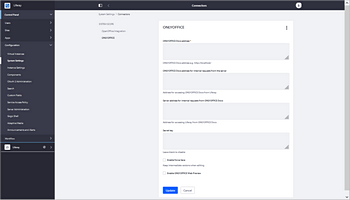
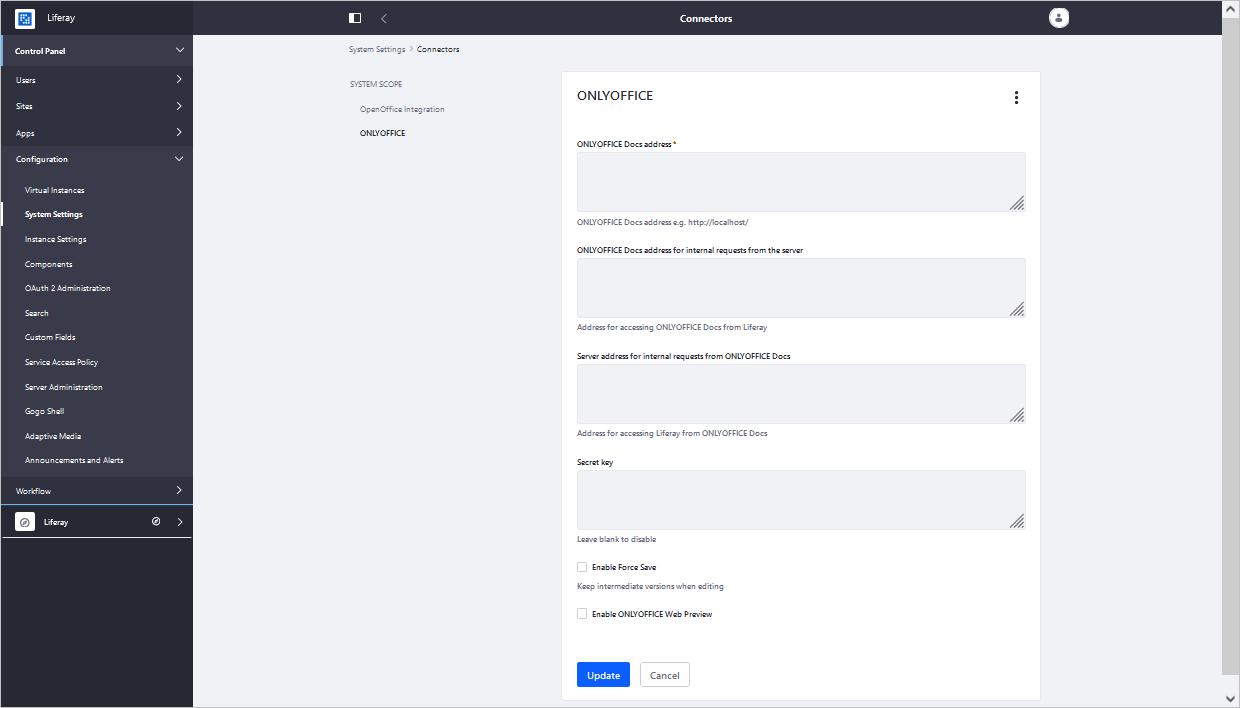
Hier können Sie die folgenden Einstellungen konfigurieren:
- ONLYOFFICE Docs address (Adresse von ONLYOFFICE Docs): Geben Sie die URL-Adresse an, unter der der Dokumentbearbeitungsdienst installiert ist.
Die Adresse von ONLYOFFICE Docs muss von Liferay aus zugänglich sein, und die Adresse von Liferay muss von ONLYOFFICE Docs aus zugänglich sein.
- ONLYOFFICE Docs address for internal requests from the server (ONLYOFFICE Docs-Adresse für interne Anfragen vom Server): Geben Sie die Adresse an, die für den Zugriff auf den Document Editing Service von Liferay verwendet wird.
- Server address for internal requests from ONLYOFFICE Docs (Serveradresse für interne Anfragen von ONLYOFFICE Docs): Geben Sie die Adresse an, die für den Zugriff auf Liferay vom Document Editing Service verwendet wird.
- Secret key (Geheimer Schlüssel): Geben Sie den Schlüssel an, der zum Signieren der Daten verwendet wird.
Ab ONLYOFFICE Docs v7.2 ist JWT standardmäßig aktiviert und der geheime Schlüssel wird automatisch generiert. Sie müssen es auch auf der Liferay-Seite aktivieren: Suchen Sie Ihren geheimen Schlüssel in der Konfigurationsdatei von ONLYOFFICE Docs und geben Sie dann denselben geheimen Schlüssel in den Konnektor-Einstellungen an. Weitere Einzelheiten finden Sie im Abschnitt Aktivieren von JWT für die ONLYOFFICE- und Liferay-Integration dieses Artikels.
- Enable Force Save (Force Save aktivieren): Aktivieren Sie das Kontrollkästchen, um beim Bearbeiten Zwischendokumentversionen beizubehalten.
- Enable ONLYOFFICE Web Preview (ONLYOFFICE Web Vorschau aktivieren): Aktivieren Sie das Kontrollkästchen, um die Dateivorschau zu aktivieren.
Klicken Sie nach der Konfiguration der Integrationsanwendung auf die Schaltfläche Save (Speichern), um die Änderungen zu übernehmen.
Erste Schritte für ONLYOFFICE Docs in Liferay
Um eine Datei zu erstellen:
- Gehen Sie zum Abschnitt Documents and Media (Dokumente und Media).
- Klicken Sie auf die Schaltfläche
 Add File (Datei hinzufügen).
 -
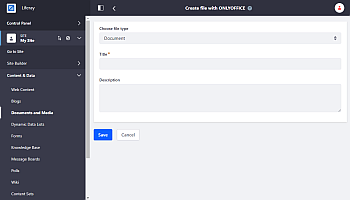
Klicken Sie im geöffneten Menü auf die Schaltfläche Create with ONLYOFFICE (Mit ONLYOFFICE erstellen).

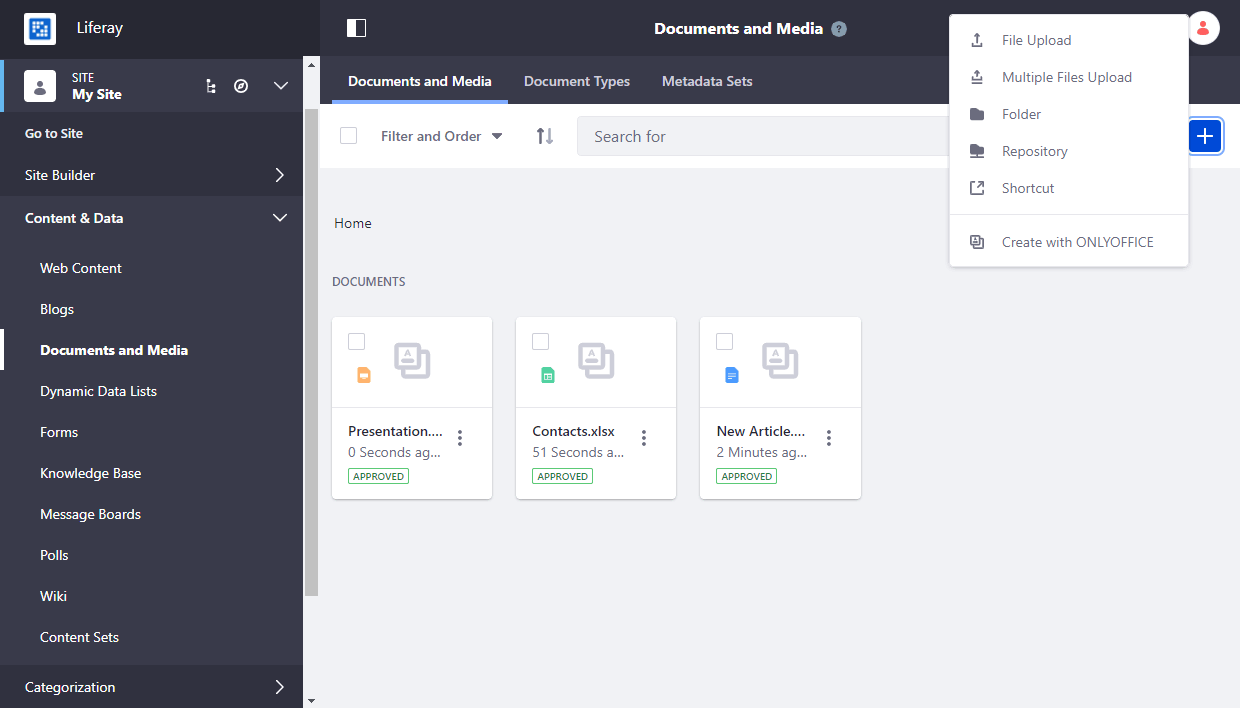
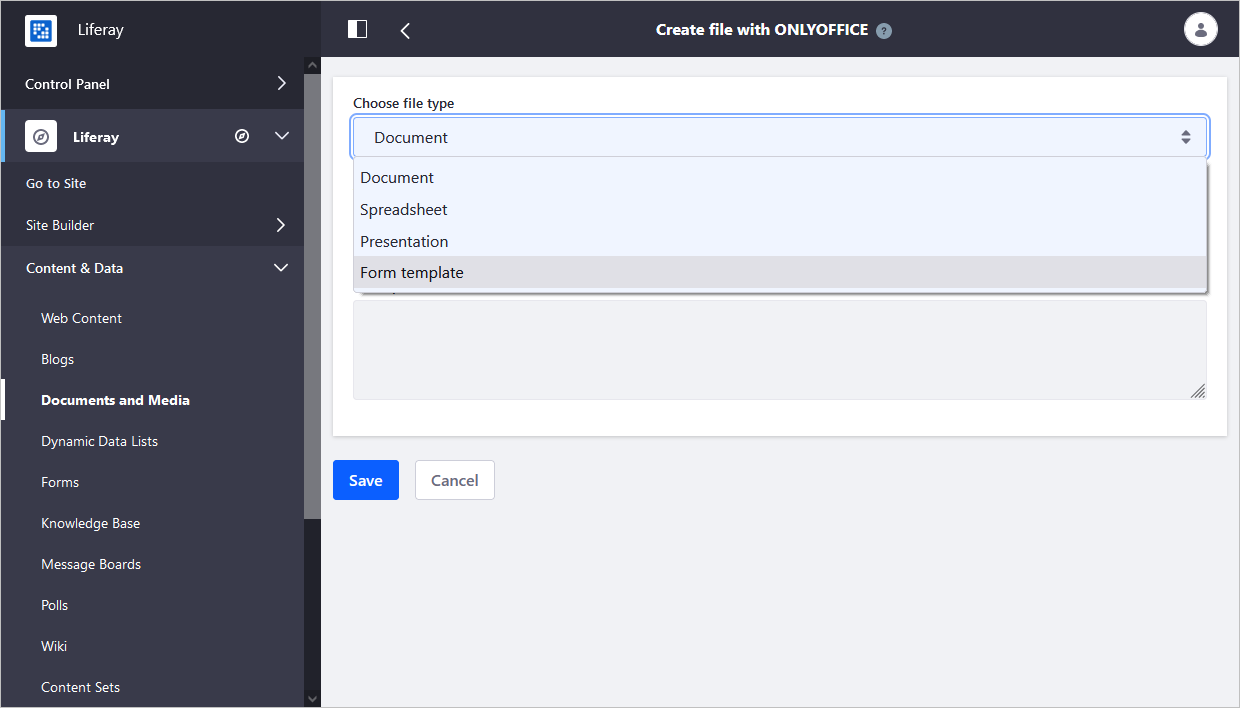
- Wählen Sie auf der geöffneten Seite den Dateityp, geben Sie den Titel und die Beschreibung (optional) an.
- Klicken Sie auf die Schaltfläche Save (Speichern).

Um eine Datei zu bearbeiten:
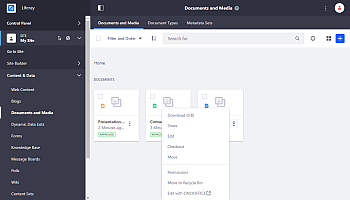
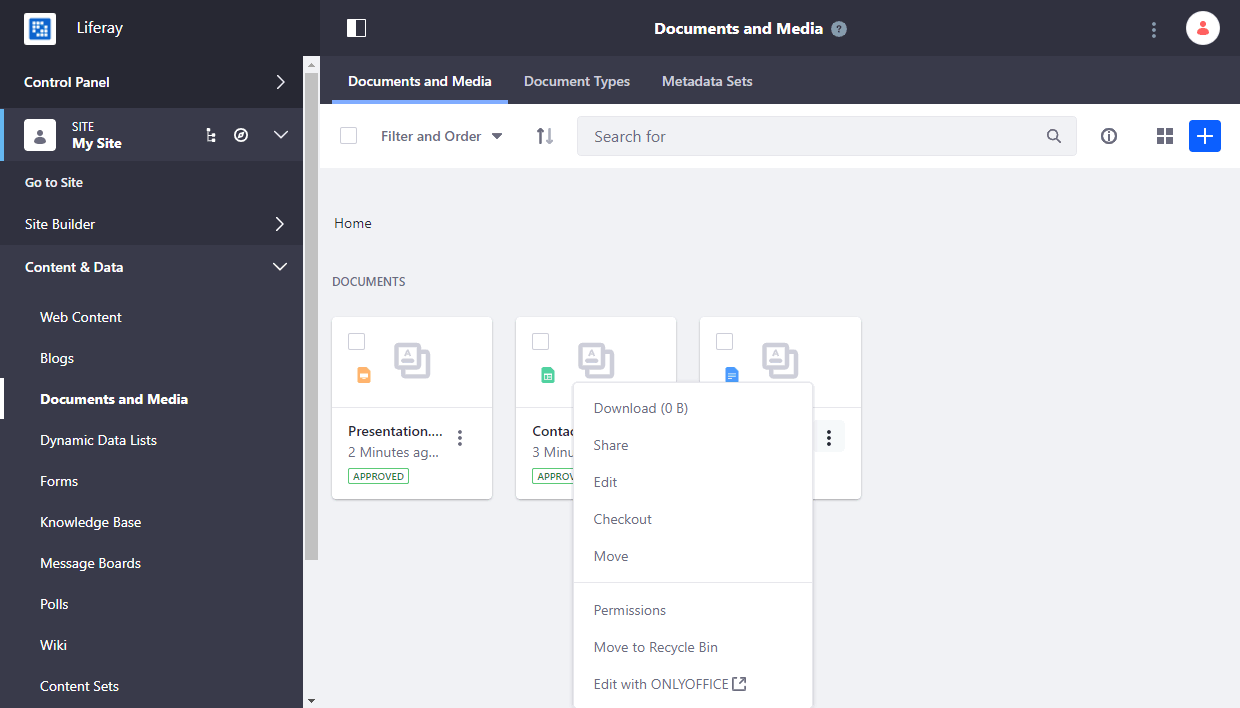
- Finden Sie die erforderliche Datei im Abschnitt Documents and Media (Dokumente und Media).
- Klicken Sie auf das Dokument.
- Klicken Sie im geöffneten Menü auf die Schaltfläche Edit in ONLYOFFFICE (Mit ONLYOFFICE bearbeiten).
Um ein Formular zu erstellen:
- Öffnen Sie den Abschnitt Documents and Media (Dokumente und Media).
- Klicken Sie auf die Schaltfläche Add File (Datei hinzufügen).
- Klicken Sie im geöffneten Menü auf die Schaltfläche Create with ONLYOFFICE (Mit ONLYOFFICE erstellen).
-
Wählen Sie auf der geöffneten Seite die Option Form (Formular) und geben Sie den Titel und die Beschreibung der Datei (optional) an.

- Klicken Sie auf die Schaltfläche Save (Speichern).
- Speichern Sie das Formular als .docxf, um in Zukunft Zugriff zum Bearbeiten, Überarbeiten oder Zusammenarbeiten zu haben.
Um ein ausfüllbares Formular zu erstellen und die Dateibearbeitung durch andere Benutzer zu beschränken:
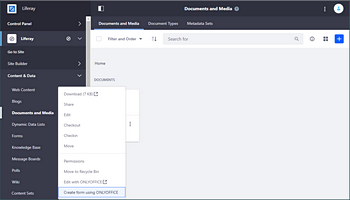
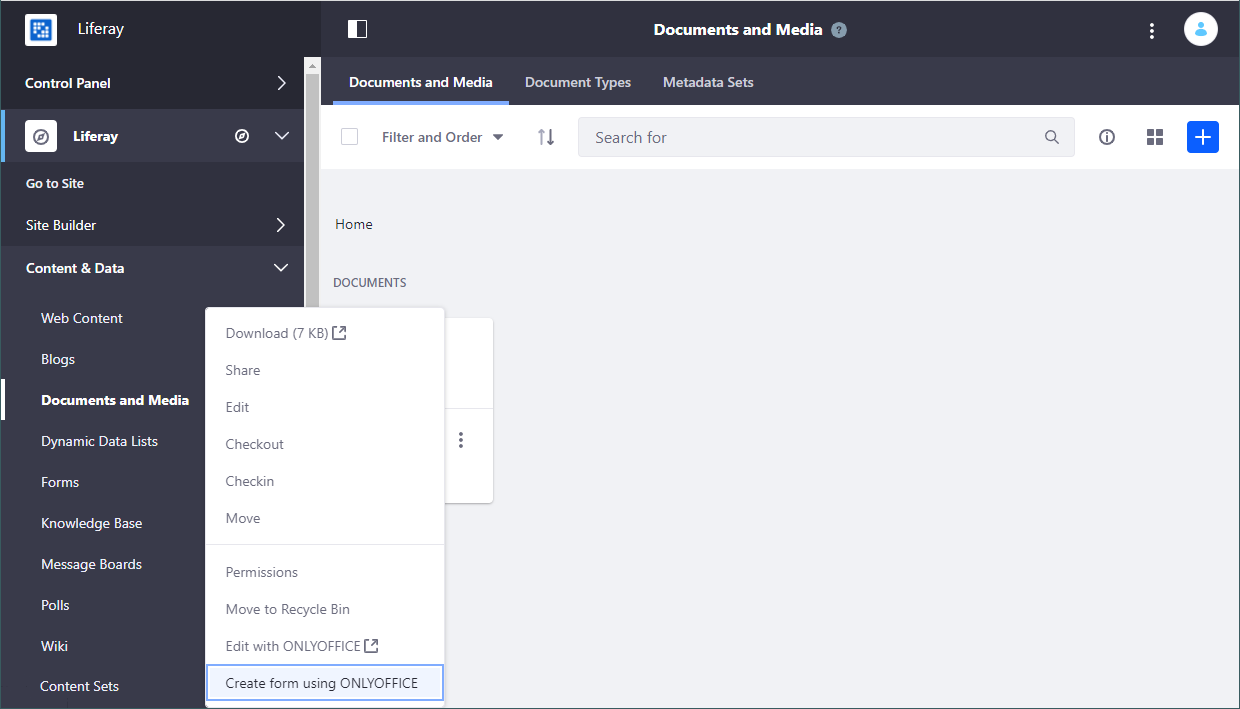
- Klicken Sie auf das Symbol More (Mehr) rechts neben der .docxf-Datei.
-
Wählen Sie die Option Create form using ONLYOFFICE (Formular mit ONLYOFFICE erstellen).
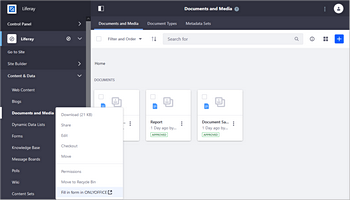
Um ein Formular auszufüllen:
- Klicken Sie auf das Symbol More rechts neben der .docxf-Datei.
-
Wählen Sie die Option Fill form in ONLYOFFICE (Formular mit ONLYOFFICE ausfüllen).