Restoring data in the cloud version
This guide describes how to back up your portal data to be able to restore it later in the cloud version.
Quick Start
Follow the steps below to create a backup of your portal:
- Sign in to your portal.
- Click the
 icon in the upper-right corner to open the Settings section.
 - Select the Data Management tab in the left-side panel, then go to the Backup subsection.
Manual backup
If you want to back up the portal data manually:
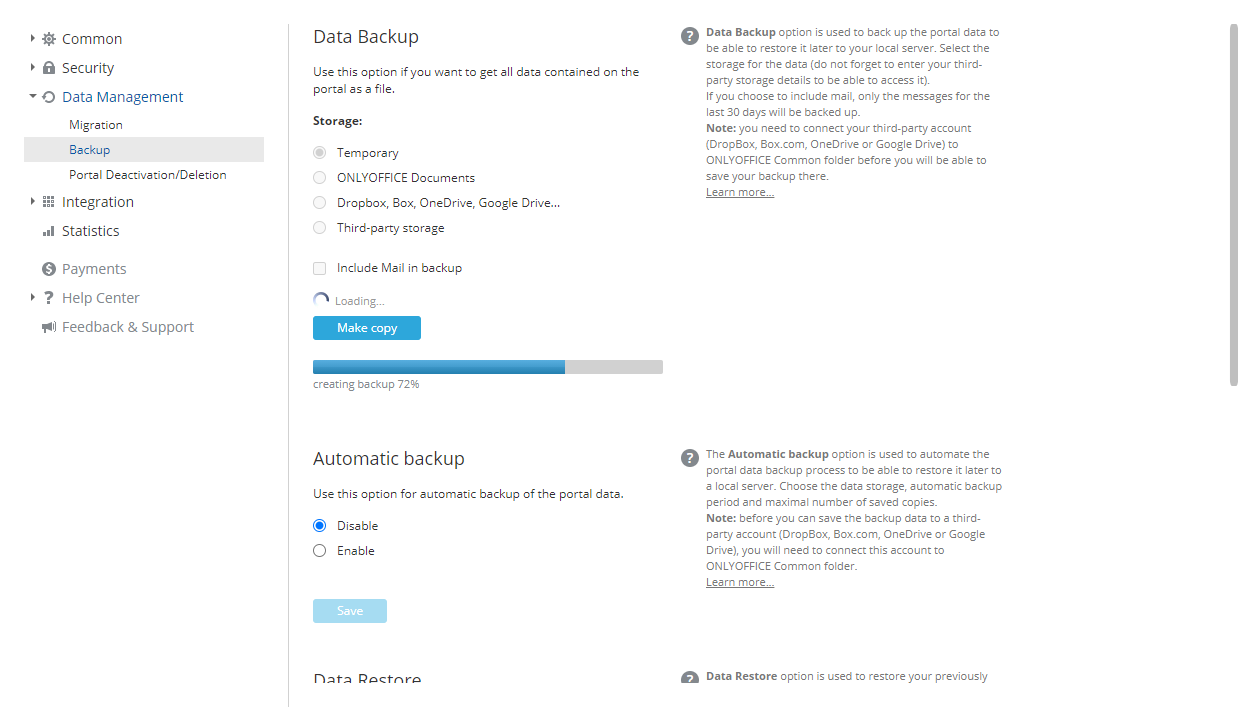
- Specify the storage for your backup by selecting one of the corresponding options:
Temporary. Select the Temporary option if you want to download the created backup to your computer. The link to the created backup is available only for 24 hours.
ONLYOFFICE documents. Click Choose next to the empty field under the options list, select a folder in the Common Documents section, and click OK.
DropBox, Box, OneDrive, Google Drive... Click Choose next to the empty field under the options list, select a folder that corresponds to the integrated third-party service, and click OK.
Third-Party Storage. Select one of the available services previously connected in the Integration section and enter the data required to access the selected third-party storage in the fields below.
- For the Amazon AWS S3 service, the following fields are available:
- Bucket: unique Amazon bucket name, e.g., my-new-test-bucket-12345.
- Region: an AWS region where your Amazon bucket resides, e.g., us-east-2.
- Service Url: this is an optional property; change it only if you want to try a different service endpoint. Leave this field empty to use the default value.
- Force Path Style: when true, requests will always use path style addressing. Leave this field empty, as the Service Url property is not specified.
- Use Http: if this property is set to true, the client attempts to use the HTTP protocol if the target endpoint supports it. By default, this property is set to false. Set it to true or leave this field empty to use the default value.
- Server Side Encryption Method: the server-side encryption algorithm used when storing this object in S3. The possible values are:
- None
- Server-Side Encryption: SSE-S3 (your assets will be encrypted with strong AES-256 GCM keys, one separate key for each object; the keys themselves are encrypted with a rotating root key for additional protection) or SSE-KMS (your assets will be encrypted with a versatile encryption mechanism; like SSE-S3, it relies on the strong AES-256 encryption method but provides a more complex and flexible model, offering separate permissions for a KMS key, the audit trail feature, and the ability to create unique custom keys). For SSE-KMS, you can select Managed CMK: Default AWS managed CMK or Customer managed CMK. When the Customer managed CMK option is selected, you need to specify the KMS Key Id.
- Client-Side Encryption: when this option is selected, you need to specify the KMS Key Id.
- For the Google Cloud Storage service, complete the Bucket field.
- For the Rackspace Cloud Storage service, complete the Public container, Private container, and Region fields.
- For the Selectel Cloud Storage service, complete the Private container and Public container fields.
- For the Amazon AWS S3 service, the following fields are available:
- Select the Include Mail in backup checkbox if necessary.
- Click Make copy.
The backup will be saved in the selected folder.
Automatic backup
The Automatic backup function is only available if your pricing plan includes it.If you want to use the Automatic backup function:
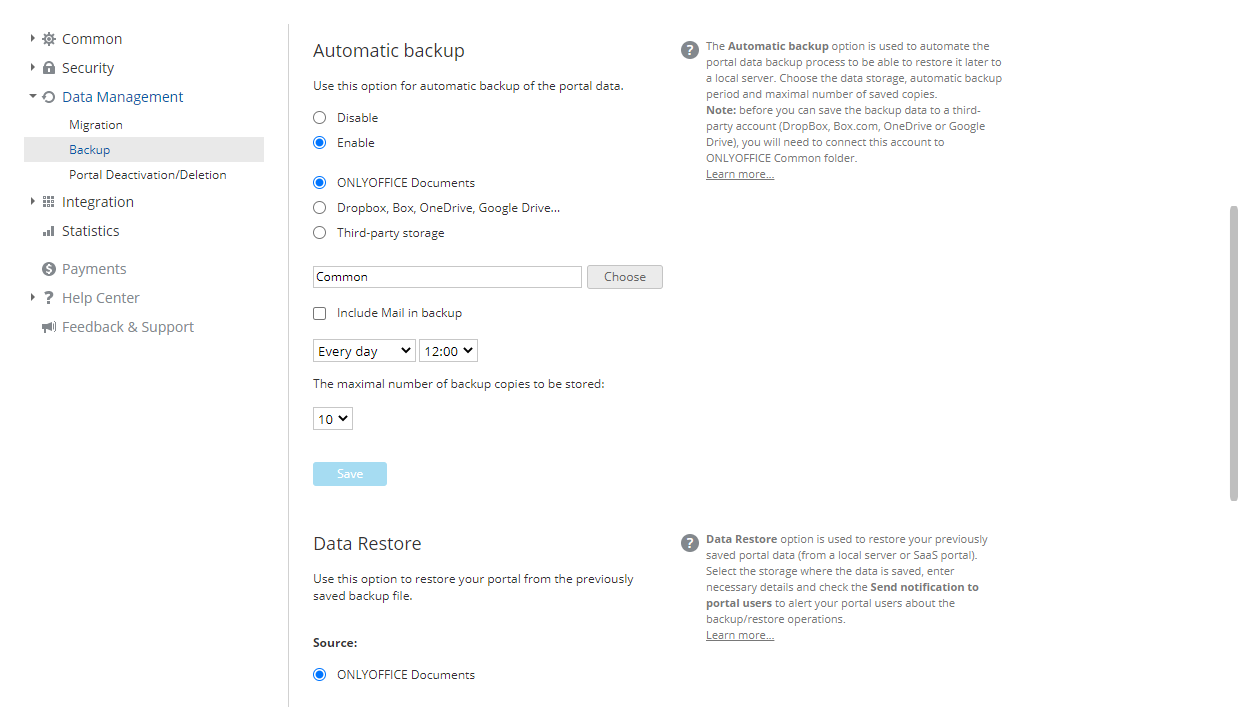
- Select the Enable option.
- Specify the storage for your backup by selecting one of the corresponding options:
ONLYOFFICE documents. Click Choose next to the empty field under the options list, select a folder in the Common Documents section, and click OK.
DropBox, Box, OneDrive, Google Drive... Click Choose next to the empty field under the options list, select a folder that corresponds to the integrated third-party service, and click OK.
Third-Party Storage. Select one of the available services previously connected in the Integration section and enter the data required to access the selected third-party storage in the fields below.
- For the Amazon AWS S3 service, the following fields are available:
- Bucket: unique Amazon bucket name, e.g., my-new-test-bucket-12345.
- Region: an AWS region where your Amazon bucket resides, e.g., us-east-2.
- Service Url: this is an optional property; change it only if you want to try a different service endpoint. Leave this field empty to use the default value.
- Force Path Style: when true, requests will always use path style addressing. Leave this field empty, as the Service Url property is not specified.
- Use Http: if this property is set to true, the client attempts to use the HTTP protocol if the target endpoint supports it. By default, this property is set to false. Set it to true or leave this field empty to use the default value.
- Server Side Encryption Method: the server-side encryption algorithm used when storing this object in S3. The possible values are:
- None
- Server-Side Encryption: SSE-S3 (your assets will be encrypted with strong AES-256 GCM keys, one separate key for each object; the keys themselves are encrypted with a rotating root key for additional protection) or SSE-KMS (your assets will be encrypted with a versatile encryption mechanism; like SSE-S3, it relies on the strong AES-256 encryption method but provides a more complex and flexible model, offering separate permissions for a KMS key, the audit trail feature, and the ability to create unique custom keys). For SSE-KMS, you can select Managed CMK: Default AWS managed CMK or Customer managed CMK. When the Customer managed CMK option is selected, you need to specify the KMS Key Id.
- Client-Side Encryption: when this option is selected, you need to specify the KMS Key Id.
- For the Google Cloud Storage service, complete the bucket field.
- For the Rackspace Cloud Storage service, complete the public_container, private_container, and region fields.
- For the Selectel Cloud Storage service, complete the private_container and public_container fields.
- For the Amazon AWS S3 service, the following fields are available:
- Select the Include Mail in backup checkbox if necessary.
- Specify the frequency of the backup creation by clicking the down arrow in the Every day field and selecting the option that suits you best.
- Set the time and/or select the day of the week or month.
- Select the number of the backup copies to be stored, from 1 to 30, in the corresponding field.
- Click Save.
The backup will be created in the selected folder on the specified day.
- Specify the storage for your backup by selecting one of the corresponding options:
Data restore
The Restore function allows you to restore your portal data in the ONLYOFFICE Workspace Cloud.
To restore your portal data from the previously created backup file that has been hashed (for ONLYOFFICE Workspace Cloud 11.5 or later) in the ONLYOFFICE Workspace Cloud, access the Settings from any portal page by clicking the icon at the top of the page, or use the drop-down list in the upper-left corner and select the corresponding option.
Select the Data Management tab in the left-side panel, then go to the Backup subsection and scroll down to Data Restore.
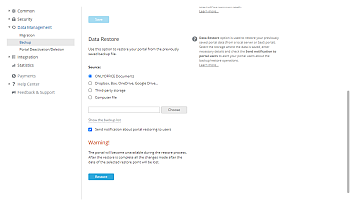
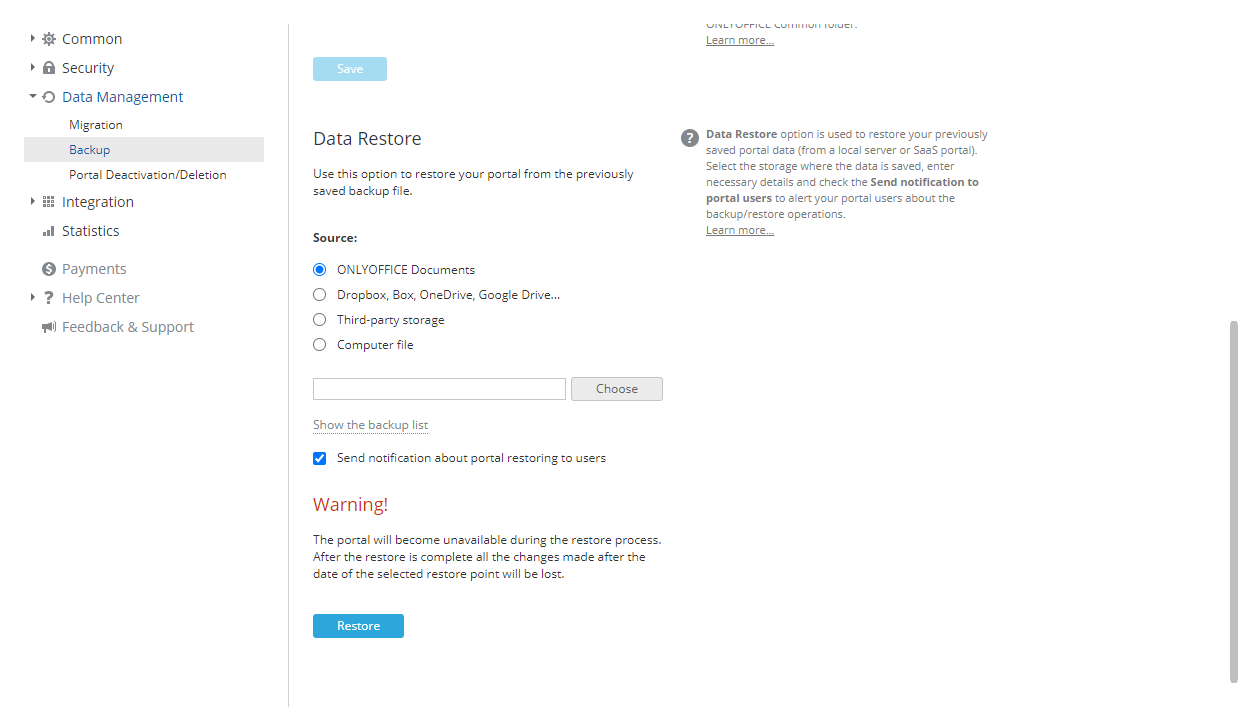
- Select the Source where the backup is stored.
- select the ONLYOFFICE Documents option and click Choose below. In the Select file window, select the backup file you need stored in the Common folder and click OK.
- select the DropBox, Box.com, OneDrive, Google Drive option (third-party services connected to the Documents module, including services connected via the WebDAV protocol) and click Choose below. In the Select file window, select the backup file you need stored in the third-party resource directory and click OK.
- select the Third-Party Storage option, select the third-party storage you need previously connected in the Integration section, and enter the data required to access the selected storage.
- select the Computer file option, click Choose below, and browse for the backup file you need stored on your computer.
Instead of selecting a backup file from a specific Source, you can click the Show the backup list link below the Choose field to select the backup file you need from the backup history. If a backup file was deleted manually from the storage, it will not be available in the list. Click the Restore link next to the backup file you need. To delete a backup file from the list, click the
 icon.
icon.
- Leave the Send notification about portal restoring to users checkbox selected to notify your portal users.
- Click Restore.
After restoring the backup in the cloud version, current passwords will be reset, and users will need to restore their access via the emails specified in their profiles by specifying the password that will be used for signing in.
Additional Information
Access rights required to create a backup
Only the portal owner and full-access administrators can back up the portal data.