Inviting users to rooms
Once a room in ONLYOFFICE Apps is created, it's necessary to invite users to this room to start collaboration.
All new users invited via link or manually from within the room will be added as guests. To add new internal users (members), admins should invite them from the Contacts section.
When inviting users to a room, inviters assign a permission level to a user. A permission level defines which actions with files the user can perform within this room:
| View | Comment | Review | Fill forms | Edit | View version history | Manage files | |
|---|---|---|---|---|---|---|---|
| Viewer | |||||||
| Commenter | |||||||
| Reviewer | |||||||
| Form filler | |||||||
| Editor | |||||||
| Content creator | |||||||
| Room manager |
Depending on the permission level, the following actions with files are available for the user within a room:
- Viewer - Operations with the existing files: viewing.
- Commenter - Operations with the existing files: viewing, commenting.
- Reviewer - Operations with the existing files: viewing, commenting, reviewing.
- Form filler - Operations with the existing files: viewing, commenting, reviewing, form filling.
- Editor - Operations with the existing files: viewing, commenting, reviewing, form filling, editing. Viewing version history.
- Content creator - Operations with the existing files: viewing, commenting, reviewing, form filling, editing. Viewing version history. Creating and uploading new files/folders. Managing version history, locking files for co-authors. Copying, moving and removing own files/folders.
- Room manager - Operations with the existing files: viewing, commenting, reviewing, form filling, editing. Viewing version history. Creating and uploading new files/folders. Managing version history, locking files for co-authors. Copying, renaming, moving and removing own and someone else's files/folders.
To invite a user to a room,
- Open the necessary room where you want to invite users.
- Click the
 icon next to the room name.
 - Select the
 Share ->
  Invite contacts option from the menu.
 -
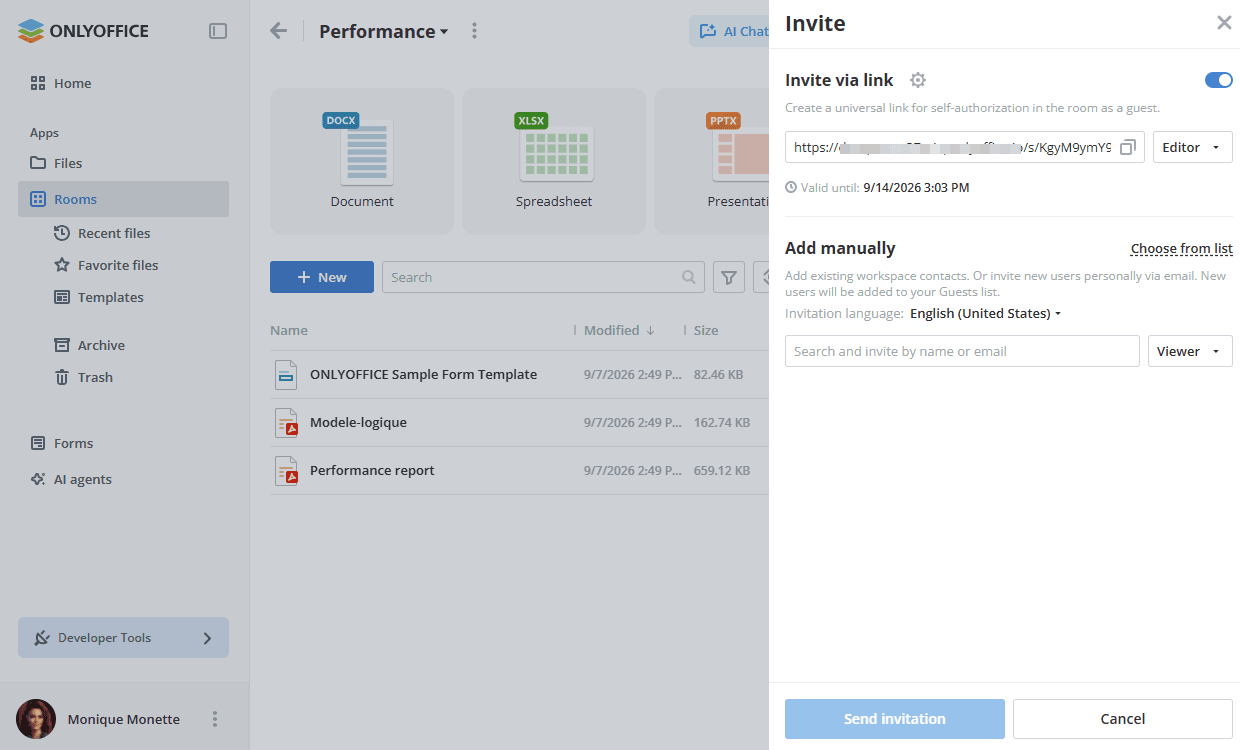
Invite external users (guests) via the link:
- Turn on the Invite via link switcher to create a universal link for self-authorization in the room as a guest. Use the
 icon to copy the link to the clipboard. You can send the copied link in any convenient way.
 -
To configure the link, click the gear icon next to Invite via link and adjust the Link settings:
- In the Role for link section, select the permission level that everybody who joins via this link will get. The available options depend on the room type.
- Turn on the User limit switcher and specify the Max. number of users who can join via this link (up to 1000). Once the limit is reached, registration via the link becomes unavailable. The counter below shows how many users have already joined.
- In the Limit by time period section, set the date and time until which the link remains valid.
Click Save & copy to apply the settings and copy the link, or Cancel to return without saving.
- Turn on the Invite via link switcher to create a universal link for self-authorization in the room as a guest. Use the
-
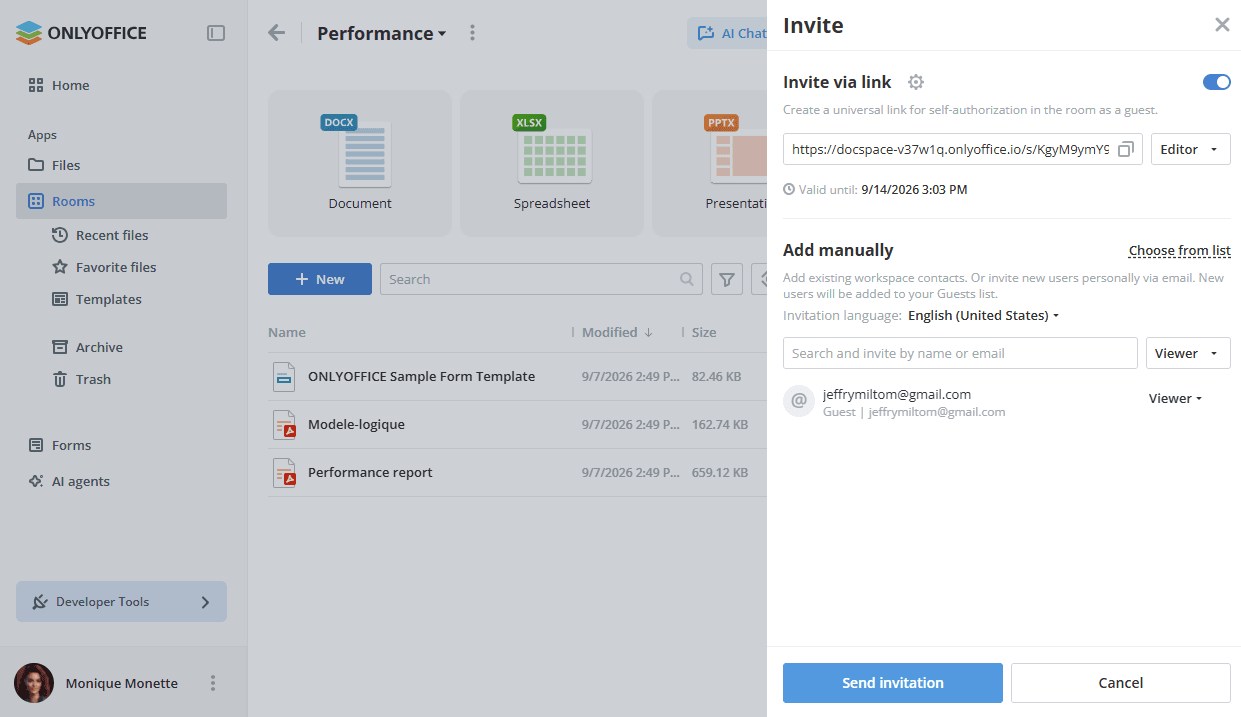
Alternatively, use the Add manually section to add existing workspace contacts, or to invite new users personally via email. New users invited this way are added to your Guests list.
-
Click the Choose from list option to select the existing workspace contacts. Check them in the list and click the Select button.
- Use the Members tab to select internal users.
- Use the Groups tab to select all users who belong to a certain group. It's also possible to choose the Everyone group to select all workspace users.
You can also start typing the existing user or group name or email in the entry field and select the found users or groups. The existing contacts or groups that match the entered characters are displayed there as you type.
- Change the Invitation language if necessary.
- To invite new external users (guests) by email, enter a valid email address in the Search and invite by name or email field and press Enter. In the same way, add several email addresses if necessary.
-
Change the permission level if necessary. The available permission levels depend on the room type: Room manager, Content creator, Editor, Form filler, Reviewer, Commenter, Viewer. Access rights to all documents stored in the room are defined by the permission level. Users can have different permission levels depending on the rooms they are invited to (one and the same user can be a Viewer in the first room and an Editor in the second one).
Guests and users cannot be assigned as Room managers. Only Full admins and room admins are suitable for this permission level, so when you select it, only those contacts are shown in the list.
-
When ready, click the Send invitation button. Invitations will be sent to the specified email addresses. Click Cancel to close the panel without sending.
-
Click the Choose from list option to select the existing workspace contacts. Check them in the list and click the Select button.
It’s also possible to invite members to the room from the Info -> Contacts screen. Click the  icon to add new members.
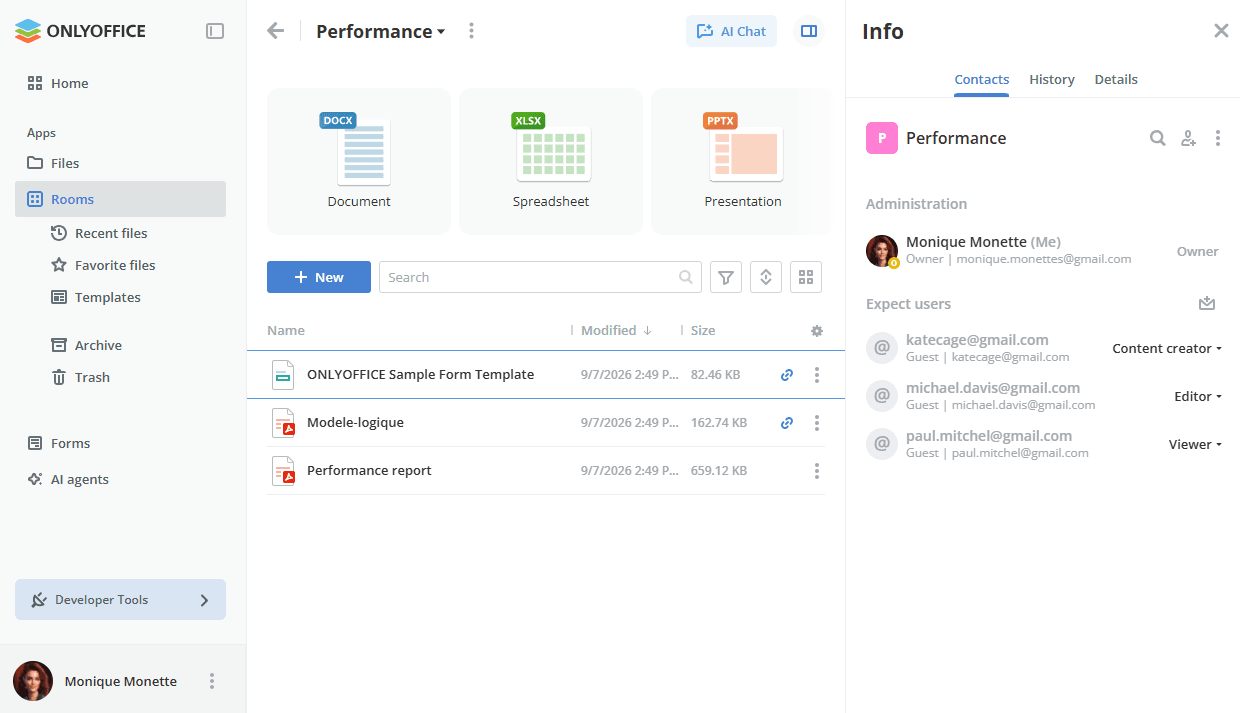
When a user accepts the invitation to the room, they can view the room in the Rooms section and can participate in collaboration with access rights according to the permission level. Admins can manage users within the room as described below.
Resending invitations to rooms
- Within the room, open the Info -> Contacts screen.
- Click the
 icon next to the Expect users caption.
Changing permission levels in rooms
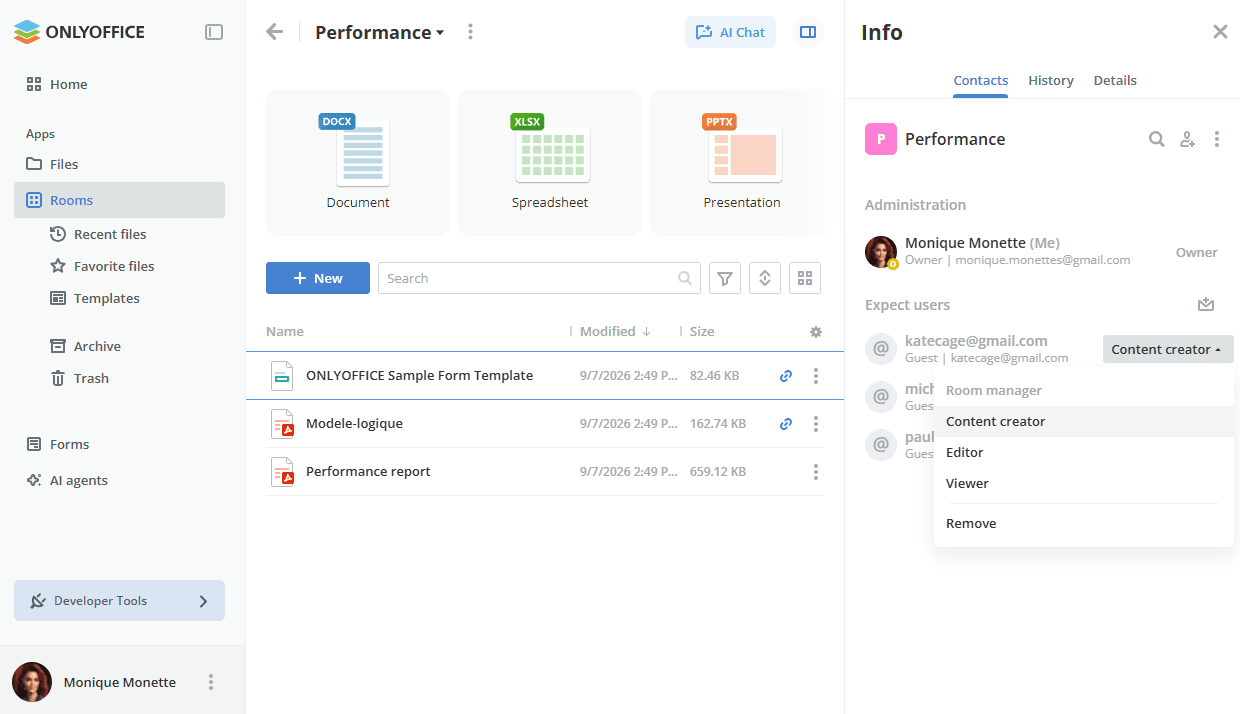
- Within the room, open the Info -> Contacts screen.
- Click the current permission level next to the necessary user.
-
Select a different permission level from the list.
Removing users from rooms
- Within the room, open the Info -> Contacts screen.
- Click the current permission level.
- Select the Remove option.