Google Workspace
Introduction
In this article, we will show you how to transfer the Google Workspace data to your ONLYOFFICE Apps.
Starting from v 2.5, ONLYOFFICE Apps supports exporting Google Workspace users, users' files, sharing settings and groups.
Export the Google Workspace data
First, you need to export your users' data from the Google Admin console.
-
Log in to your Google Admin console.
-
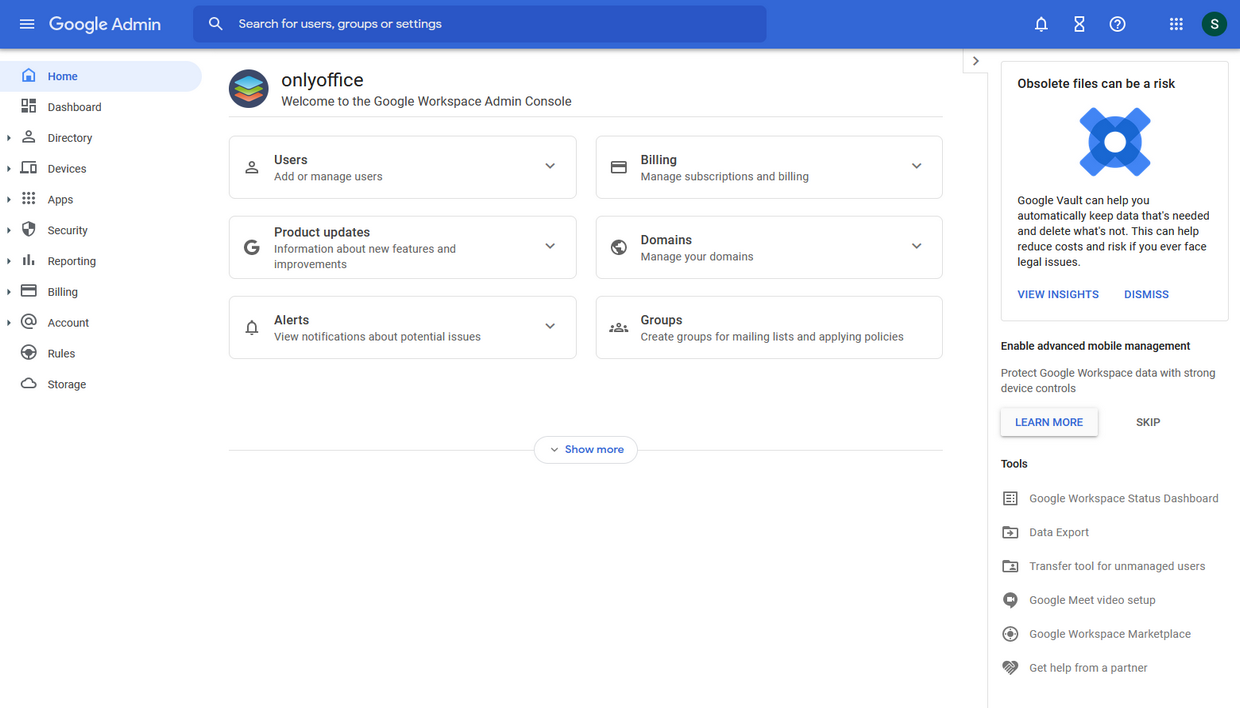
Click Open from the Admin Home page.
-
Under Tools, click Data Export.
-
Click Start Export.
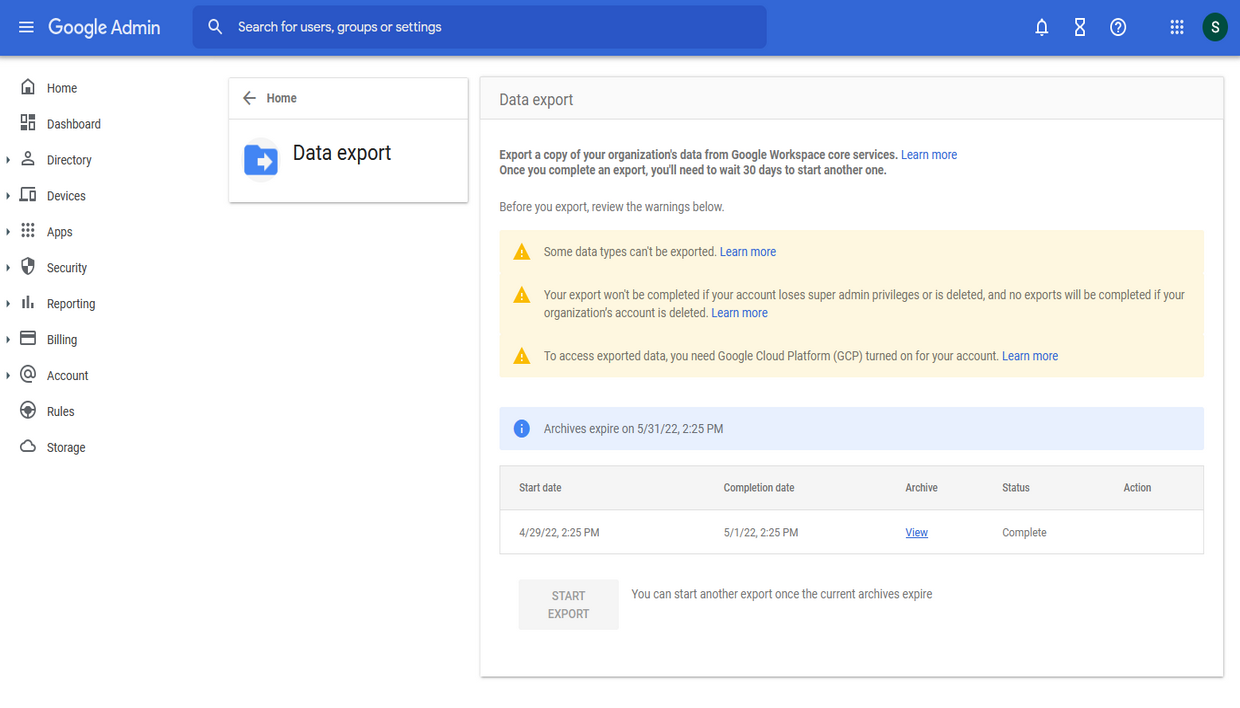
After completion of data export, another procedure can be initiated only after 30 days. For more information on Google Workspace data export, go to this help page.
Upon successful export, you will receive an e-mail with a link to Google Cloud Storage containing a folder with the users' data. Download the folder and prepare the users' data for import.
To learn more about downloading objects from Cloud Storage, visit the Google Cloud help page.
Prepare the data for import
The downloaded directory contains users' data folders. Each folder corresponds to a particular user. Choose users to be imported to the ONLYOFFICE Apps and compress their folders to a zip archive.
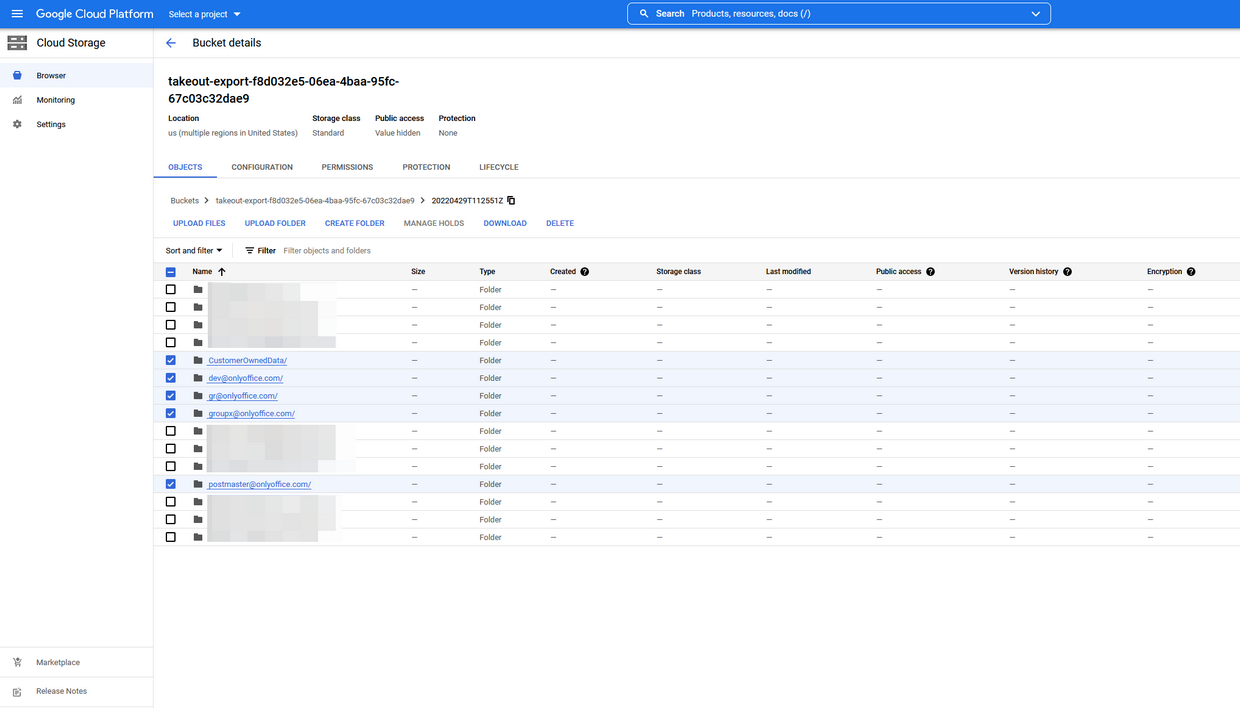
Each archive represents a Google Workspace user. We recommend uploading multiple users' archives. It allows importing sharing settings alongside the users' files.
Import the data to ONLYOFFICE Apps
-
Log in to your ONLYOFFICE Apps.
-
Use the
 menu in the lower left corner and select the Settings option.
-
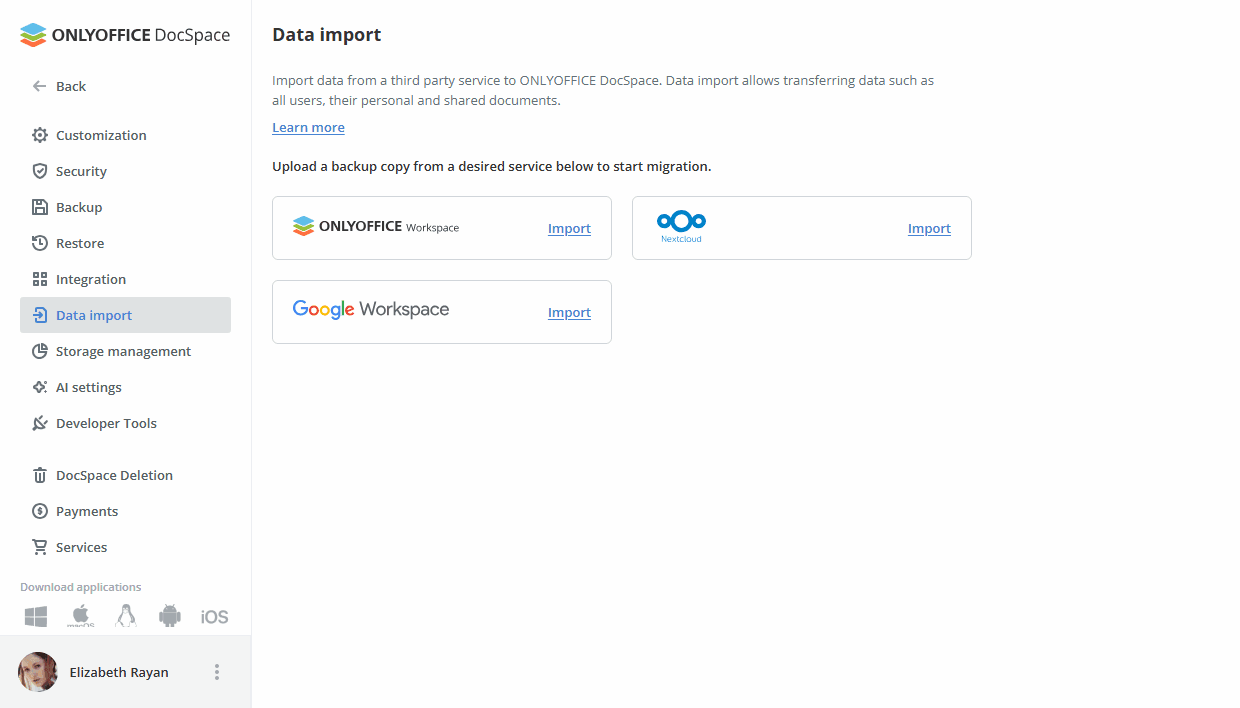
Choose the Data import section.
-
Click the Import link next to the Google Workspace service or the Google Workspace item itself.
-
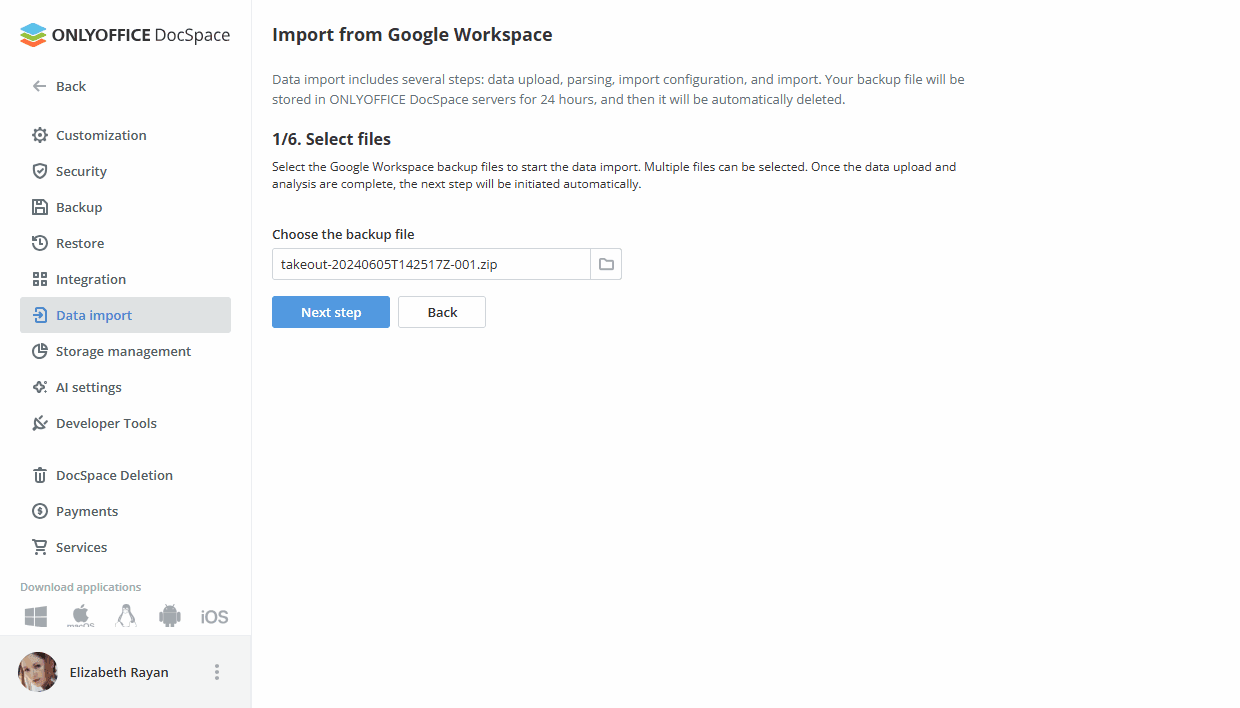
Click the folder icon next to the selection box or the Backup file box itself and select the archives of the users.
Wait for the archive to load. When the loading is complete, click the Next step button.
-
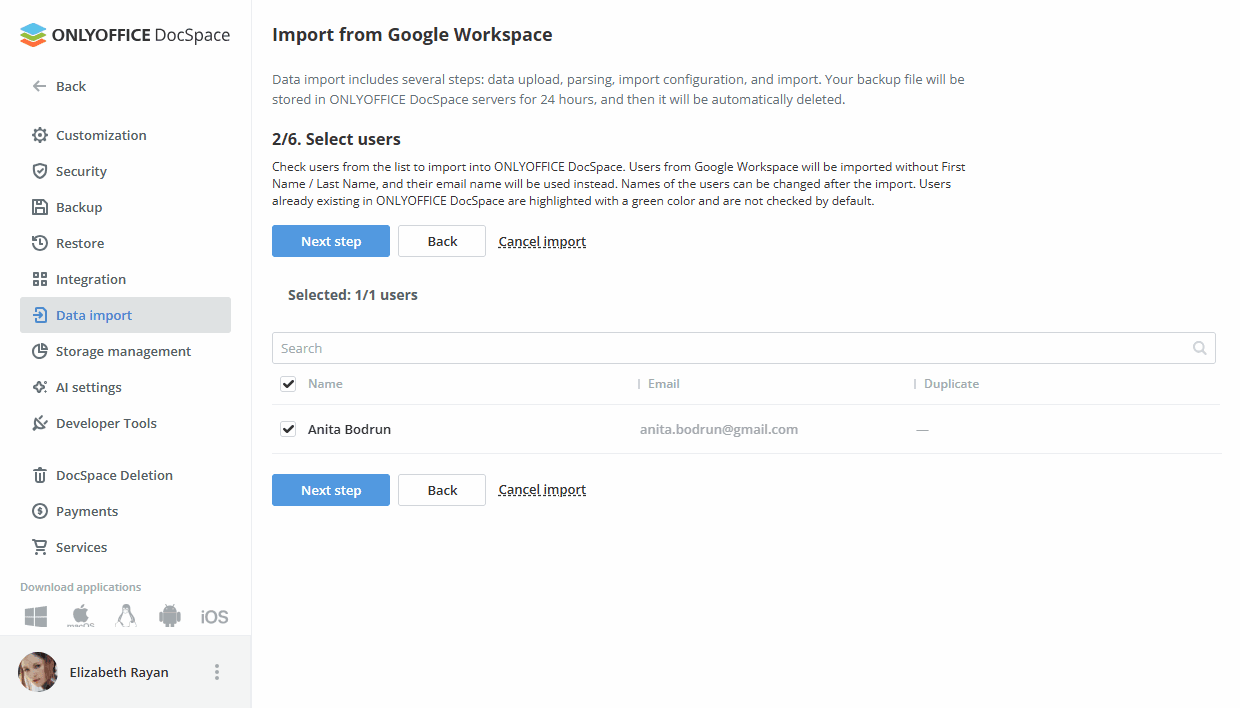
Select users from the list and click the Next step button.
-
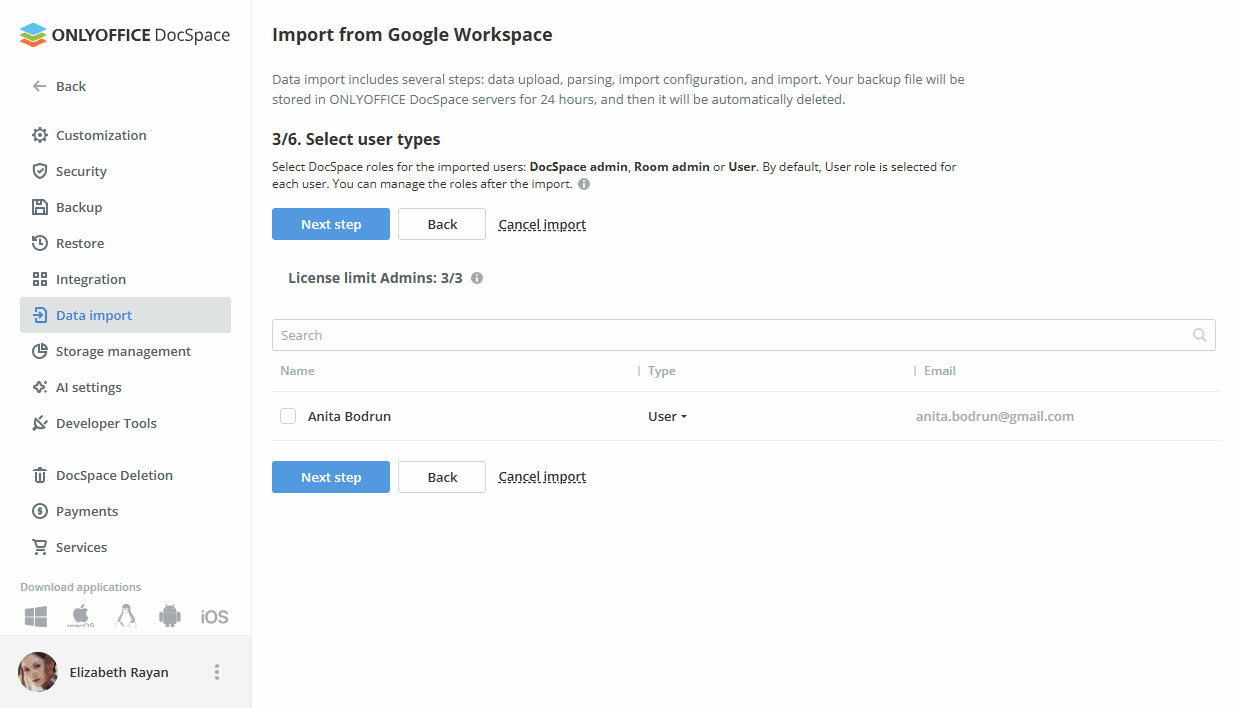
Select user types (Full admin, Room admin, User) and click the Next step button.
noteIf the admin limit is exceeded, an error will appear and the button for moving to the next step will be blocked.
-
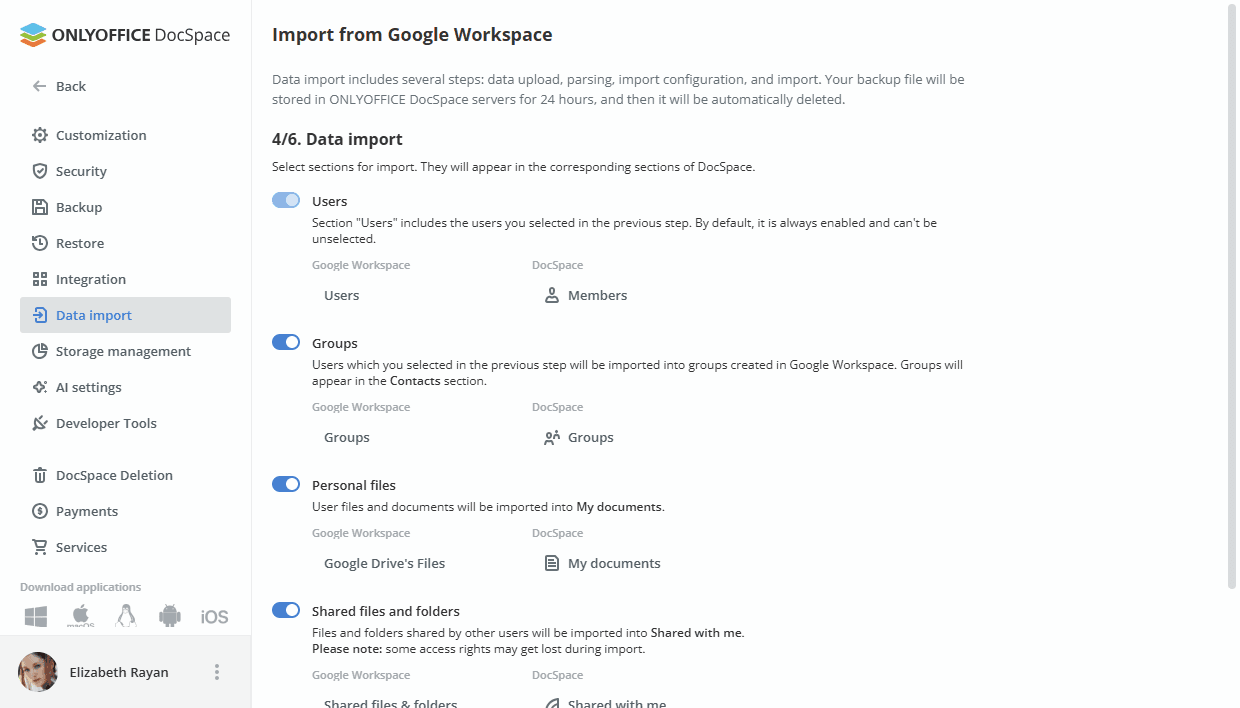
Select modules for import (Users, Groups, Personal files, Shared files and folders). Click the Start data import button to proceed with the final step.
noteIf the Personal files module is disabled, the Shared files and folders module is blocked.
-
After the data is migrated, click the Finish button to complete the data import.
Use the Download log button if you want to download information about migration, as well as any errors that occurred.
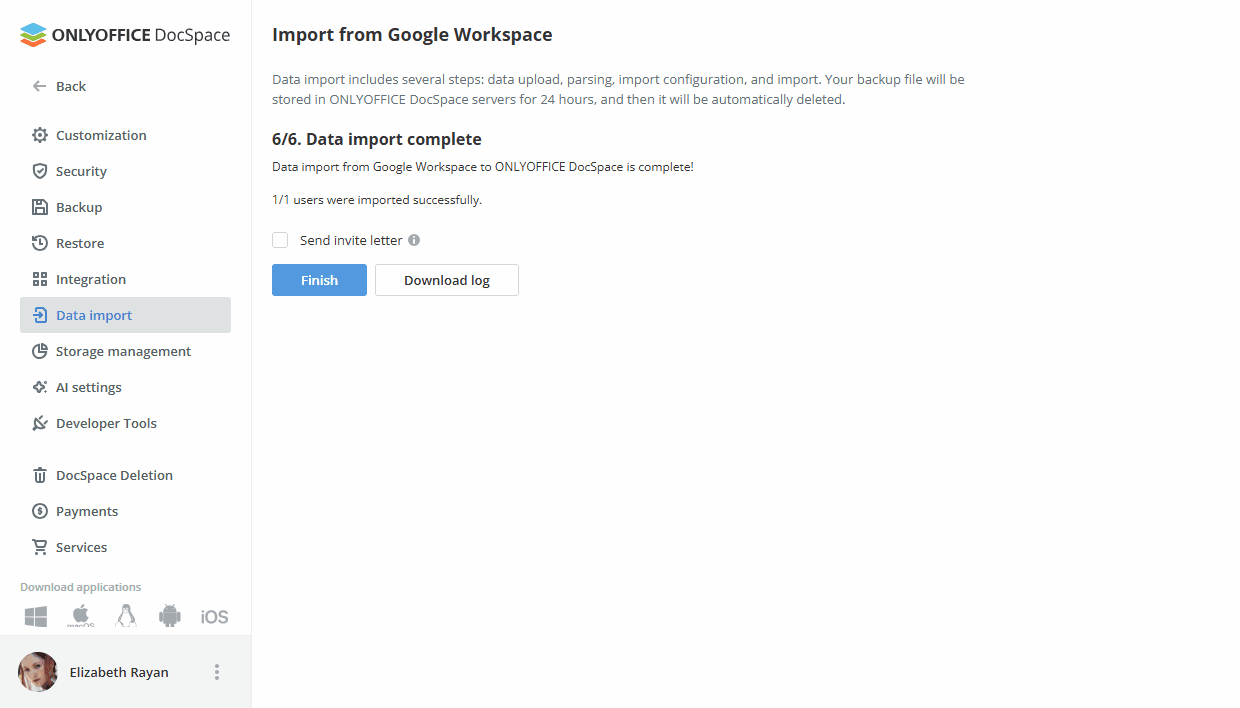
Also, you can send a welcome letter to the new users. This letter will inform your users about migration to ONLYOFFICE Apps. It contains a brief description of the main features and a login link. To send the letter, check the Send invite letter option before clicking the Finish button.
After the migration is complete, the new users and groups can be found in the Contacts section.
Personal files can be accessed through the Files section. Files and folders shared by other users can be accessed through the Shared with me section.