Workspaces
Managing workspaces
The Workspace management section of the server version allows you to create several independent workspaces and centrally manage them. To open it, use the  menu in the lower left corner and select the Workspaces option.
The left menu contains the Workspaces and Settings sections, followed by the Payments section in the paid versions or the Bonus section in the free Community version.
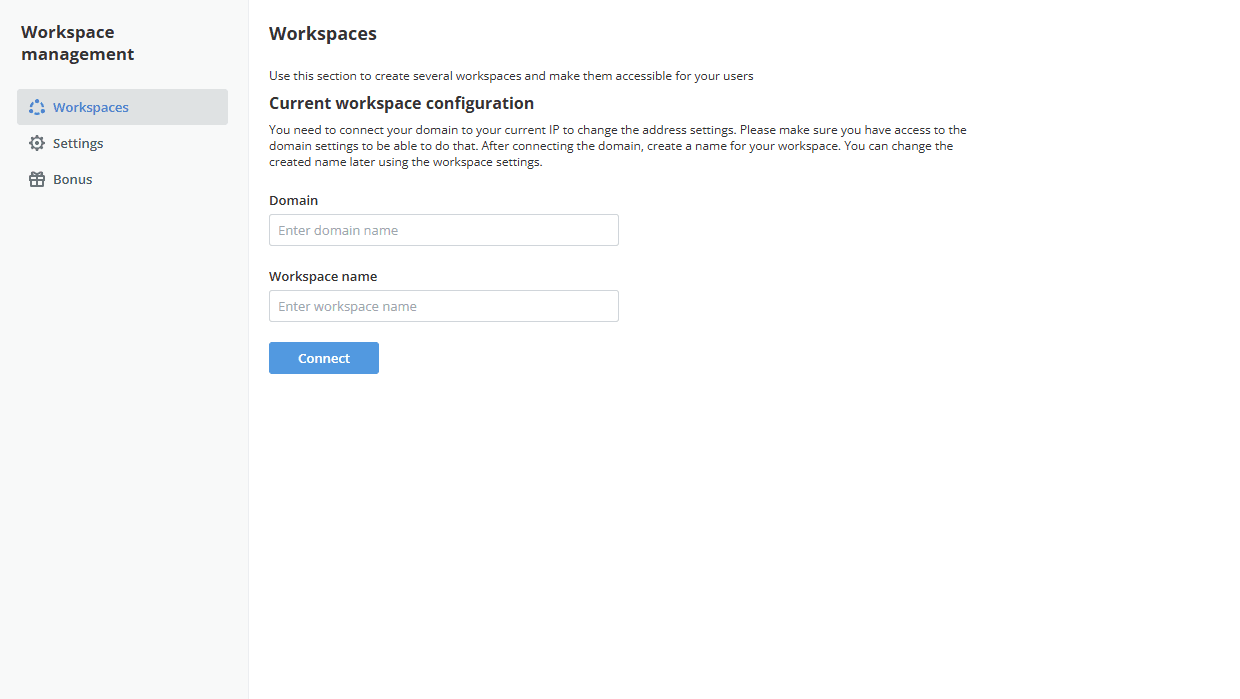
To create several workspaces, you need to have a registered domain name. In your domain DNS settings, create the following records:
- Create the A record that points your domain name to the IP address of the server where ONLYOFFICE Apps is installed.
- Create the wildcard A record specifying the asterisk "*" as a name to enable subdomains.
In the Current workspace configuration section, specify your domain name in the Domain entry field. Then enter any workspace name you like in the Workspace name field and click the Connect button.
You need to connect your domain to your current IP to change the address settings. Make sure you have access to the domain settings to be able to do that. You can change the created workspace name later using the workspace settings.
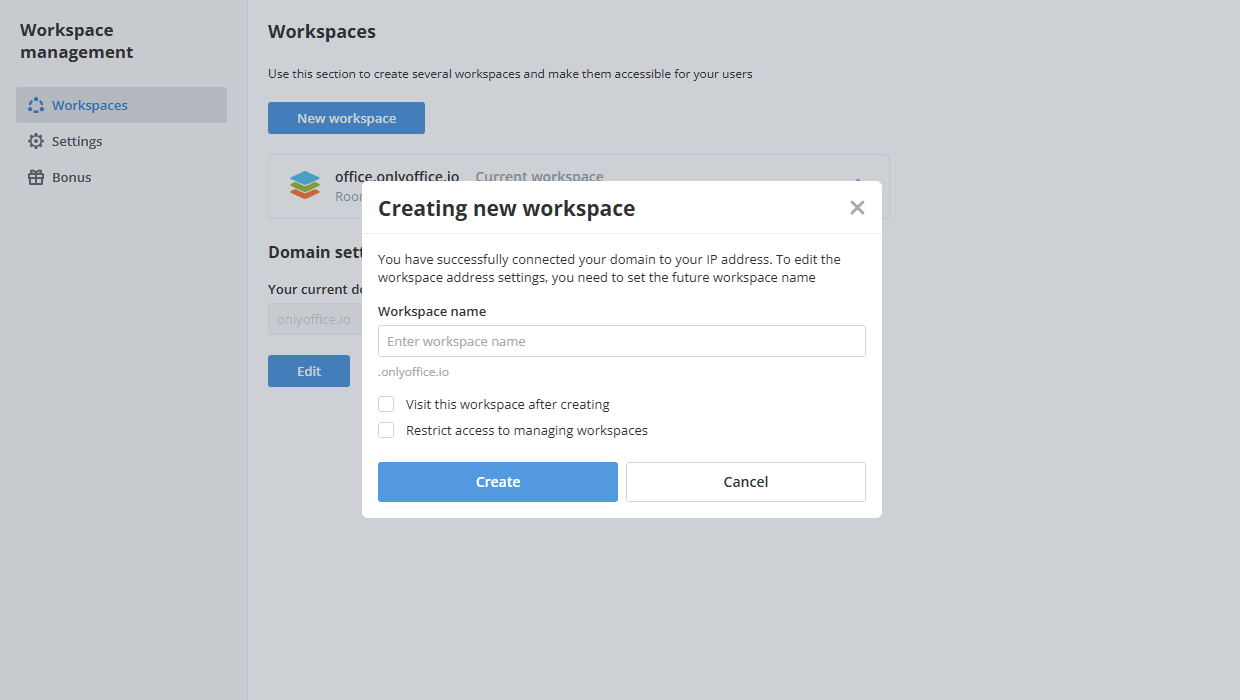
To create a new workspace, click the New workspace button. The Creating new workspace window opens. Specify a name for your second workspace in the Workspace name field and click Create to save the settings.
If you check the Visit this workspace after creating option, you will be redirected to the new workspace that is available at the newworkspacename.domainname.com address.
If necessary, check the Restrict access to managing workspaces option to allow the workspace administrator to manage the current workspace only. If this option is unchecked, the workspace administrator will be able to manage all workspaces.
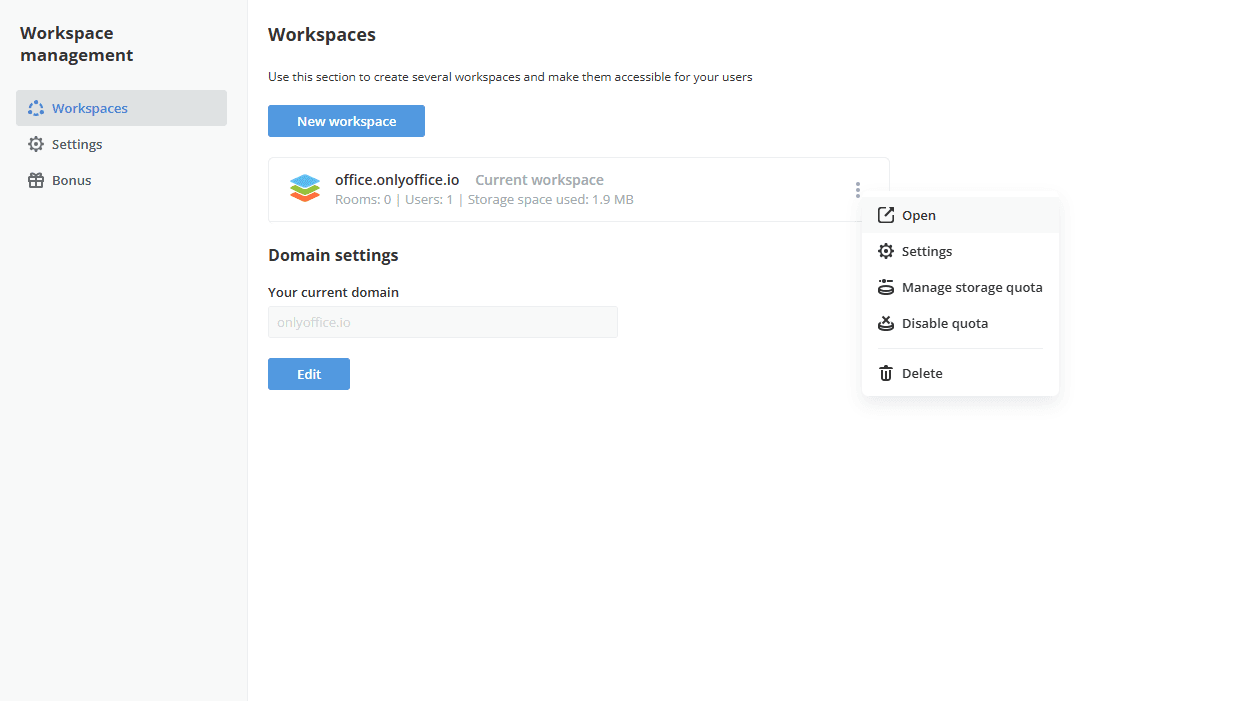
You can access the Workspace management client from each of the created workspaces. All the created workspace addresses are displayed at the Workspaces tab, the current one being marked as Current workspace. Each entry also displays the number of rooms and users and the storage space used. You can navigate between the workspaces clicking the one you want to go to.
Use the Actions icon next to the workspace name to perform the following operations:
- Open – to open the workspace.
- Settings – to access the workspace settings.
- Manage storage quota – to set the storage quota for the workspace.
- Disable quota – to disable the storage quota.
- Delete – to delete the workspace.
The Domain settings section below the workspace list displays your current domain. Click the Edit button to change it.
Settings
The Settings section of the left menu contains the settings that are applied to all your workspaces at once.
These settings become available once the second workspace is created.
The following tabs are available:
- Branding – set up branding for all workspaces. Specify the Brand name that shows up in invitations, notifications, and anywhere else your workspace name appears, then upload the logos for the light and dark themes or generate one from text using the Generate logo from text field. This can be done in the same way as described in the Branding section.
- Data backup – perform backup of all workspaces. This can be done in the same way as described in the Data backup section.
- Automatic backup – set up a backup schedule for all workspaces.
- Restore – restore backups of all workspaces. This can be done in the same way as described in the Restore section.
- Storage – encrypt data at rest for all workspaces. Read the instructions.
Some of these settings may be unavailable depending on your license. In this case, the Not available under this license notice is displayed at the top of the tab.
Payments
The Payments section of the left menu displays the information about your subscription and allows you to renew it. It is available in the paid versions; in the free Community version, the Bonus section is displayed instead.
- The Renew subscription section shows the edition you are using, the number of users covered by your license, and the date your subscription expires. To continue getting support and updates, click the Buy now button and buy a renewal. To get your personal renewal terms, contact your dedicated manager or write to sales@onlyoffice.com.
- The Activate license section allows you to activate the renewal you have already bought. Upload the license file using the Upload license file field and click the Activate button.
Ask purchase questions at sales@onlyoffice.com. Get tech assistance at https://helpdesk.onlyoffice.com.