Integration
Integration settings
The Integration section is used to enable the LDAP settings, enable the SSO settings, add plugins, integrate your workspace with third-party services and adjust the SMTP settings. You can also check or configure the Document Service settings.
LDAP settings
When using ONLYOFFICE Apps, the first thing that you need to do is to create accounts for all your company employees. But if it numbers more than 50 persons, the process of creating new workspace users will take a lot of time. The LDAP Settings option allows you to import the necessary users and groups from an LDAP Server (e.g. OpenLDAP Server or Microsoft Active Directory) to your workspace, literally, in several minutes. The newly created users, in turn, do not need to memorize new passwords and logins because they will sign in to the workspace using their credentials stored on your LDAP Server.
In the SaaS version, this is a Paid feature (available for the paid Business plan only).
Fill out the required fields and click Save.
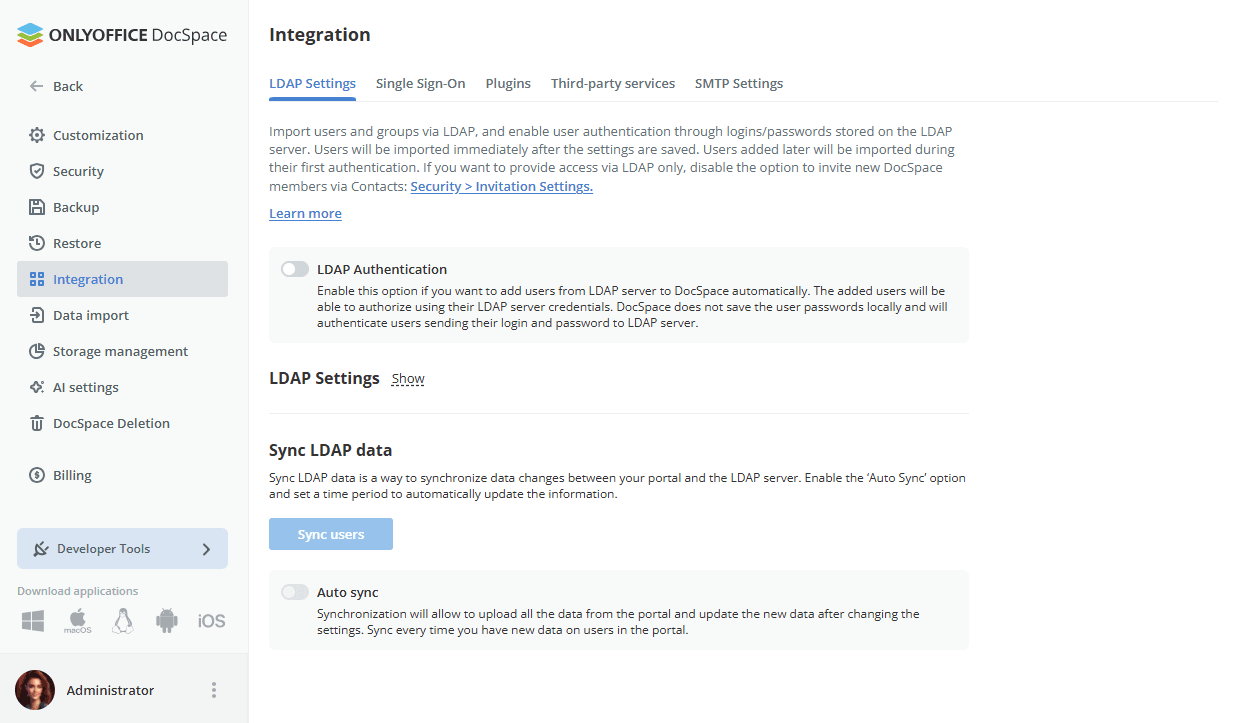
For more detailed information on each field and corresponding values, please refer to the following instructions.
Single sign-on settings
The Single Sign-on section allows you to enable/disable third-party authentication using SAML, thereby providing users with a quicker, easier and more secure way to access the workspace.
In the SaaS version, this is a Paid feature (available for the paid Business plan only).
Generally, the Single Sign-on technology allows users to sign in only once and then get access to multiple authorized (i.e. integrated with an Identity Provider) applications/services without having to enter their credentials each time they access a different application.
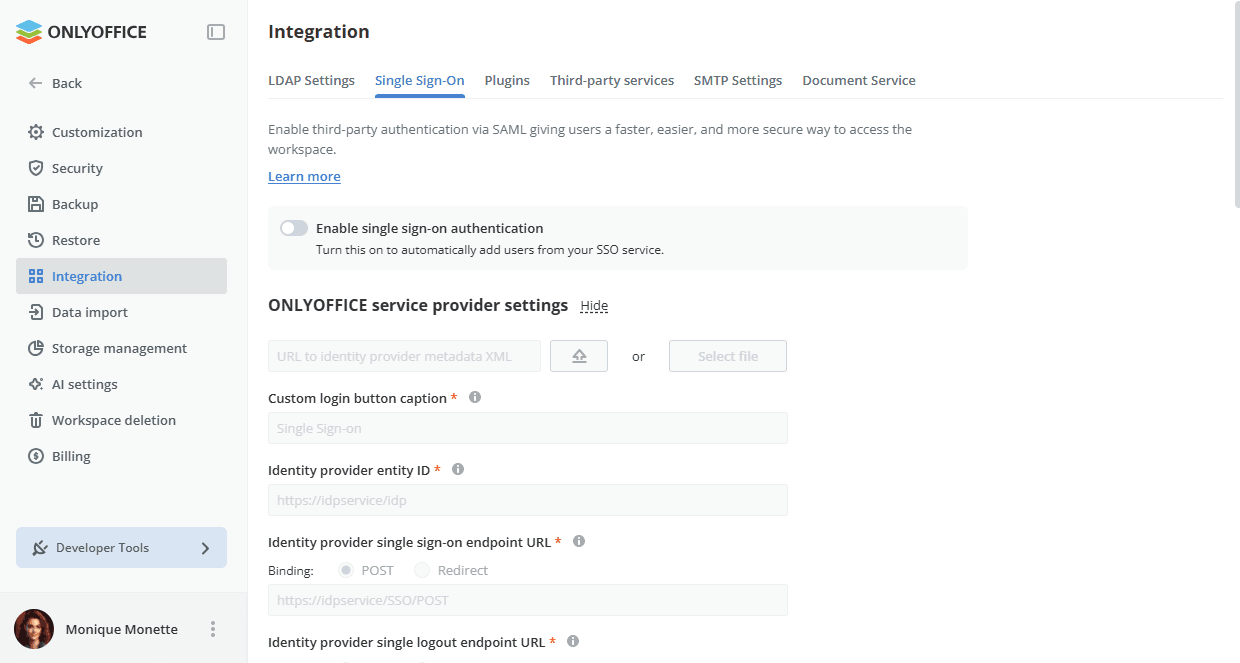
To learn more about configuring SSO, read this article.
Plugins
Add plugins to extend your workspace with extra features.
There are two types of plugins: system ones, which we develop ourselves, and custom ones. You can upload a custom plugin on this page if this option is enabled in the config.
In the SaaS version, there are some restrictions:
-
The plugin can be uploaded in the zip format and should have the following structure:
- config.json- plugin.js- assets- image1- ...- imageN -
The maximum size of the archive itself and each file is limited to 5 MB.
-
The maximum number of images is 10.
-
The list of image formats is limited to the following ones: .jpg, .jpeg, .png, .svg.
Currently, the following system plugins are available: draw.io, pdf-converter, speech-to-text, markdown, zip-archives, image-editor, codemirror.
In the server version, you can remove system plugins, if the configuration and settings allow it.
The incompatible versions of plugins are highlighted in red. When hovering over an outdated plugin version or uploading a new custom plugin you will be prompted to update the plugin to a compatible version.
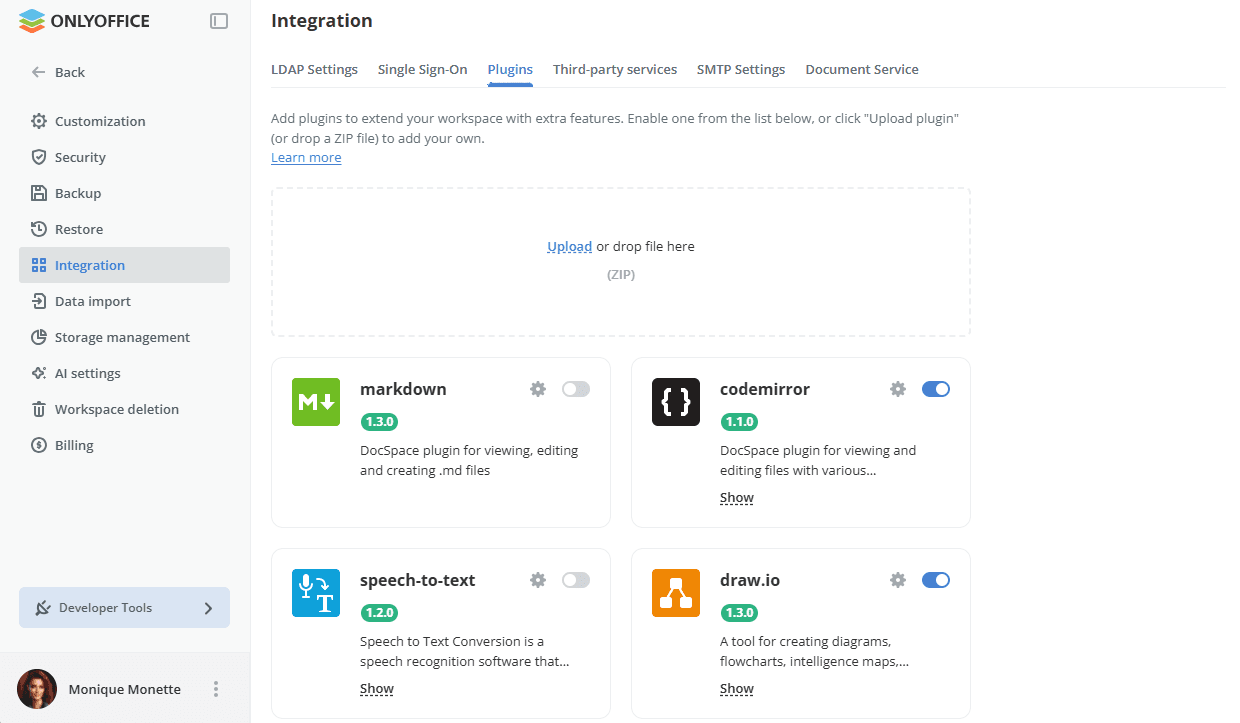
When uploading the same version of a plugin that is already installed, a warning about potential caching is displayed. Make sure to clear the plugin cache or increment the version number to ensure your changes take effect.

For more details on the Plugin SDK, please refer to api.onlyoffice.com.
Third-party service integration
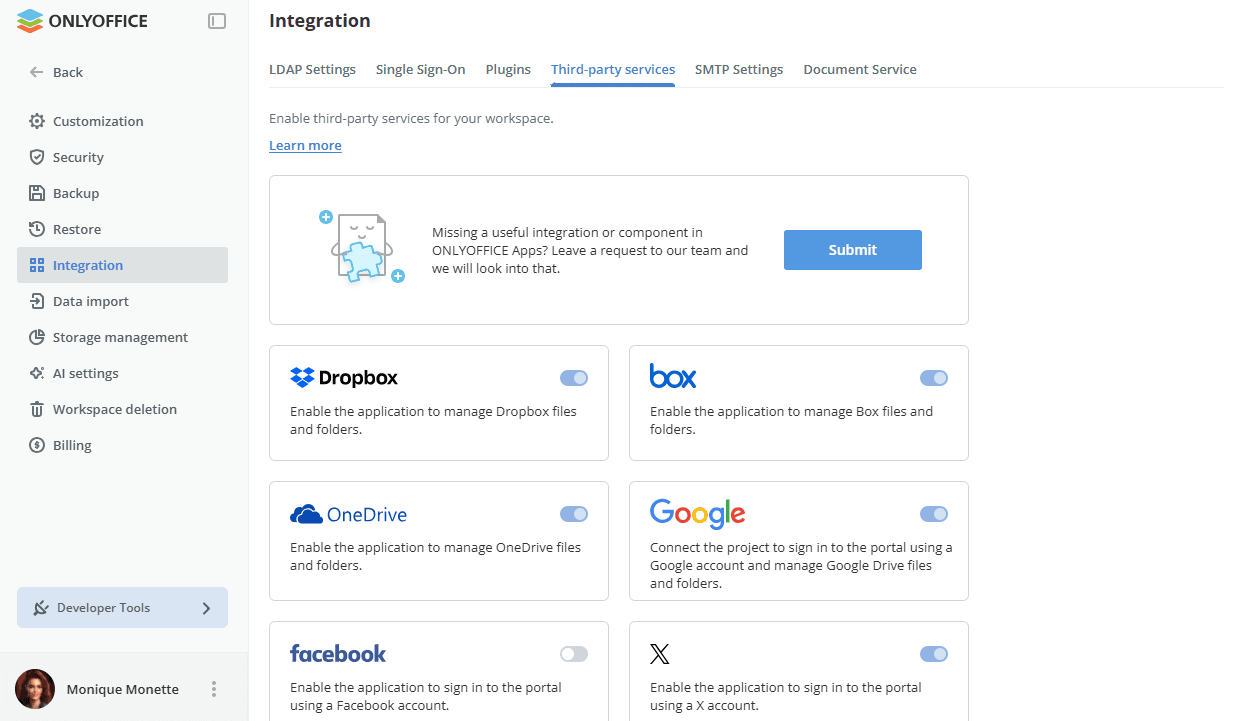
Use Authorization keys to connect your workspace with third-party services: Amazon AWS S3, Apple, Box.com, DropBox, Facebook, Google Cloud Storage, LinkedIn, Nextcloud, OneDrive, Telegram, X, Rackspace Cloud Storage, WeChat, Zoom.
In the SaaS version, some services are available for the paid Business plan only (Amazon AWS S3, Google Cloud Storage, Rackspace Cloud Storage).
- Connect your Apple, FB, LinkedIn, Nextcloud, X, WeChat, Zoom account to log in to your workspace quickly. In the cloud version, the authorization keys parameters for these services are set up automatically. Integration with Zoom is currently available in the server version only.
- Link up your workspace with Box, Dropbox, OneDrive to use the connected account as a third-party resource when creating backups. In the cloud version, the authorization keys parameters for these services are set up automatically.
- Connect the Amazon AWS S3, Google Cloud Storage, Rackspace Cloud Storage service to use the connected cloud storage as a third-party storage when creating backups.
- Connect the Telegram service to receive workspace notifications via Telegram.
For more details on the third-party service integration, please refer to our instructions.
SMTP settings
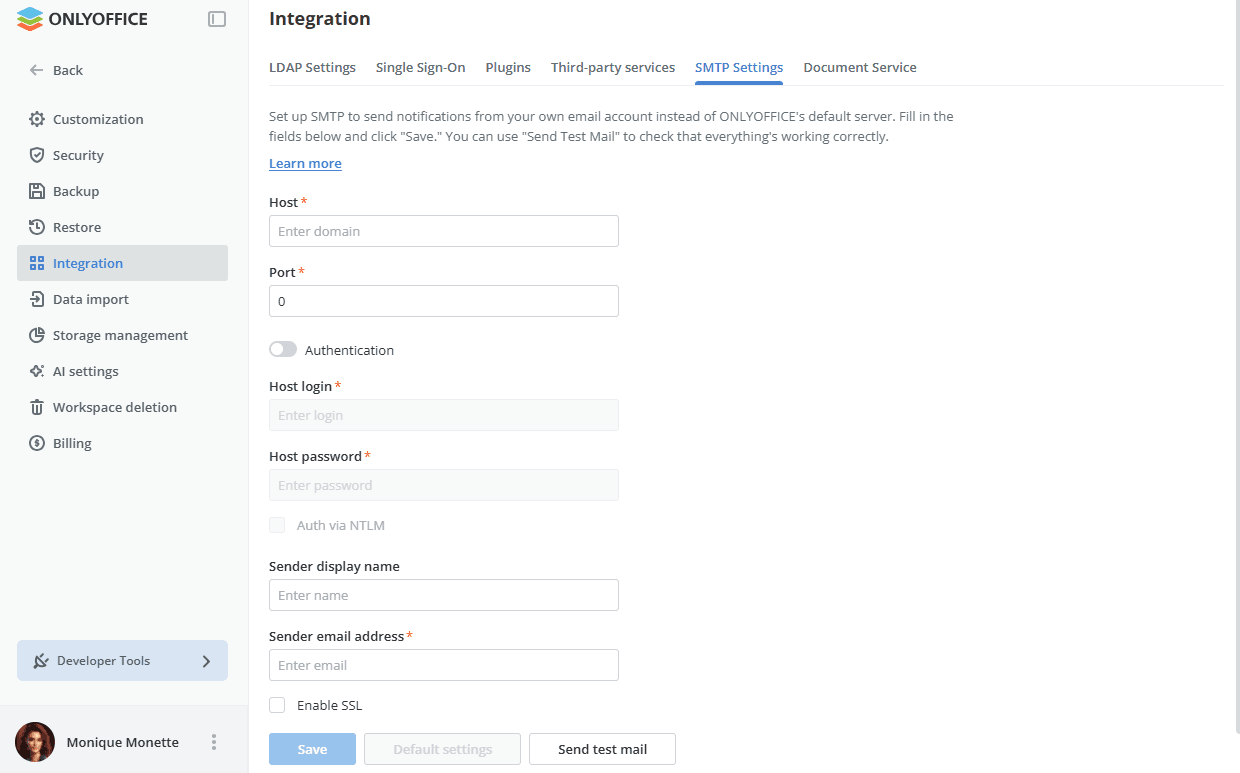
The SMTP Settings subsection allows you to configure your workspace so that email notifications are sent using your own SMTP server. To do that,
-
In the Host field, specify the domain name of the SMTP server you use.
-
In the Port field, specify the SMTP port number. It is recommended to use port 587 or 25.
-
Turn on the Authentication toggle if the SMTP server requires authentication.
-
In the Host login and Host password fields, specify the login and password you use to access the SMTP server.
-
Select the Auth via NTLM checkbox to be able to login using SaslMechanismNtlm.
-
In the Sender display name field, specify the name of the sender which will be displayed in the From: field.
-
In the Sender email address field, specify the email address of the sender.
-
Select the Enable SSL checkbox to enable encrypted connections.
-
Click the Save button. To discard your changes and return to the default server, click the Default settings button.
noteTo verify whether the specified settings are correct, click the Send test mail button. If the settings are specified correctly, you will receive the SMTP Test Message to the email address specified in your user profile.
Document Service settings
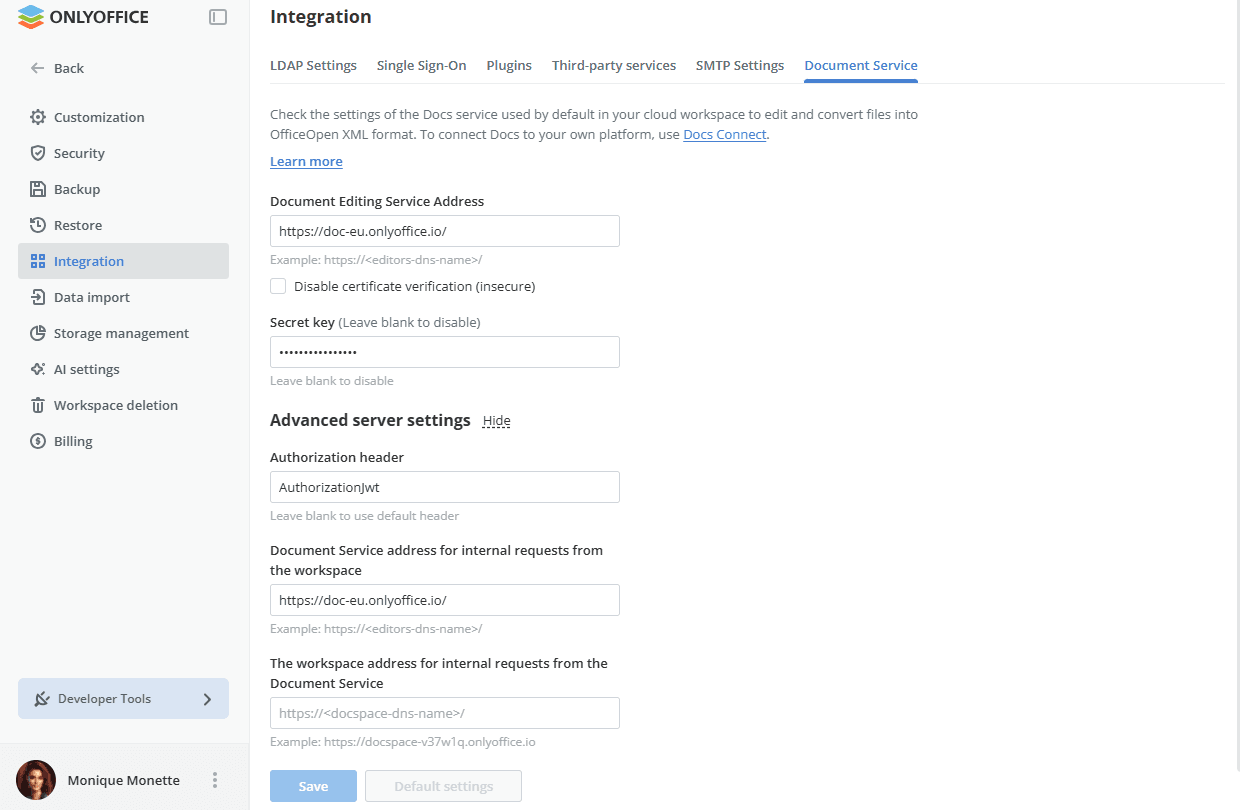
The Document Service subsection displays the settings of the ONLYOFFICE Docs service used to edit and convert files into the OfficeOpen XML format. In the SaaS version, it shows the service that your workspace uses by default. In the server version, you can connect your own ONLYOFFICE Docs here. To do that:
To run the ONLYOFFICE editing engine in the cloud and connect it to your own platform instead, use Docs Connect.
-
Go to the workspace Settings and select the Integration > Document Service section.
-
Fill in the Document Editing Service Address field. Specify the URL address where ONLYOFFICE Docs is installed. If you install ONLYOFFICE Docs on a custom port, you must specify the port, e.g.:
http://127.0.0.1:8081/ImportantThe address of ONLYOFFICE Docs must be accessible from ONLYOFFICE Apps, as well as the address of ONLYOFFICE Apps must be accessible from ONLYOFFICE Docs.
-
You can select the Disable certificate verification (insecure) option to disable the certificate verification and allow the workspace to establish connection with ONLYOFFICE Docs if you are using a self-signed certificate for your ONLYOFFICE Docs (otherwise, the workspace will not validate a self-signed certificate and will not allow connection to/from ONLYOFFICE Docs). This is an insecure solution, and we strongly recommend that you replace the certificate with the one issued by some CA.
-
Fill in the Secret key field specifying the secret used to sign the data. You can leave it empty to disable this setting.
noteStarting from ONLYOFFICE Docs v7.2, JWT is enabled by default and the secret key is generated automatically. You need to specify the JWT parameters in the ONLYOFFICE Apps configuration file as well. For more details, see this article.
-
Click the Show link next to the Advanced server settings section.
-
Fill in the Authorization header field. You can leave it empty to use the default header.
-
If your network configuration does not allow requests between the installed ONLYOFFICE Apps and ONLYOFFICE Docs using the public addresses, specify addresses for internal requests in the corresponding fields:
- Fill in the Document Service address for internal requests from the workspace field. Specify the address that is used to access ONLYOFFICE Docs from ONLYOFFICE Apps.
- Fill in the The workspace address for internal requests from the Document Service field. Specify the address that is used to access ONLYOFFICE Apps from ONLYOFFICE Docs.
If your ONLYOFFICE Docs/ONLYOFFICE Apps installations are not switched to https, please, make sure that you specify
httpin the addresses. -
Save the settings by clicking the Save button. To discard your changes and return to the settings that the workspace uses by default, click the Default settings button.
If you connected external editors installed on another machine, please duplicate the license file that you uploaded to the workspace on this external machine with Docs as well.
For example, on the machine with the Docker version of Docs, the default path is /var/www/onlyoffice/Data/license.lic You can refer to this article to find out paths for other OS.