Editing profiles
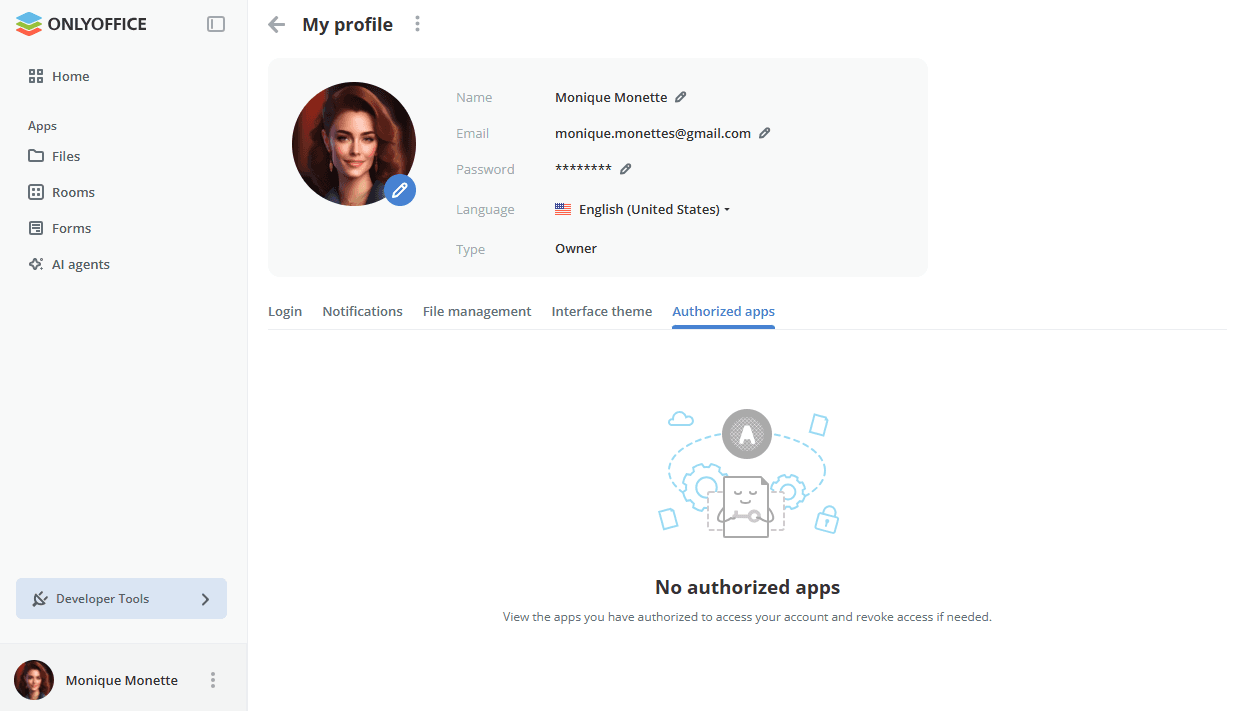
When you accept an invitation to the workspace, you can view the Rooms and Archive sections (they are empty if you are not invited to a room yet) and change your own profile data.
To edit your profile:
- Click the
 icon next to your name in the lower left corner and select the Profile option, or click your name.
- On the My profile page, switch to the necessary tab and change the required data.
User info
-
Edit your name, email or password by clicking the
 icon next to the corresponding field.
-
Name – in a new window, enter the first and last name and click Save.
-
Email – in a new window, enter a new email address and click Send. The activation instructions will be sent to the entered email address.
-
Password – in a new window, click Send. The password change instructions will be sent to the current email address.
noteThe password CANNOT be less than 8 and more than 30 characters long.
-
-
Select the account language.
-
The Type field displays your role in the workspace, for example, Owner. This field cannot be edited.
-
Change the profile photo. Click the
 button at the bottom of the current profile photo to upload another one (JPG or PNG, max 1 MB) and select the image area that will be displayed as your avatar photo.
Login tab
-
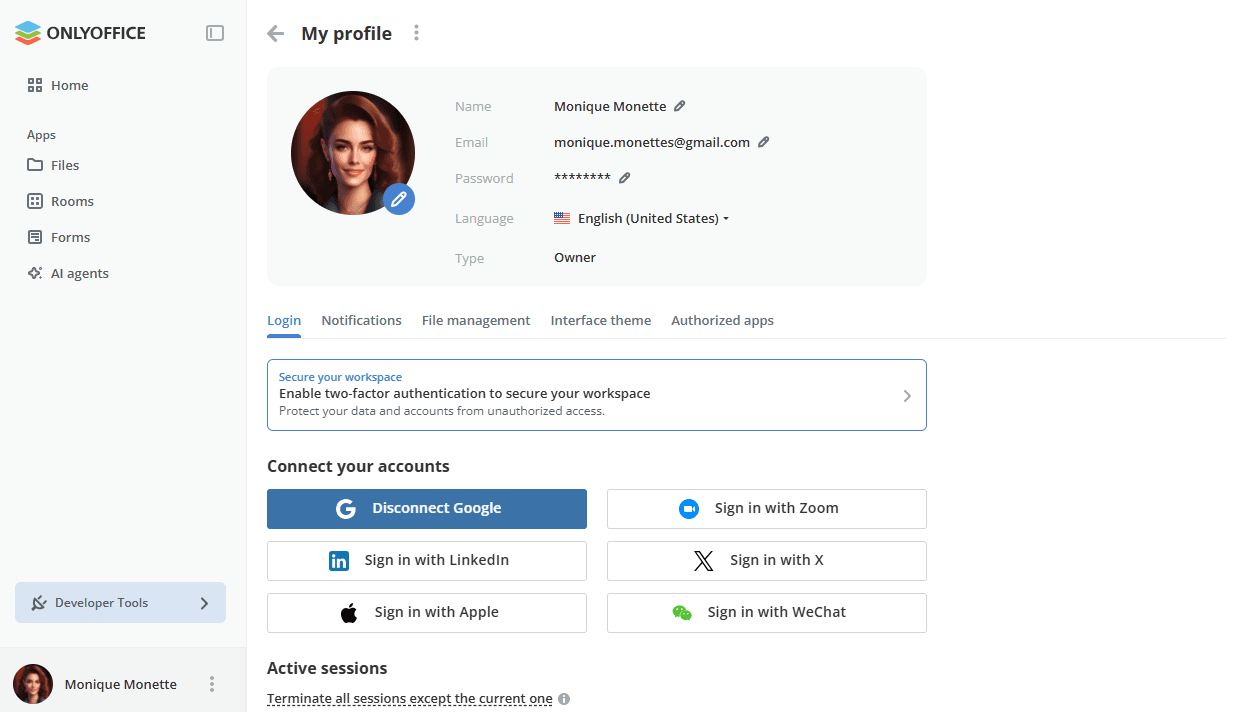
If two-factor authentication is not enabled yet, the Secure your workspace block at the top of the tab prompts you to turn it on. Click the block to proceed to the corresponding settings.
-
When two-factor authentication by an authenticator app is enabled by the administrator, the Two-factor authentication section is available.
Click Show backup codes to open the backup codes in a new window. You can use the backup codes when you do not have access to your mobile device. Print the backup codes by clicking the corresponding button and use them when necessary. To get new codes, you can use the Request new button. Only codes which were generated last are valid. It is also possible to reset the application using the Reset application link and then connect a new authenticator app. To learn more about two-factor authentication, you can read this article.
-
The Connect your accounts section allows connecting third-party services to log in to your workspace quickly. In the SaaS version, Apple, Google, LinkedIn, X, WeChat, Zoom are available by default, Facebook and Nextcloud must be previously connected by the administrator in the workspace settings. In the server version, all the services must be previously connected by the administrator.
Click the necessary service. In the opened window, enter the account credentials, if necessary, and allow the ONLYOFFICE application to access your account. For an already connected service, the button changes to Disconnect.
-
Manage active sessions. Use the Terminate all sessions except the current one link to close active connections on other devices.
Notifications tab
-
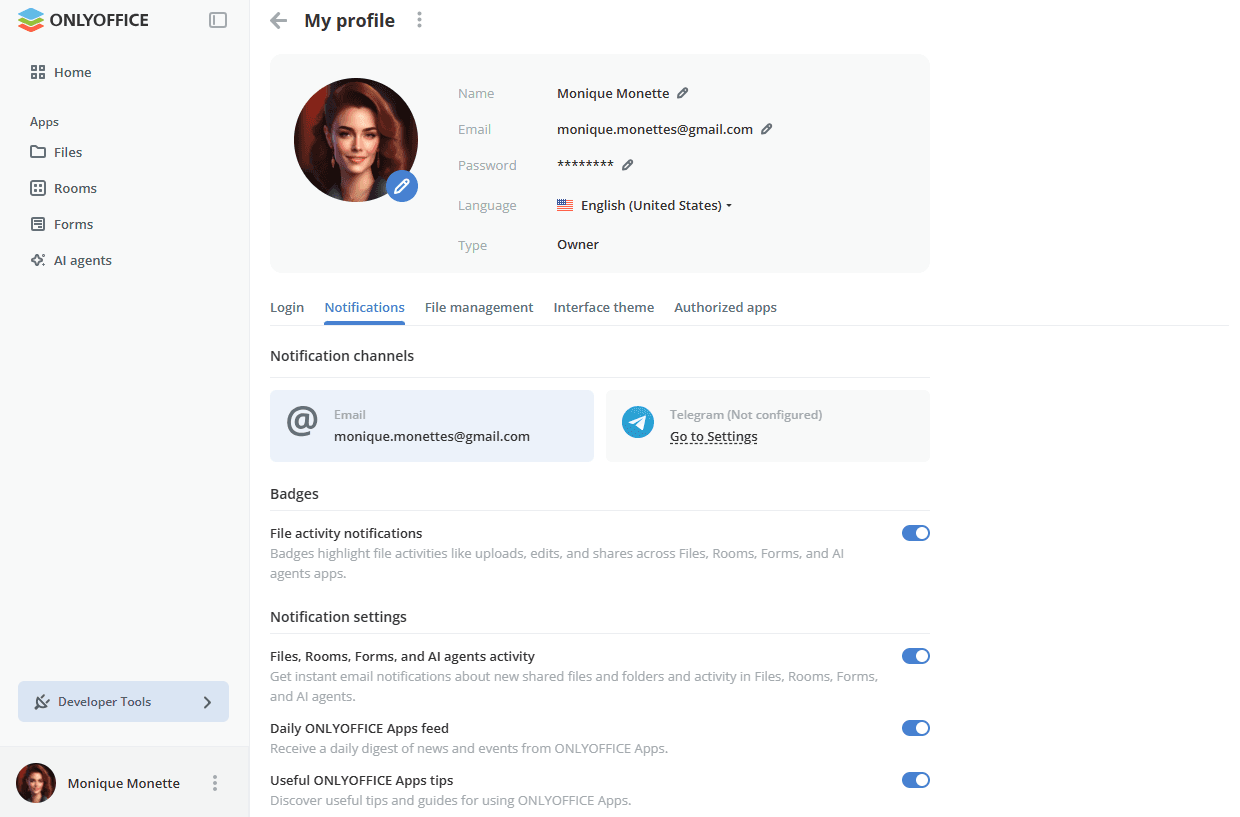
In the Notification channels section, you can see the available ways to receive notifications: via Email and Telegram. The email address linked to your account is displayed. If Telegram is not configured yet, use the Go to Settings link to connect Telegram, provided that it is connected in the workspace settings by an administrator.
-
In the Badges section, use the File activity notifications toggle to highlight file activities such as uploads, edits, and shares across the Files, Rooms, Forms, and AI agents apps. Badges are displayed in the left-side menu.
-
In the Notification settings section, enable or disable the following email notifications:
- Files, Rooms, Forms, and AI agents activity – instant notifications about new shared files and folders as well as activity in these apps.
- Daily ONLYOFFICE Apps feed – a daily digest of news and events.
- Useful ONLYOFFICE Apps tips – tips and guides on using ONLYOFFICE Apps.
File management tab
-
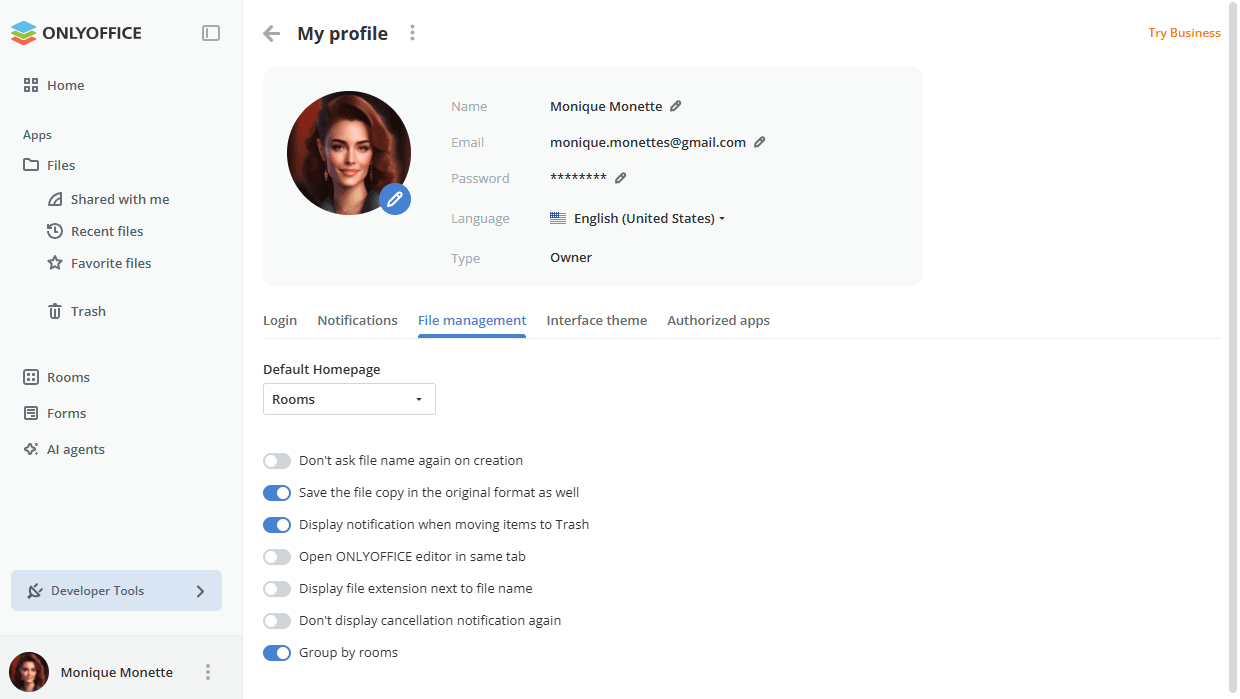
The file management settings allow you to control your own work with documents within rooms and the Files section. These settings are available for all users and guests.
Interface theme tab
-
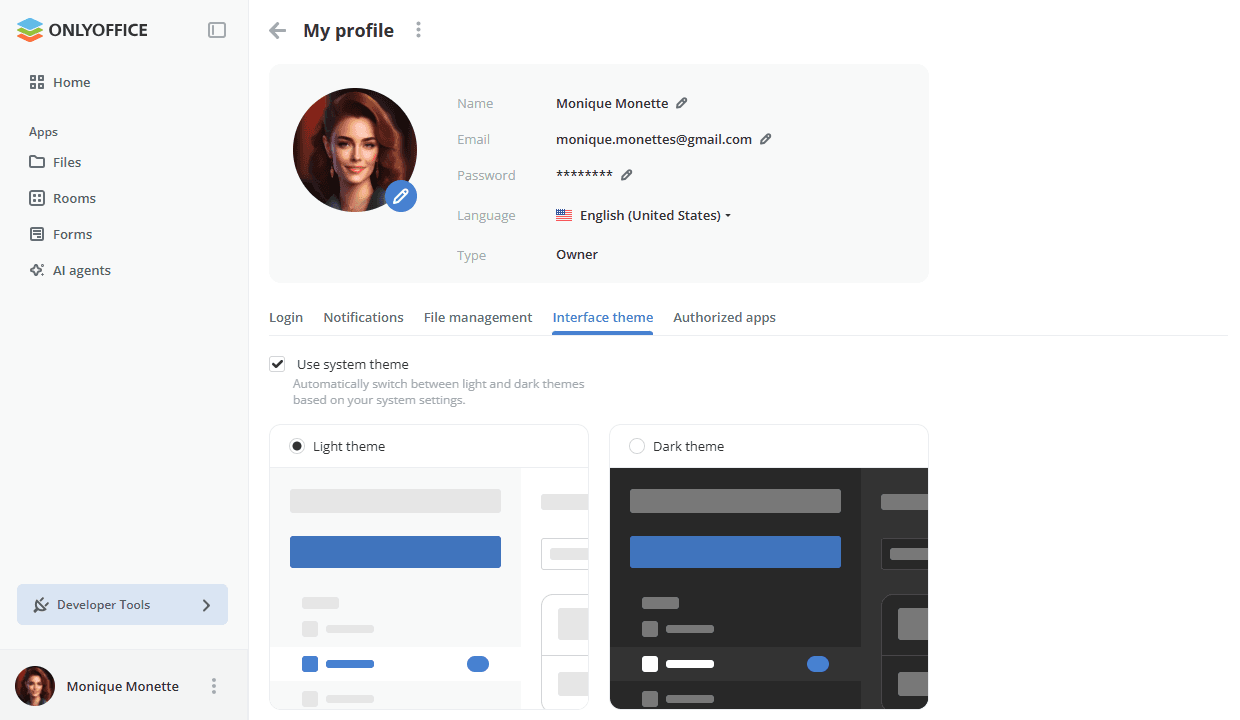
Select the Use system theme checkbox to automatically switch between the light and dark themes based on your system settings. To choose the theme manually, clear this checkbox and select the Light theme or the Dark theme option.
Authorized apps tab
-
Manage OAuth applications previously created in the Developer Tools -> OAuth 2.0 section. You can open the application to view its info or revoke consent. If you have not authorized any application yet, the tab is empty. To learn more about OAuth applications, you can read this article.
You can also disable your account. Click the icon next to the My profile caption at the top of the page and select the Disable account option. An email will be sent to the linked email address with instructions on how to disable the account. Only a Full admin or the Owner can delete the account.