Managing and editing forms in a Forms space
A Form space in the Forms app is a space where you collect filled out PDF forms from the invited members and external users. Once a space is created, add forms to it to start collecting responses: you can create new forms from scratch or from the template gallery, upload the existing ONLYOFFICE PDF forms, and organize them into folders. You can also rename forms, move or copy them to another location, and delete the unnecessary files.
The set of the operations available to you depends on your access rights to the space and to a particular file.
Users can work with PDF forms as well as with the spreadsheets that collect the form responses using the ONLYOFFICE Online Editors.
It's also possible to adjust the file management settings.
Adding forms
Only PDF files and forms can be added to a Form space. Files of other formats are not accepted. The spreadsheets that collect the form responses are generated by the space itself.
Forms can be created within the space or uploaded from your computer. To add forms,
-
open the necessary Form space,
-
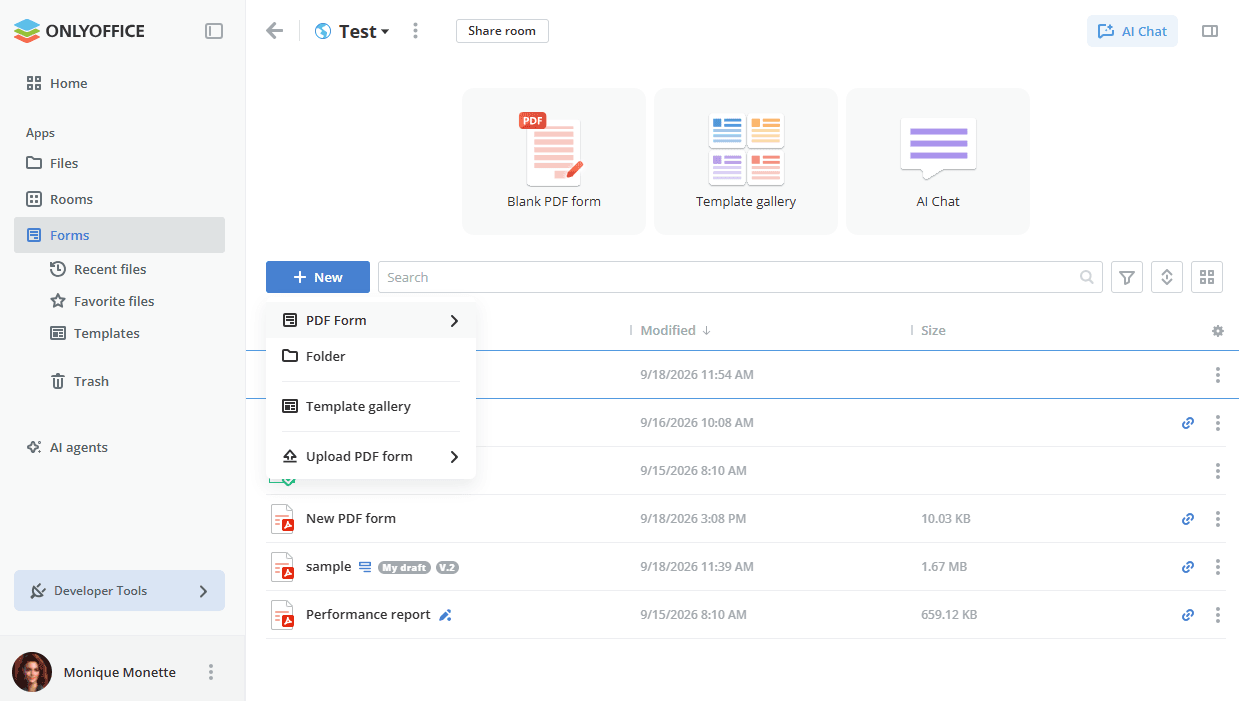
use the Blank PDF form or Template gallery quick action tile at the top of the space, or click the New button above the list of documents, or right-click within the working area and select one of the following options:
 PDF Form to create a new
PDFform. Use the submenu to create a Blank form or a form From text file, Folder to create a new folder,
- Template gallery to create a form on the base of a ready-made template, as described below,
 Upload PDF form to add the existing forms from your computer.
-
enter a name for your form or folder into the appropriate field and click the Create button.
noteif you don't want to enter the file name, you can check the Don't ask for the file name again when creating a file box or use the corresponding option in the file management settings.
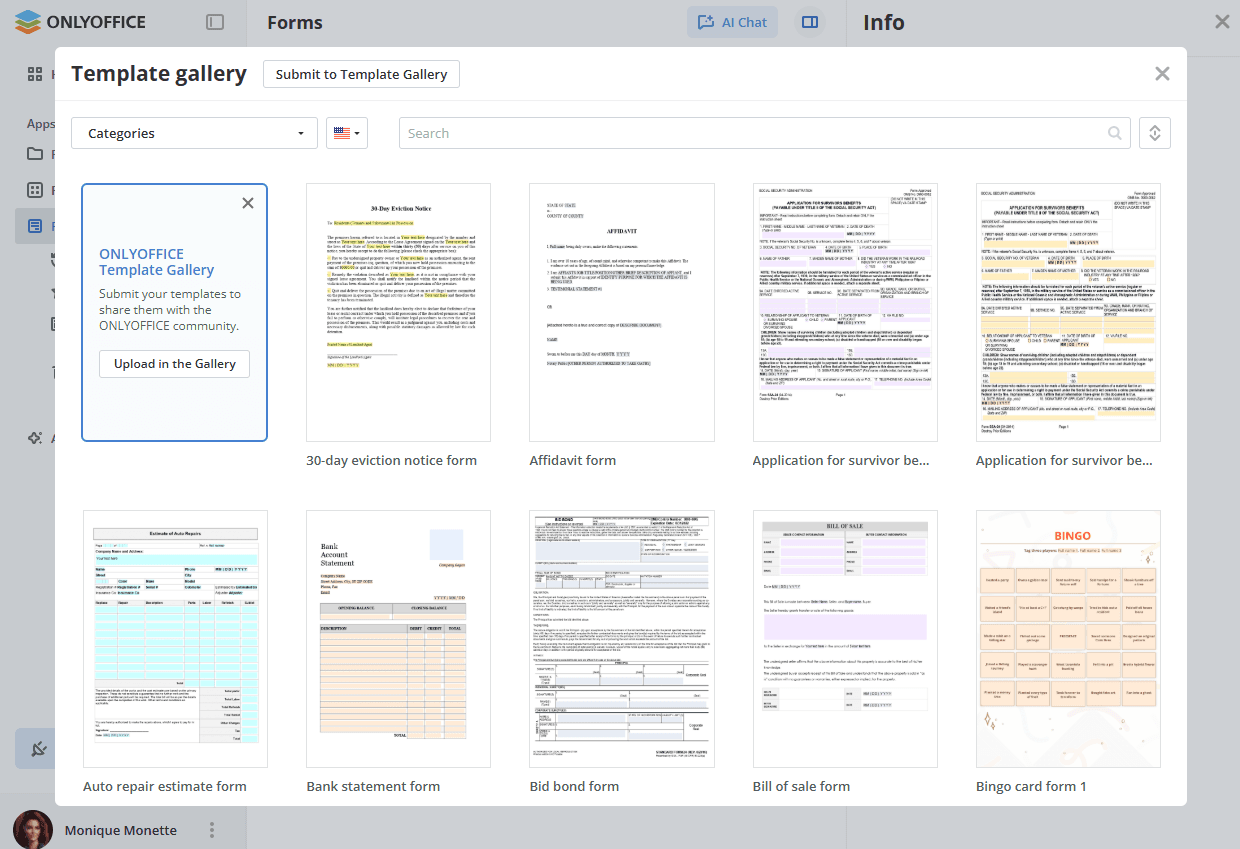
The Template gallery opens the library of the ready-made form templates. Use the Categories filter, the language selector, and the Search field to find the necessary template, then select it to create a form on its base. The Submit to Template Gallery button and the Upload in the Gallery option allow you to share your own templates with the ONLYOFFICE community.
To add the existing forms, click the New button and select the Upload PDF form option, then choose Upload files to add separate forms or Upload folder to add a folder with nested subfolders and forms. Select the necessary items in the file manager window and click the Open button. You can also drag and drop the forms or the folder from your computer to the working area.
If the form with the same name already exists in the space, a copy of the file will be created by default.
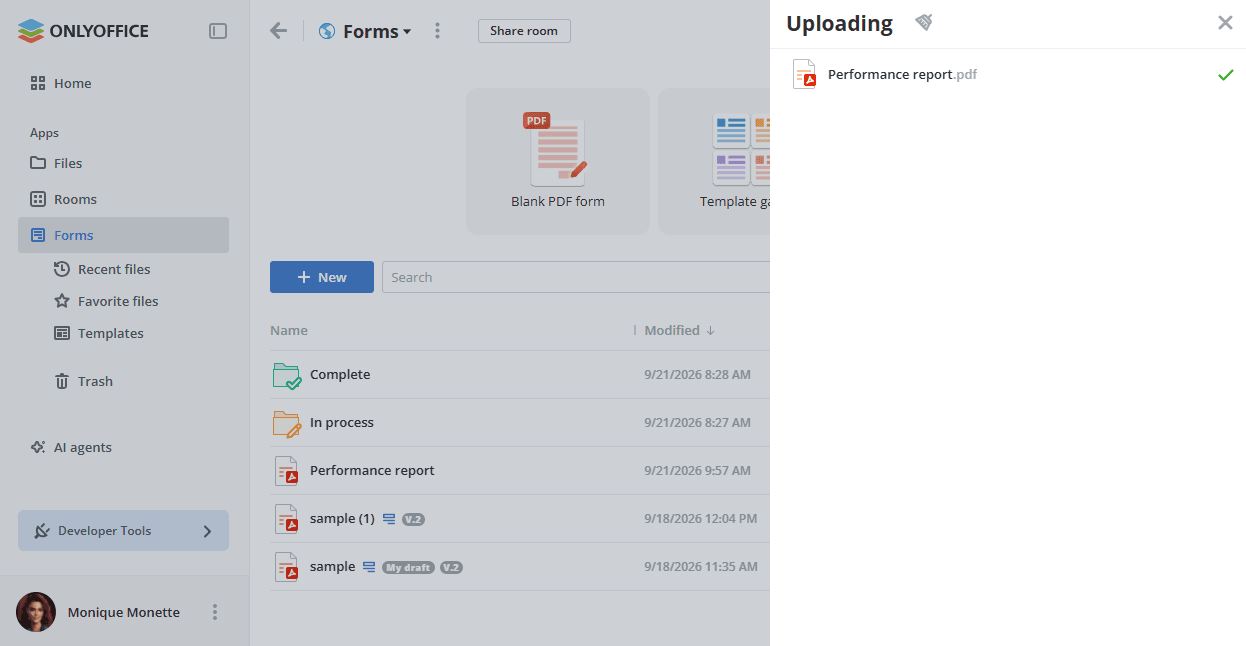
The current status of the upload can be found by clicking the  icon. The Uploading panel displays the forms that have already been uploaded, as well as the ones that are still in the queue, and allows you to cancel the upload or clear the list, as described in the Managing and editing documents in Files article.
Managing documents
To quickly find a necessary form, make use of the Search options panel at the top of the document list.
Click the  button to open the Search options panel, and specify the necessary search and filter parameters:
- To filter items by Author, click Me or use the Other option and select the necessary user from the list.
- To filter items by Type, choose one of the available options.
- Click the Apply button to apply filters, or Cancel to close the panel. To clear the filter, use the
 icon next to the panel title.
Enter a document title, entirely or partially, in the search field and press the Enter key to display the found item(s). If you want to go to the folder where the found file is located, right-click the file and use the  Open location option. To go to the parent folder that is one level up from the current folder, use the
 arrow.
Sort documents by parameters (Name, Last modified date, Size) using the  button. Click the arrow next to the selected parameter to change the sort order.
Use the  or
 buttons on the right to switch between the available display modes: Thumbnails view and Compact view.
Use the  icon to display or hide the Author, Created, Modified, Size, Type columns in the document list (Compact view).
Using the context menu of a folder, you can perform the following operations:
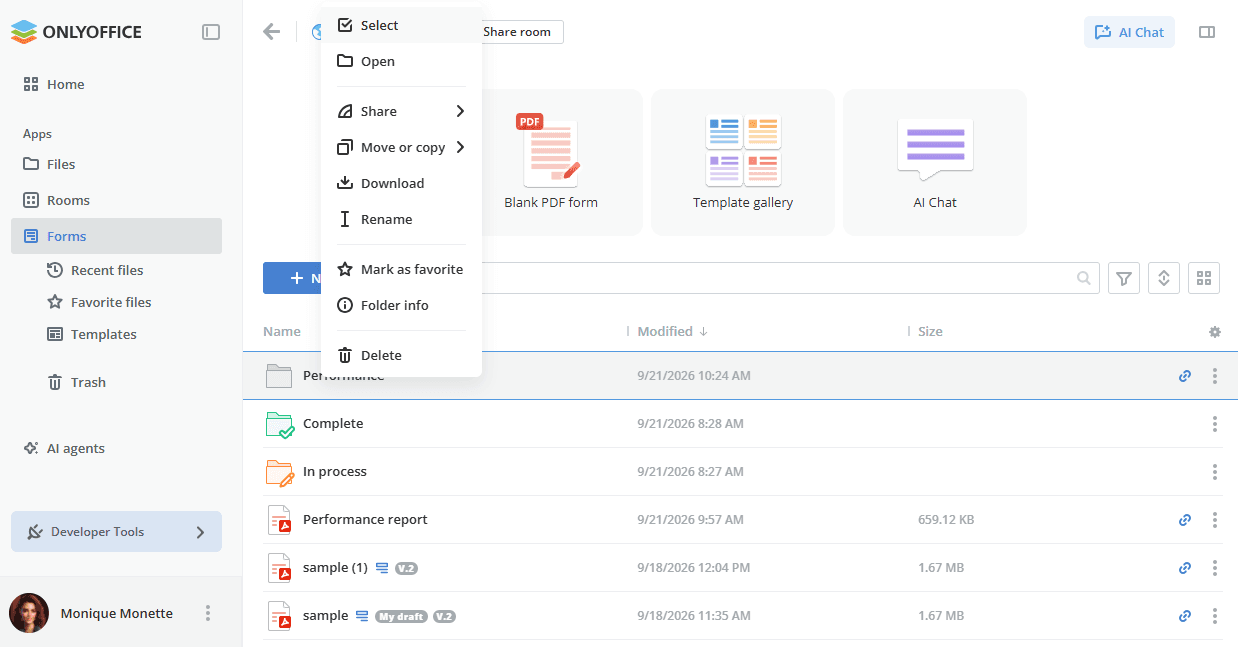
 Select to select the folder in the list.
 Open to open the folder.
 Share to copy the shared link to the folder or open its sharing settings.
 Move or copy to move the folder to another location or create its copy.
 Download the folder to your computer's hard disk drive.
 Rename the folder.
 Mark as favorite to add the folder to the Favorite files section.
 Folder info to open the Info panel.
 Delete the folder by moving it to Trash.
Using the context menu of a form, you can perform the following operations:
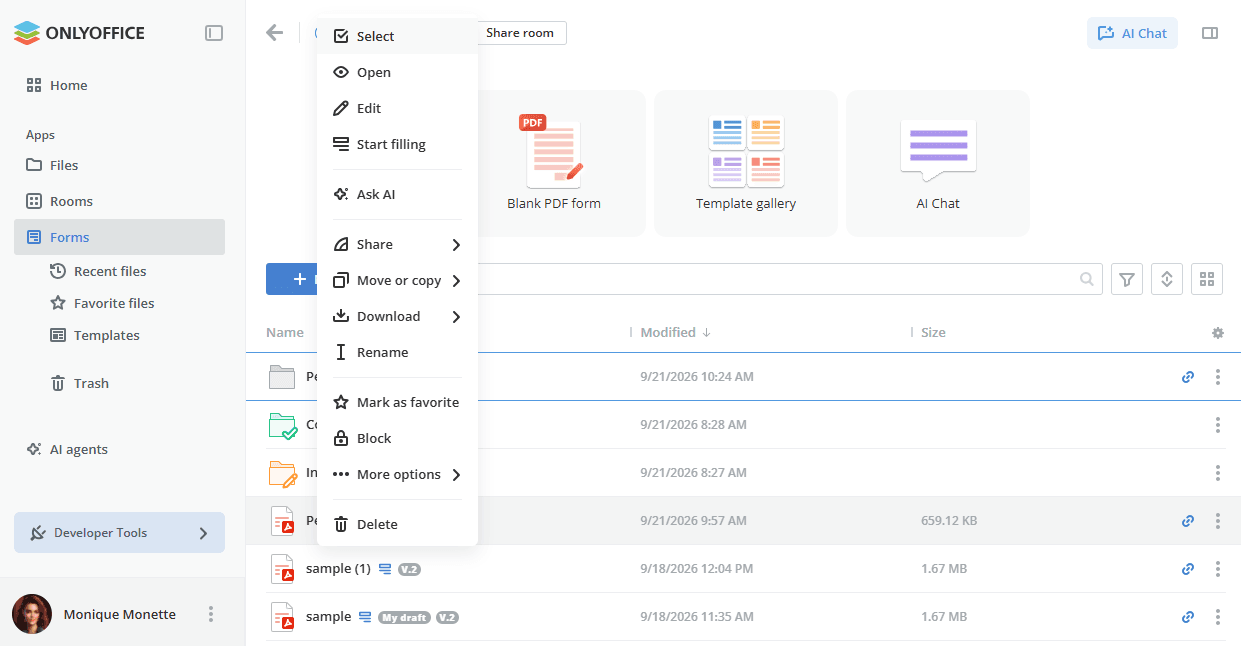
- Select to select the file in the list.
- Open to open the form.
- Start filling to switch the form to filling mode so that it becomes available to the Form fillers.
 Edit to open the form for editing in a new tab.
 Ask AI to attach the document to a prompt in an AI chat, as described below.
- Share - this menu entry contains the following sub-entries:
 Copy shared link to get a link to the file.
 Sharing settings to open the sharing settings to provide access to the file via a link.
 More options - this menu entry contains the following sub-entries:
-
File info to open the Info panel which contains the following tabs:
- Share - the links the file is shared via. A file inside a Form space is accessible via the shared link of its parent folder, which is stated by the File available via parent folder link notice.
- History - the recent changes made to the file, grouped by day.
- Details - the file preview and its properties: Owner, Type, File extension, Size, Modification date, Last modified by, Creation date, Versions, Comments.
To open the same panel you can click the
 icon located in the top right corner.
-
 Embed to generate the code for embedding the form into your website.
-
 Show version history to open the version history list, where each version is described in detail: Version number, Date and time, Author, and Comments are listed.
-
- Update XLSX data (available for the spreadsheets that collect the form responses) to refresh the spreadsheet with the responses submitted since the file was last generated.
- Mark as favorite to add the file to the Favorite files section.
 Block to protect the form with a password.
- Download - this menu entry contains the following sub-entries:
-
Original format to download the file in the original format.
-
 Download as to download the file in the selected format.note
If several files are chosen for download, they will be packed in a .zip archive and saved onto your hard disk.
-
- Move or copy - this menu entry contains the following sub-entries:
 Move to another location.
- Copy the file and move the created copy to the selected location.
 Duplicate the file in the current folder. Duplicated items have an index at the end of the name.
- Rename the file.
- Delete the file by moving it to Trash.
Group operations with files can be performed using buttons on the top or the context menu. To download, move, or copy several files at once,
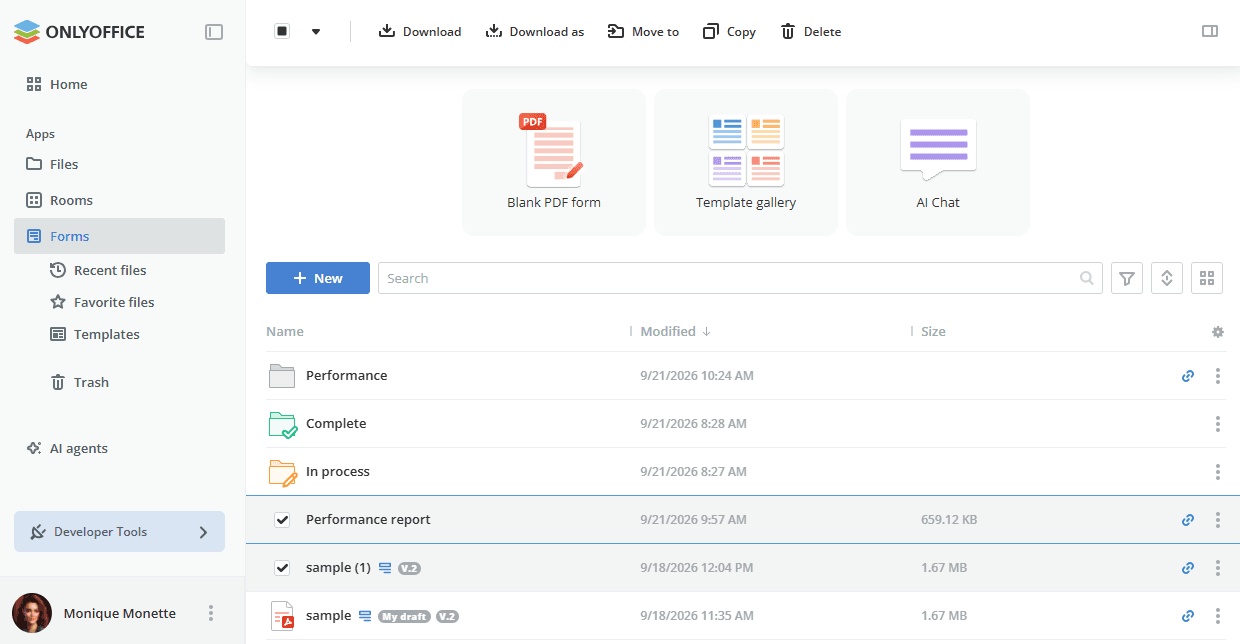
- open the needed Form space by clicking the Forms option at the left-side panel,
- hover over the file icon and check the boxes for the files you want to manage,
- click the needed button at the top depending on the operation you want to perform: Download, Download as, Move to, Copy, or Delete. The set of the buttons displayed depends on the operations available for the selected items.
Use the arrow next to the check box on the top panel to select the items by type at once. The list includes the types of the items stored in the space only.
Adding documents to Favorite files
Each app has its own Recent files, Favorite files, Templates, and Trash sections on the left-side panel. In the Forms app, the Favorite files section contains the files and folders you marked as favorites in your Form spaces. To add a file/folder to Favorite files:
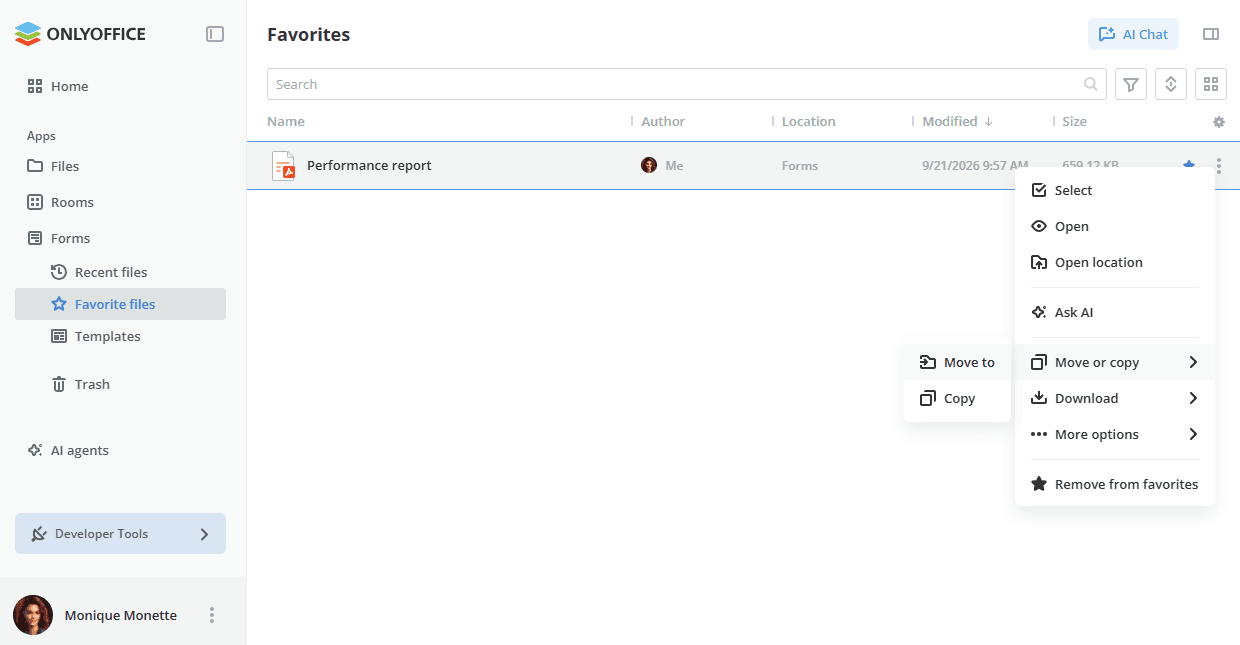
- open the needed Form space,
- find the needed file/folder and click the
 icon next to it,
- select the Mark as favorite option.
The file will be available in the Favorite files section and marked with the  icon in the file list.
Within the Favorite files section, the list displays the Author, Location, Modified, and Size columns, and the context menu offers Select, Open, Open location, Ask AI, Move or copy with the Move to and Copy options, Download, More options, and Remove from favorites. Use Open location to switch to the space that contains this file.
To remove an added file from Favorite files, use the  Remove from favorites option in the context menu or click the icon next to the file name.
Using the Recent files section
The Recent files section lists the documents that you recently opened in the editor. It contains the latest 100 files, they are stored for 90 days.
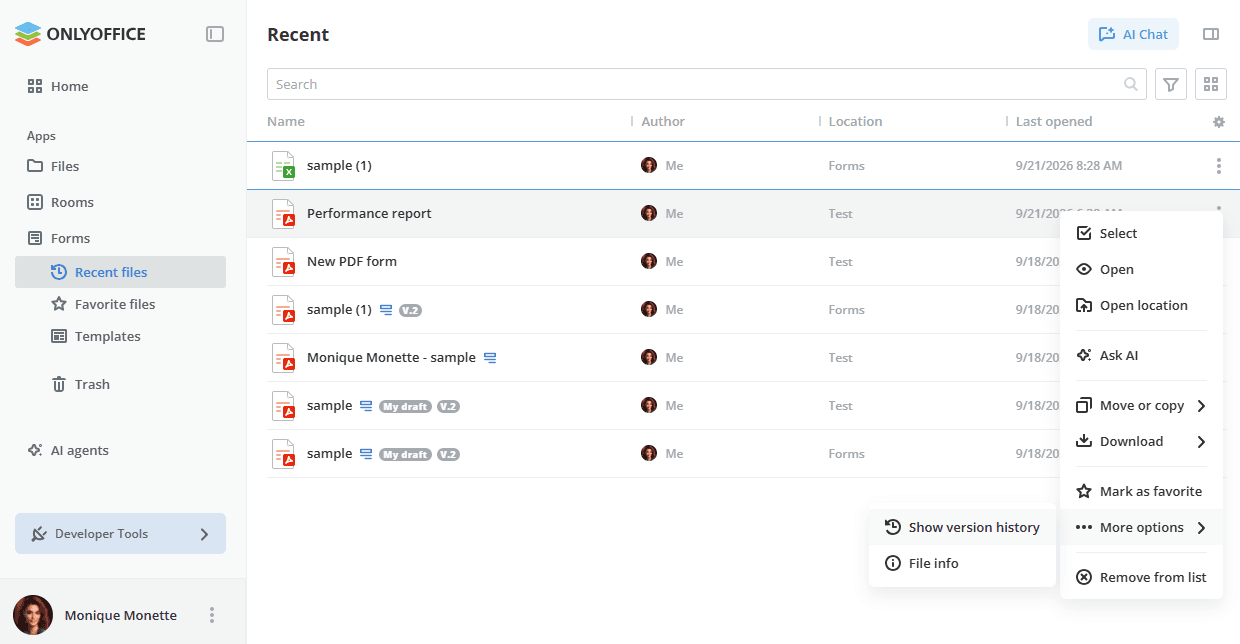
The list displays the Author, Location, and Last opened columns. The context menu offers a limited set of items: Select, Open, Open location, Ask AI, Move or copy, Download, Mark as favorite, More options with Show version history and File info, and Remove from list.
Using the Templates section
The Templates section contains the space templates available in the Forms app, not the form templates of the Template gallery described above. A template stores the settings, folders, and forms of a space, so that a new Form space can be created from it using the From template option of the Choose space type panel, as described in the Creating Form spaces article.
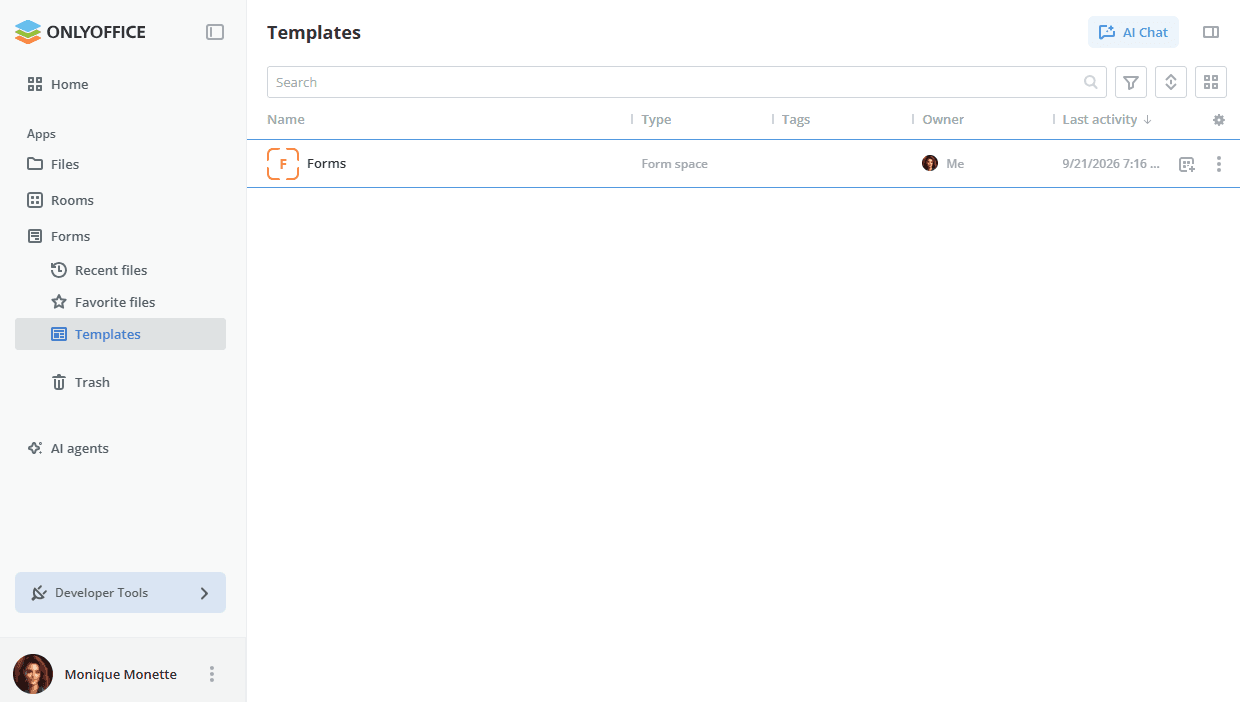
The list displays the Type, Tags, Owner, and Last activity columns. The context menu of a template offers the following options:
- Select to select the template in the list.
- Open to open the template.
- Copy link to copy the link to the template to the clipboard.
- Create space to create a new Form space from this template.
- Edit template to change the template name, icon, and tags.
- Access settings to define who can use the template.
- Download to download the template contents.
- Room info to open the Info panel.
- Delete template to remove the template.
Asking AI about a form
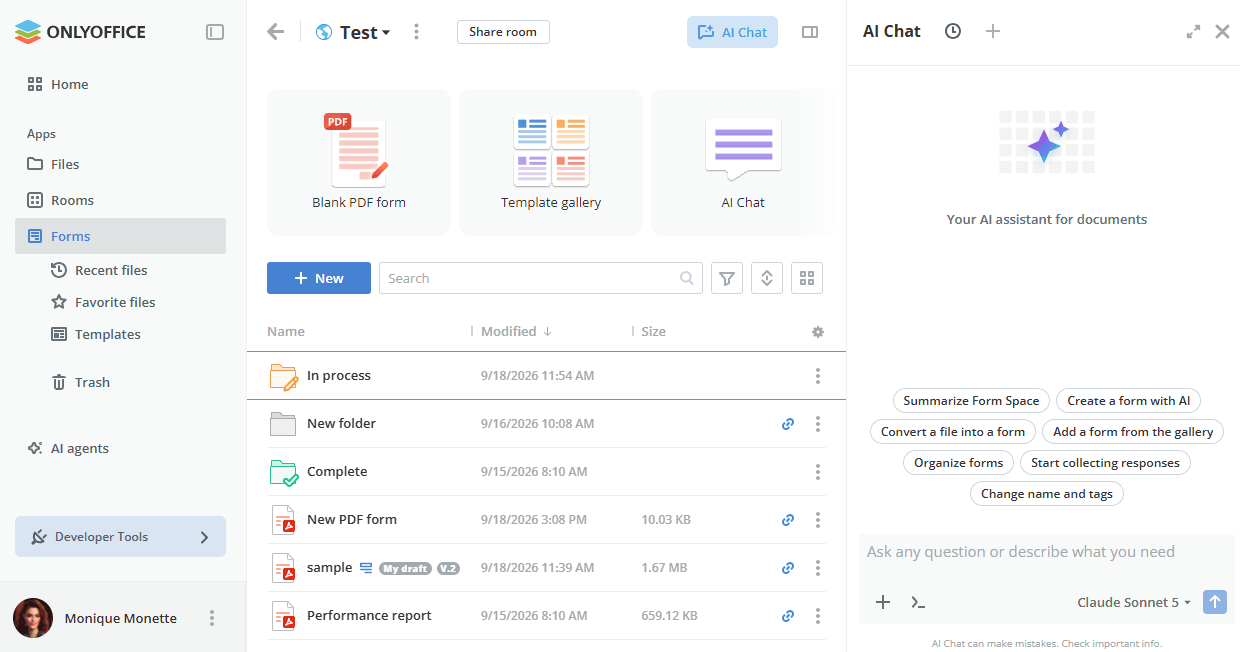
Click the AI Chat tile at the top of the space or the AI Chat button in the upper right corner to open the AI chat panel. Use the Ask AI option of the file context menu to attach a form or a response spreadsheet to the prompt; the attached file is displayed above the prompt field.
When no file is attached, the chat offers the ready-made prompts of the space: Summarize Form Space, Create a form with AI, Convert a file into a form, Add a form from the gallery, Organize forms, Start collecting responses, and Change name and tags. Once a file is attached, the prompts offered concern this file: Summarize file, Fix grammar, Convert to a table, Convert file, Create a presentation from the file, and Translate and save a copy. You can also enter your own prompt in the Ask any question or describe what you need field. Read more about using AI agents.
Viewing and editing documents
You can view and edit PDF forms and the spreadsheets that collect the form responses right in the Form space using the multi-functional ONLYOFFICE Online Editors.
To edit a form, click the  icon next to it, select the Edit option, and it will be opened in a new tab of the Internet browser. If the file is currently being edited, you will see the colored pencil
 icon. To find out more about the editors' features, visit this page.
Editing a form that is already in filling mode switches it back to edit mode and hides it from the Form fillers until filling is restarted.
If the storage quota for a space or user has been reached, opening a document will launch it in view-only mode and a banner will be displayed to notify you that the quota has been exceeded. Additionally, if the quota is reached while a document is being edited and saved, a banner will appear in the editor notifying you of the quota limit.
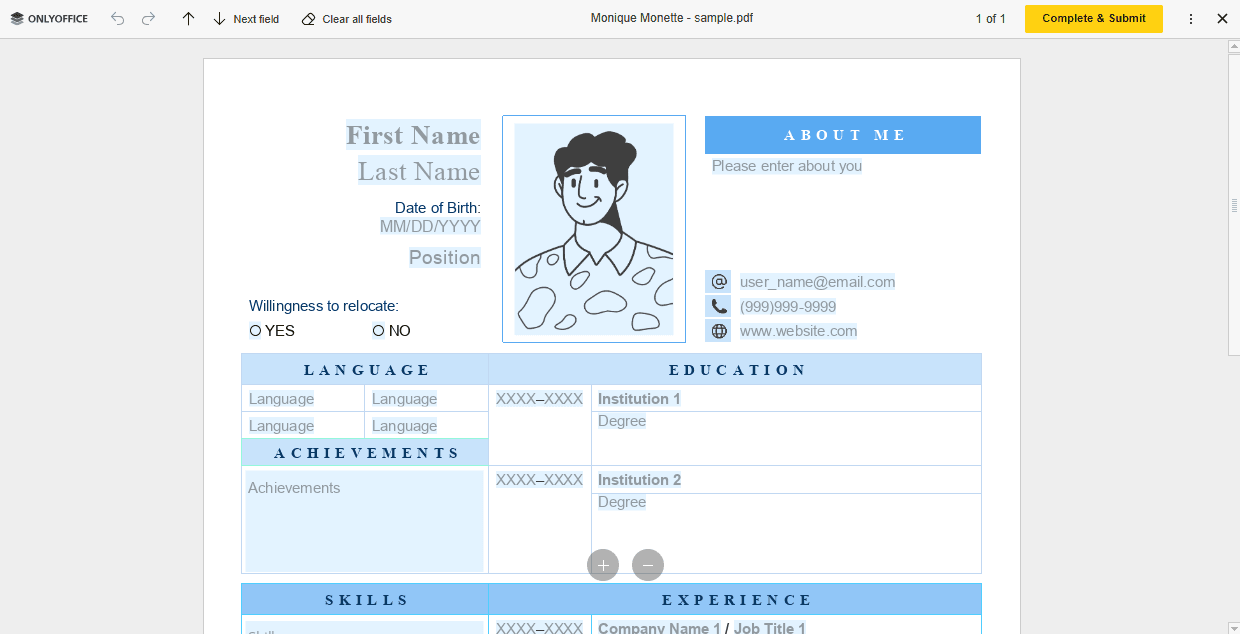
Once you edit a form and save the changes you made, both versions of your file will be available, so that you'll be able to restore the previous one if necessary. To learn more about versions, please refer to this article.
To view a file, click the icon next to it and select the  Preview option. This will open the file with the corresponding ONLYOFFICE Viewer. The ONLYOFFICE Viewers offer standard tools to zoom in/out your files, adjust their size, navigate between their pages, download or print them.