Editing Form spaces
Once a Form space is created, you can change its settings, organize the spaces in the list, control the storage quota, and delete the spaces you no longer need. This article describes the operations on the spaces themselves. To learn how to work with the forms stored inside a space, refer to the Managing and editing forms in a Forms space article.
Operations in the space list
The Forms app displays the created Form spaces with the Name, Tags, and Last activity columns. Use the Search field above the list to find a certain space, and the filter, sorting, and view icons to the right of it to narrow down, reorder, or switch between the list and tile views. Use the  icon to display or hide the columns. The All spaces tab and the Add group button below are used to organize the spaces into groups, as described below.
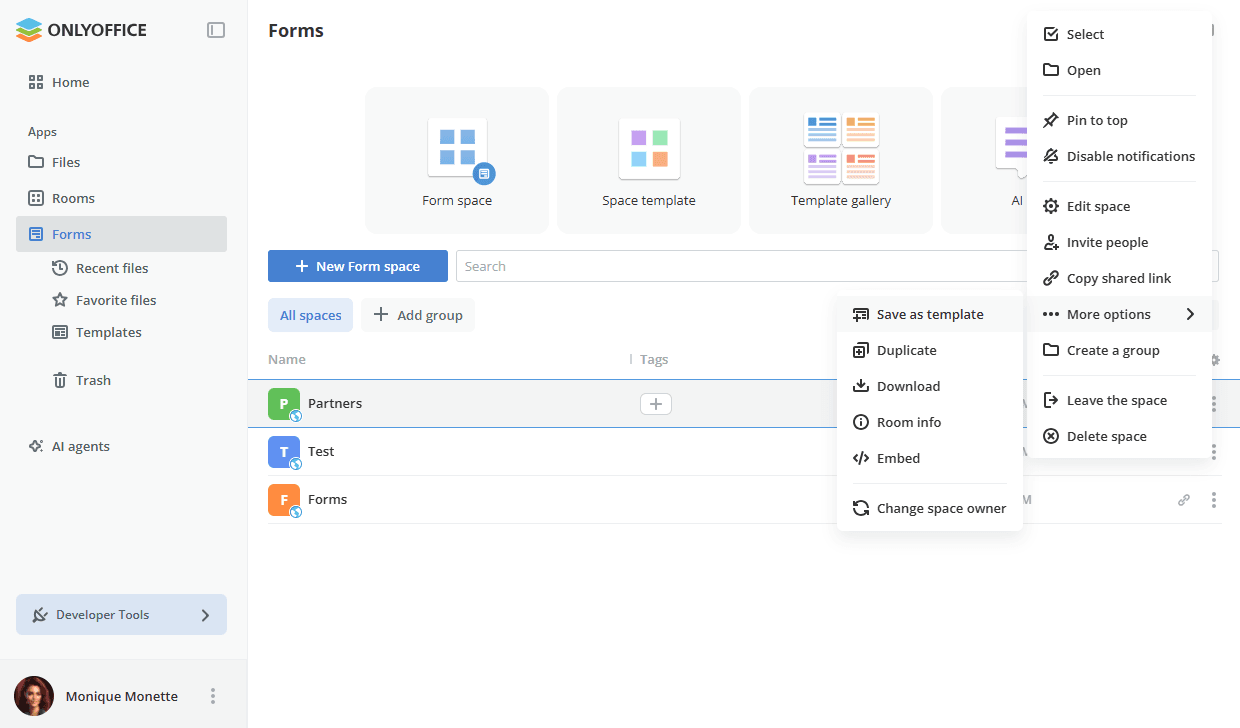
Click the  icon next to a space to open the context menu with the following options:
 Select – select the space to perform group operations.
 Open – open the space.
 Pin to top – display the space at the top of the list. You can unpin the pinned space by clicking the
 icon or using the Unpin option in the menu.
 Disable notifications – stop receiving notifications about the space. You can re-enable them using the
 Enable notifications option in the menu.
 Edit space – change the space settings specified during its creation.
 Invite people – add members to the space, as described in the Inviting users to Form spaces article.
 Copy shared link – copy the link to fill out the forms to the clipboard.
- More options – access additional operations with the space:
 Save as template – save the space structure as a template for reuse, as described in the Creating Form spaces article.
 Duplicate – create a copy of the space.
 Download – download the contents of the space.
 Room info – open the Info panel with the Contacts, History, and Details tabs, as described below.
 Embed – embed the space available via a public link.
 Change space owner – assign another owner to the space.
 Create a group – create a group of spaces.
 Add to group – add the space to one of the existing groups. The submenu lists the names of the groups that have already been created. If no groups exist yet, create one using the Create a group option.
 Leave the space – remove yourself from the space members.
 Delete space – delete the space.
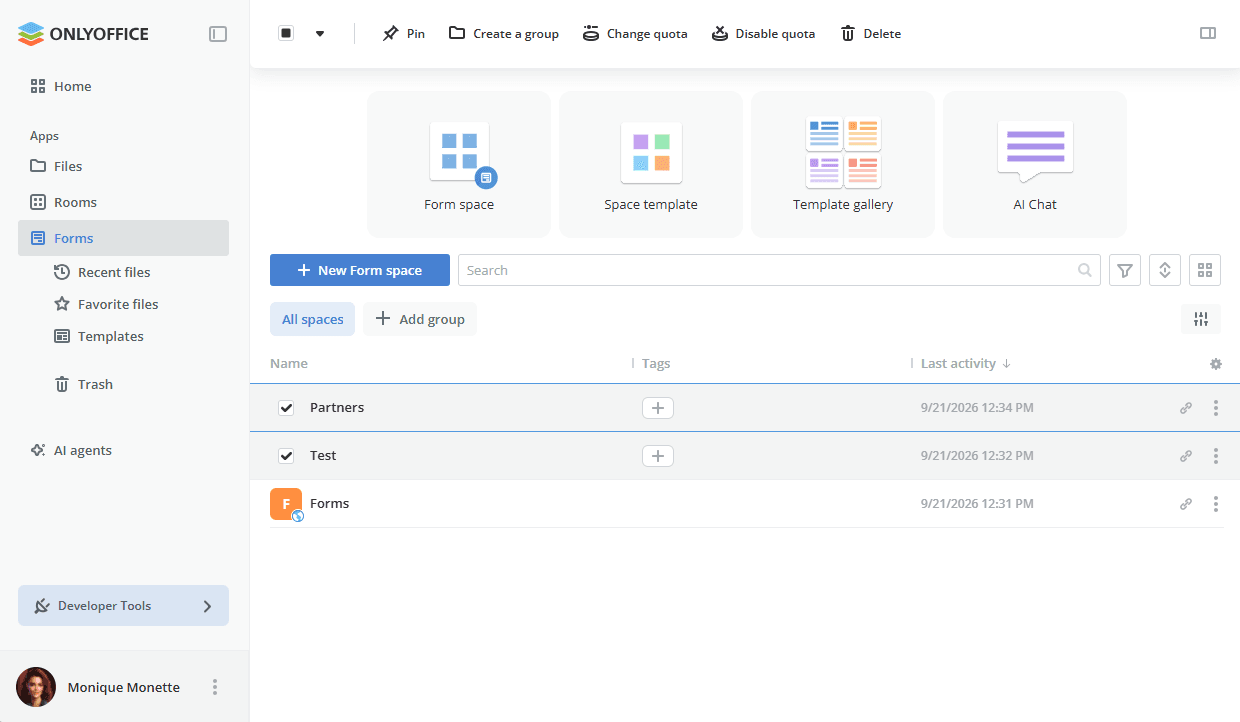
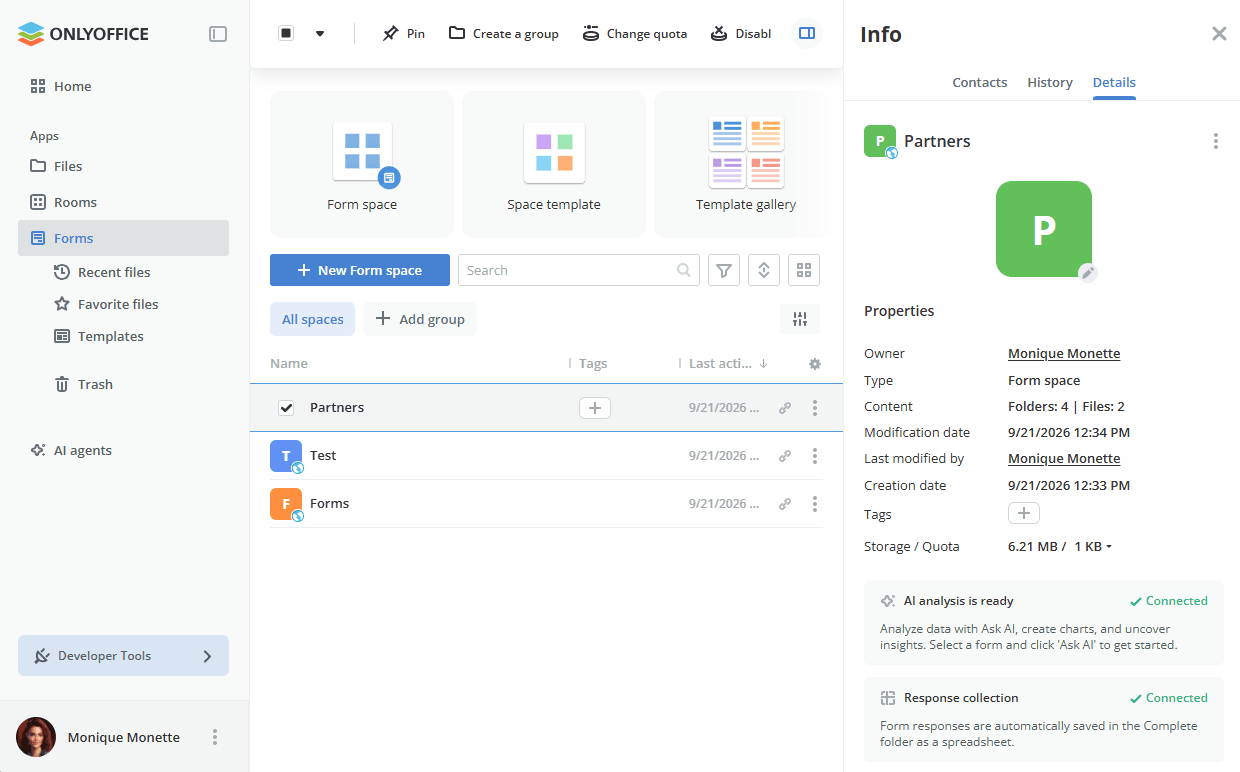
When one or more spaces are selected in the list, the toolbar at the top of the page provides the Pin, Create a group, Change quota, Disable quota, and Delete operations.
Grouping the spaces
The spaces can be organized into groups so that you can switch between them quickly. The All spaces tab and the Add group button are displayed above the list.
Use the  icon to the right of this row to open the Edit space groups panel:
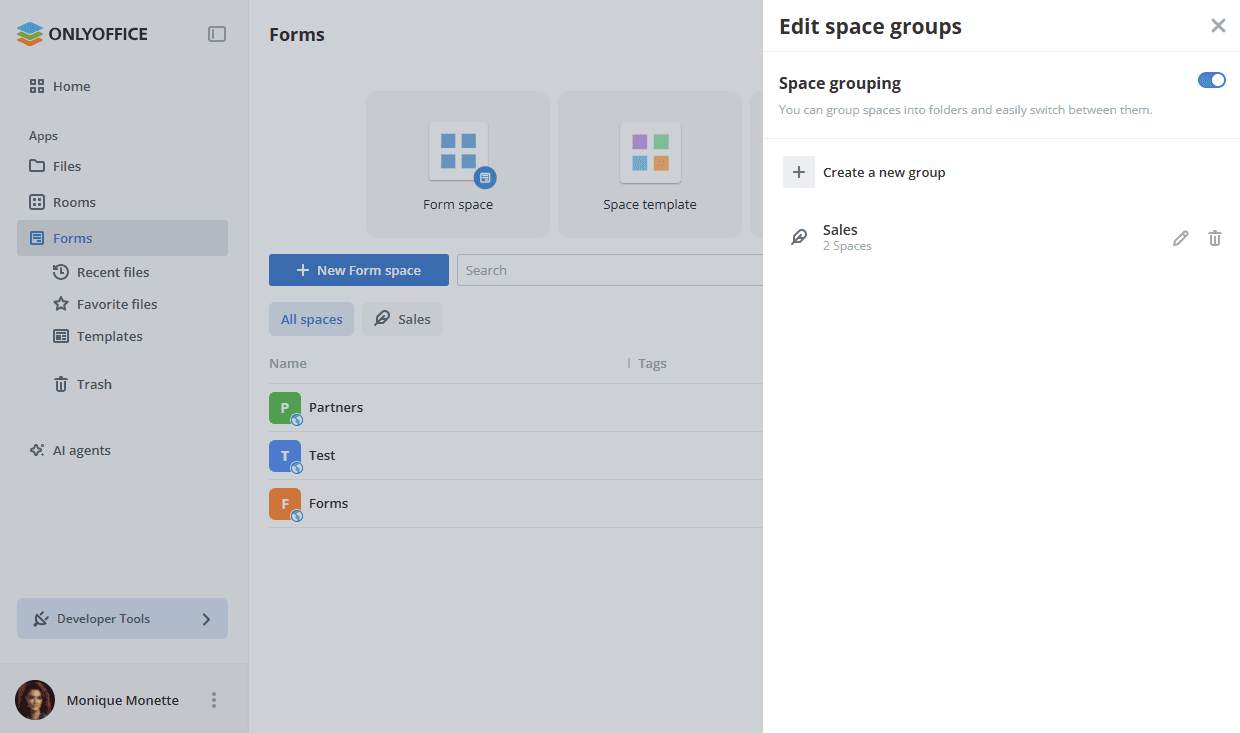
- Space grouping – turn the toggle on to group the spaces into folders and switch between them easily.
- Create a new group – create a new group of spaces.
- The list of the created groups, each with the number of the spaces it contains. Use the icon to change the group, and the icon to delete it.
To create a group:
-
Click the Add group button above the list, click Create a new group in the Edit space groups panel, or use the Create a group option in the context menu of a space.
-
In the Create a group window, enter the Group name and select an Icon.

-
Click Create.
-
Select the spaces to include in the group and click the Select button. The number of the selected spaces is displayed on the button.
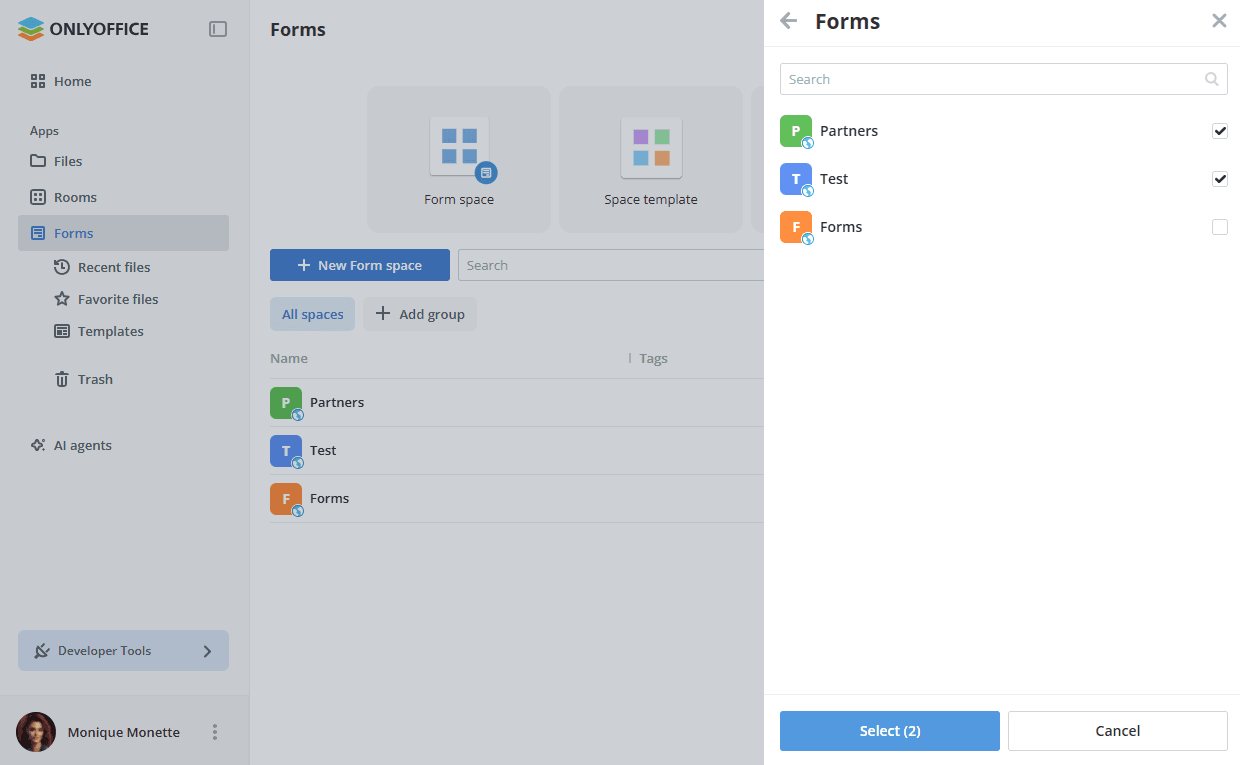
The created group is displayed as a tab next to All spaces. Click the tab to show only the spaces it contains, and the All spaces tab to show them all again.
To add a space to an existing group, use the Add to group option in its context menu and select the necessary group from the submenu.
Editing the space settings
To change the settings specified when the space was created:
- Click the icon next to the space name and select the Edit space option.
- Change the Name, the icon, or the Tags if necessary.
- Turn the data collection options on or off:
- Collect results in XLSX – saving the form responses to spreadsheets.
- Export results to the database – automatic submission of the completed forms to an external database. The option is only available when a database connection has been configured under Settings -> Integration -> Third-party services. Read the Database connection article for details.
- Click Save.
Turning an option off affects the responses submitted from that moment on. The spreadsheets and the database tables created earlier are not removed.
Viewing the space information
Select a space in the list and use the  icon in the upper right corner to open the Info panel. It contains the following tabs:
- Contacts – the public link to fill out the forms and the list of the space members with their permission levels.
- History – the recent actions in the space, grouped by date. Use the Go to date option to jump to a certain date, and the Export history option to save the history to a file.
- Details – the space properties.
The Details tab displays the following properties: Owner, Type, Content (the number of folders and files), Modification date, Last modified by, Creation date, Tags, and Storage / Quota.
Two status cards are displayed below the properties:
- AI analysis is ready – the space data can be analyzed with Ask AI. Select a form and click Ask AI to create charts and discover insights.
- Response collection – the form responses are automatically saved in the Complete folder as a spreadsheet.
When a feature has not been set up yet, the corresponding card leads to its settings, for example to the Database connection settings, where an external database for storing the form results can be connected.
Managing the space with AI
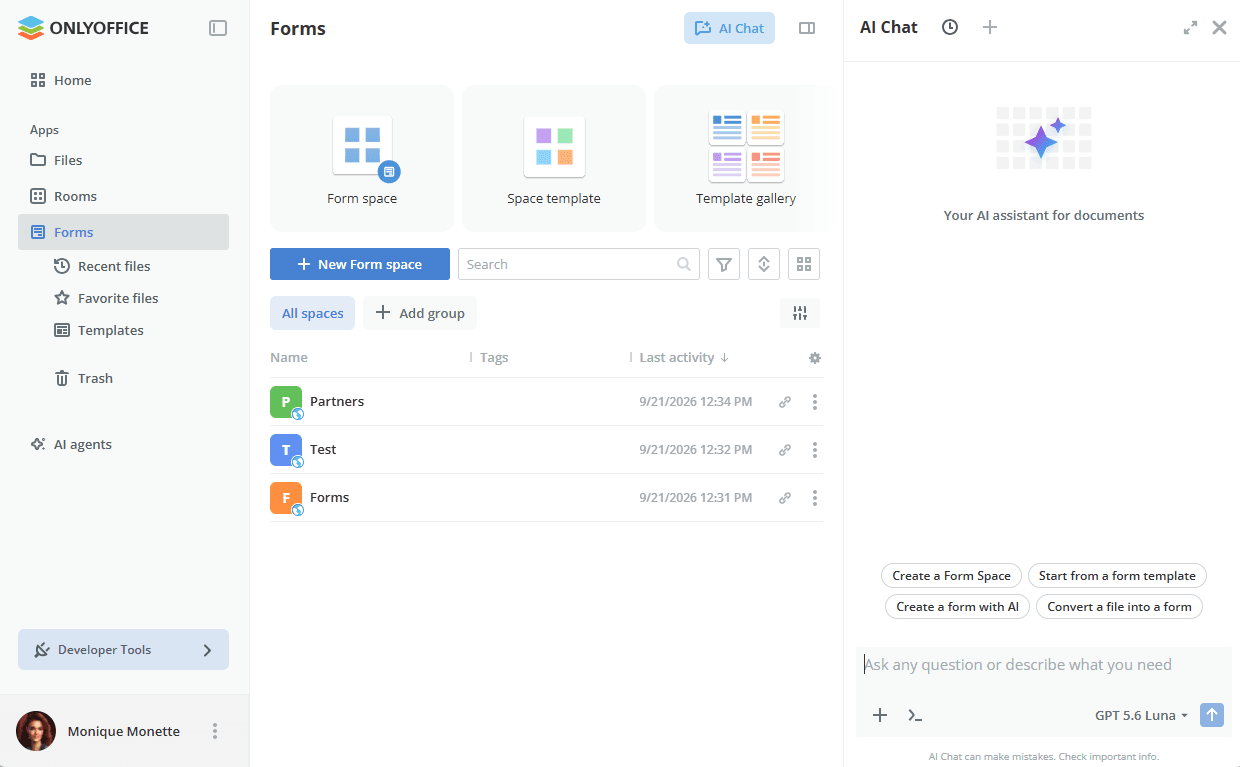
Click the AI Chat tile at the top of the page or the AI Chat button in the upper right corner to open the AI chat panel. When no file is attached to the prompt, the chat offers the ready-made prompts that concern the spaces.
You can also enter your own prompt in the Ask any question or describe what you need field, and select the AI model to use below it. To attach a certain form or response spreadsheet to the prompt instead, use the Ask AI option of the file context menu, as described in the Managing and editing forms in a Forms space article. Read more about using AI agents.
Managing the storage quota
The Storage / Quota property on the Details tab displays how much space the forms take and the limit set for the space. Click the value to change the limit.
It is also possible to select one or more spaces in the list and use the Change quota or Disable quota buttons on the top toolbar.
If the storage quota has been exceeded, a notification banner appears in the space header, and the documents open in view-only mode.
Deleting spaces
To delete a Form space, click the icon next to the space name and select the Delete space option, or select the spaces in the list and use the Delete button on the top toolbar.
If you do not want to delete the space but no longer want to participate in it, use the Leave the space option. The space owner cannot leave the space.