Creating Form spaces
A Form space is a space in the Forms app where you store PDF forms, invite users to fill them out, and collect the completed copies. This article describes how to create a Form space. To learn how to manage the created spaces, refer to the Editing Form spaces article.
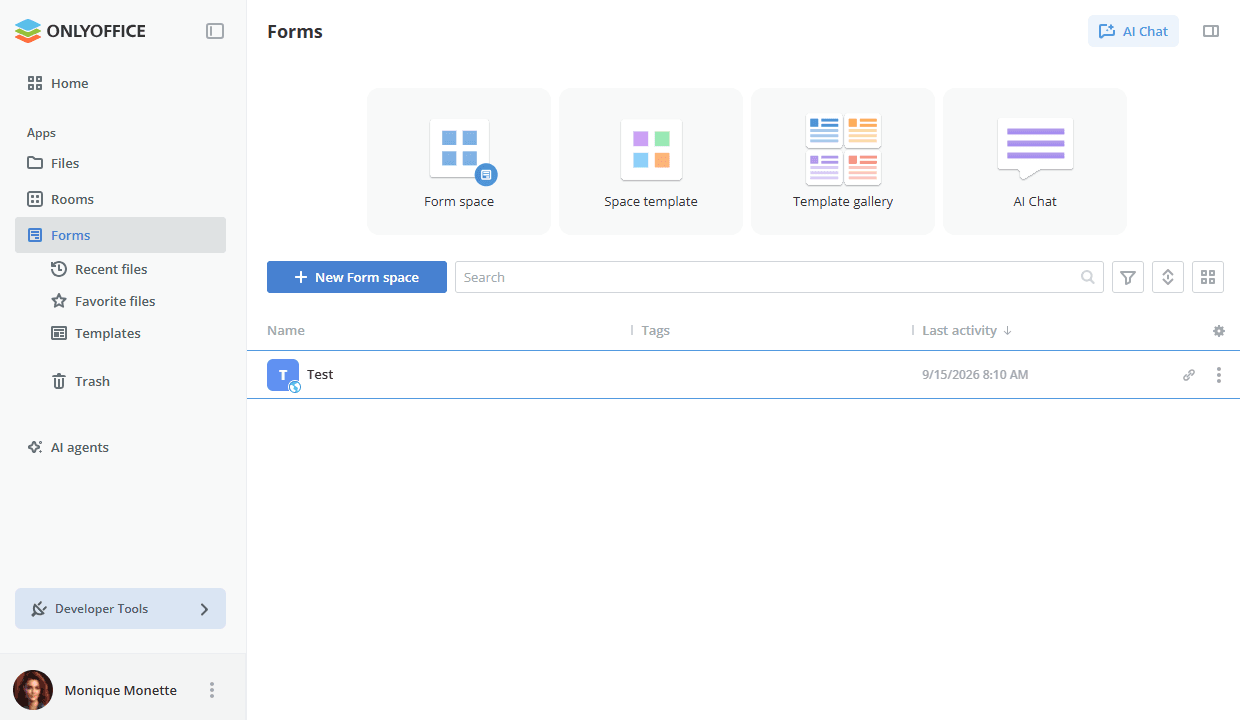
The Forms app displays the quick actions at the top of the page:
-
Form space – create a new Form space.
-
Space template – work with the space templates stored in the Templates section.
-
Template gallery – create a Form space on the base of one of the ready-made PDF form templates.
-
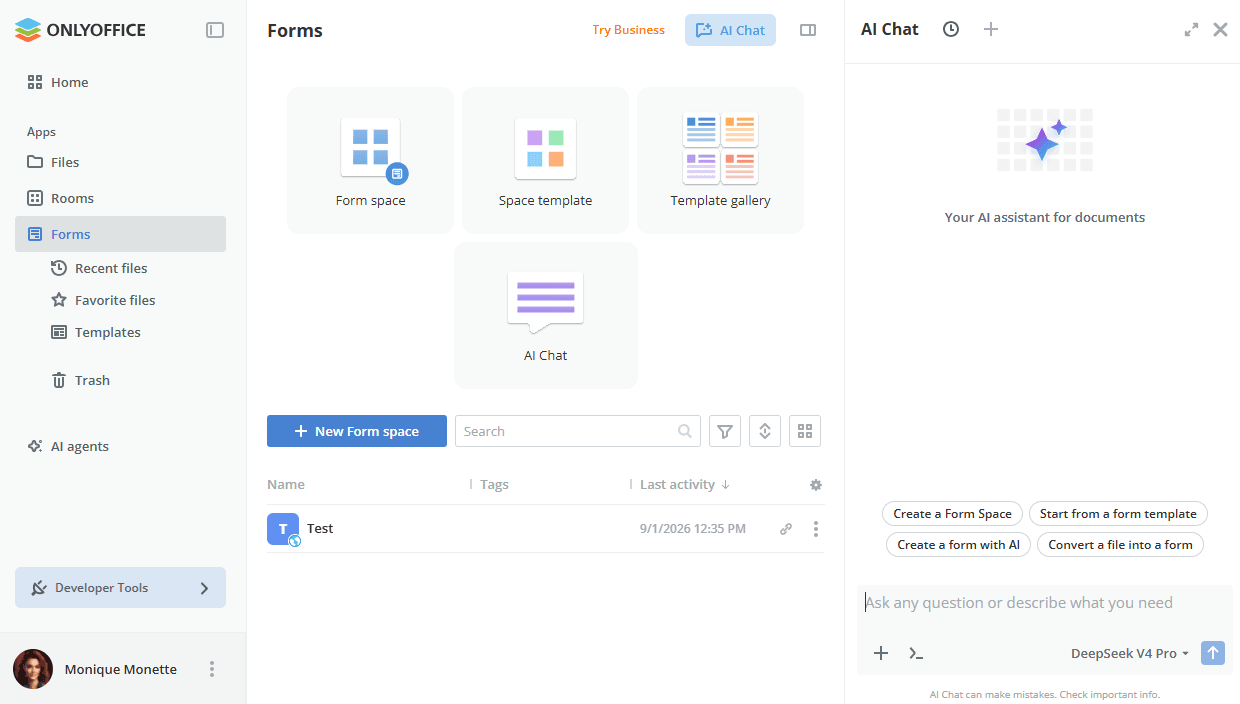
AI Chat – open the AI chat panel, where the Create a Form Space, Start from a form template, Create a form with AI, and Convert a file into a form prompts are offered. Read more about using AI agents.
Creating a new space
To create a new Form space:
-
Go to the Forms app and click the New Form space button, the
 Plus icon, or the Form space tile.
-
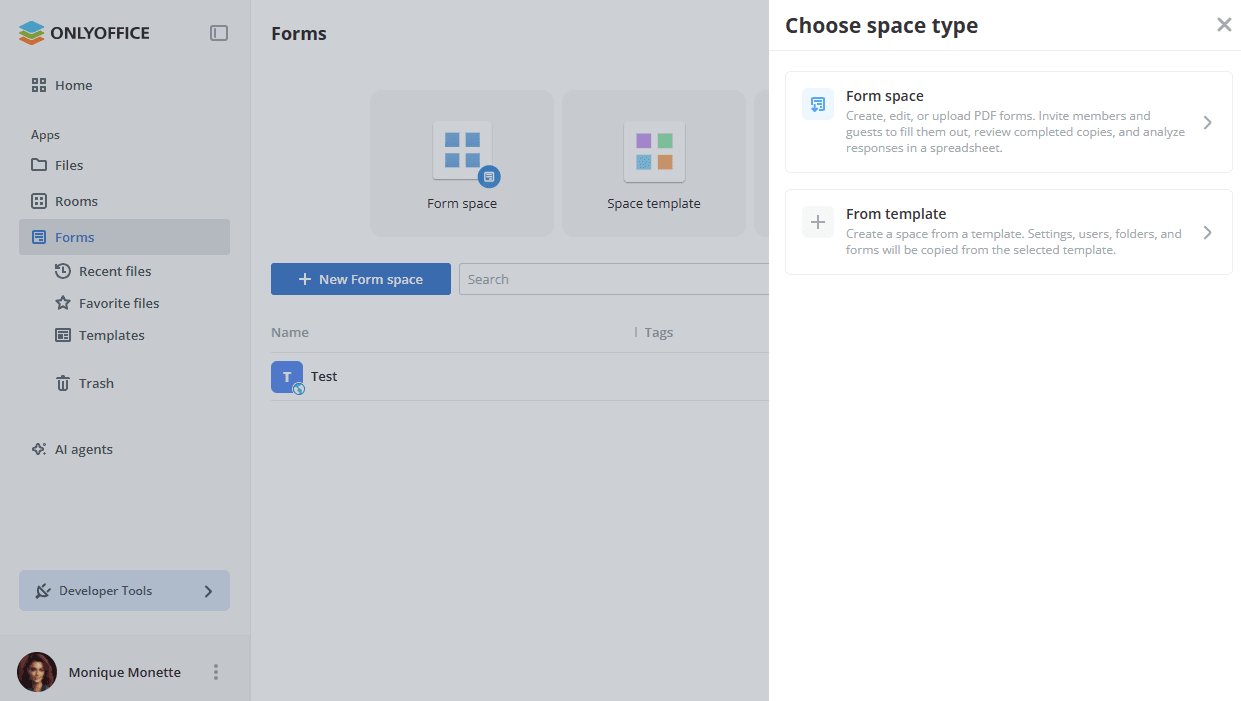
In the Choose space type panel, select one of the following options:
-
Form space – create, edit, or upload PDF forms. Invite members and guests to fill them out, review completed copies, and analyze responses in a spreadsheet.
-
From template – create a space from a template. The settings, folders, and forms are copied from the selected template. Users who have access to the template are not added to the created space and need to be invited separately.
-
-
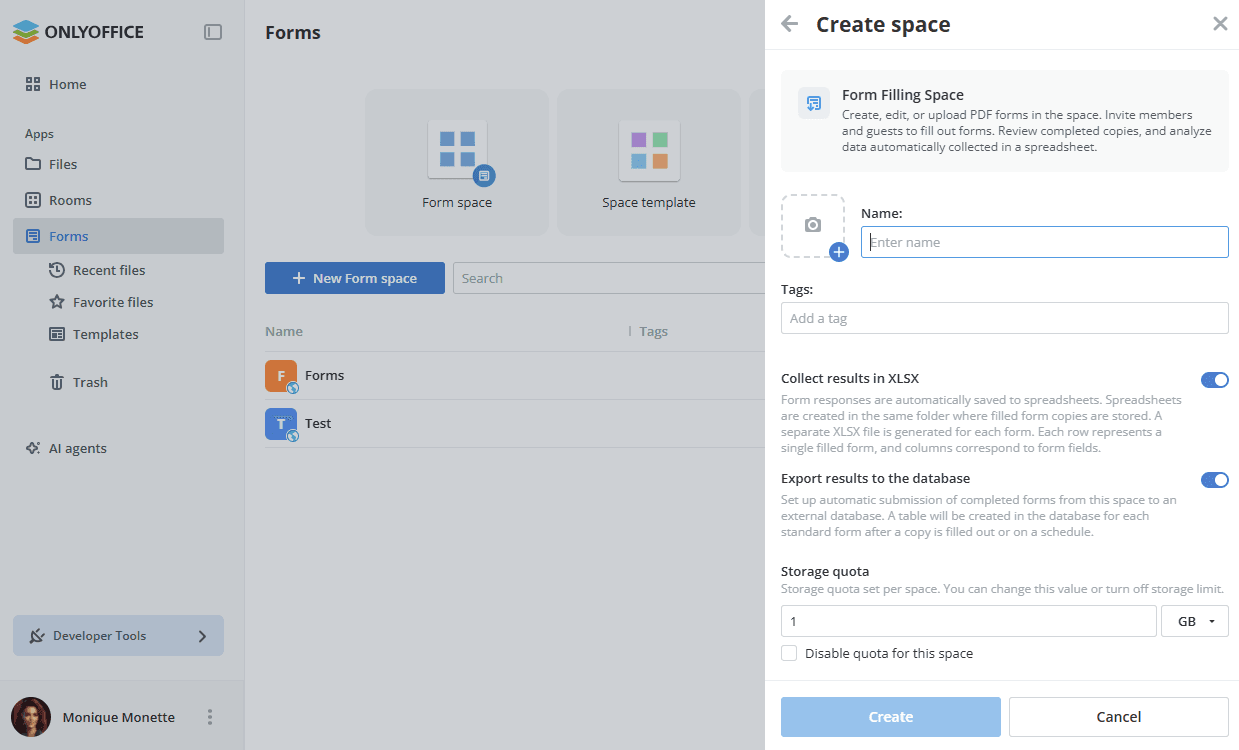
Enter the space Name.
-
Optionally, upload an icon for the space using the camera icon to the left of the name field.
-
Optionally, add tags in the Tags field.
-
Configure the data collection options:
-
Collect results in XLSX – when enabled, form responses are automatically saved to spreadsheets. Spreadsheets are created in the same folder where the filled form copies are stored. A separate XLSX file is generated for each form. Each row represents a single filled form, and columns correspond to form fields.
-
Export results to the database – when enabled, completed forms from this space are automatically submitted to an external database. A table is created in the database for each standard form after a copy is filled out or on a schedule.
noteThis option requires a database connection configured under Settings -> Integration -> Third-party services. If no connection exists, the No database connections configured notice with the Go to Integrations link is displayed in the panel. For setup instructions, read the Database connection article.
-
-
Click Create.
The created space appears in the list with the Name, Tags, and Last activity columns. The data collection options can be changed later using the Edit space option, as described in the Editing Form spaces article.
Creating spaces from templates
A space template stores the settings, folders, and forms of a space, so that the same structure can be reused for the next collection of responses without configuring it again. Users who have access to the template are not added to the created space and need to be invited separately.
To create a space from a template:
- Go to the Forms app and click the New Form space button.
- In the Choose space type panel, select the From template option.
- Choose the necessary template.
- Change the name, icon, tags, and the data collection options if necessary.
- Click Create.
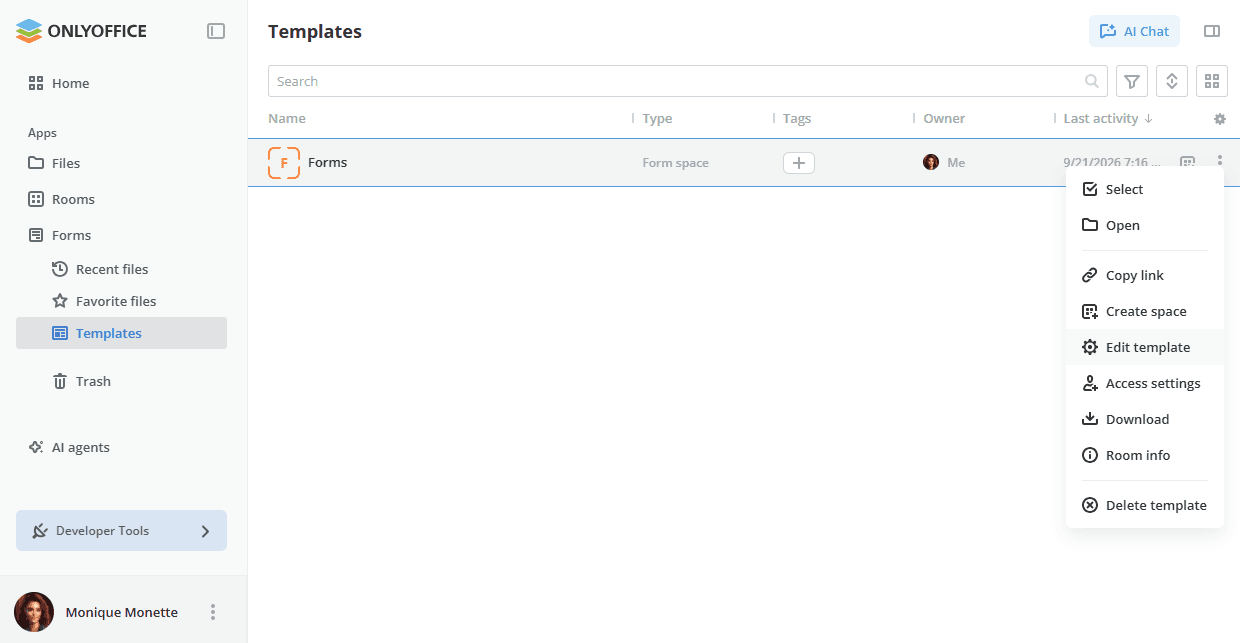
The available templates are stored in the Templates section of the left-side panel and can also be accessed via the Space template tile at the top of the Forms app.
Saving a space as a template
Any existing Form space can be saved as a template so that its structure becomes reusable:
- Use the right-click menu or click the
 icon next to the space in the list and select the More options ->
 Save as template option. You can also open the space and use the More options -> Save as template option in the menu within the selected space.
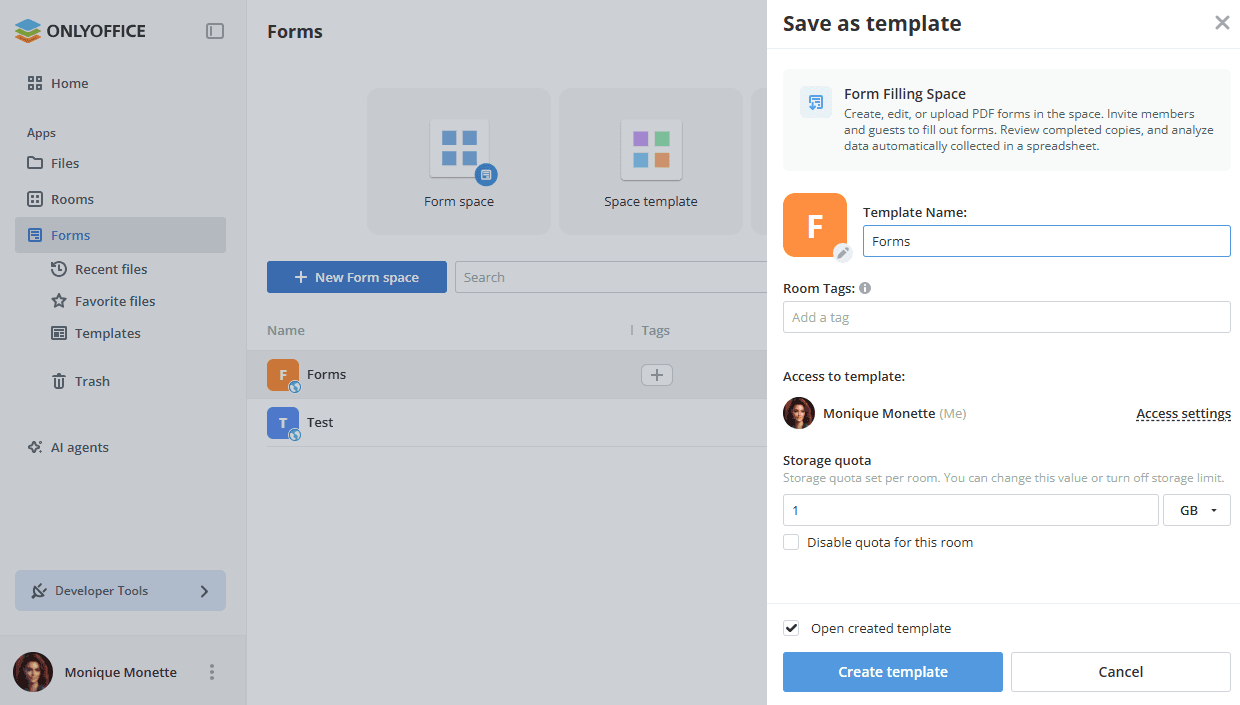
- In the Save as template panel, enter the Template Name. By default, the name of the space is used. Click the pencil icon on the template logo to change the icon.
- Add Room Tags if necessary.
- The Access to template section displays who can use the template. Click Access settings to change it.
- Set or disable the Storage quota for the spaces created from this template.
- Leave the Open created template box checked to open the template right after it is created.
- Click the Create template button. Click Cancel to close the panel without saving.
The created template appears in the Templates section and can be used as the From template option described above.
What's next
- To add forms to the created space, refer to the Managing and editing forms in a Forms space article.
- To invite users to fill out the forms, refer to the Inviting users to Form spaces article.
- For the whole form collection scenario from start to finish, refer to the Working with Form spaces article.