Managing and editing documents in Files
The Files app is where your own documents are stored. You can upload the existing files and folders, create new ones, and organize them into folders. It is also possible to manage versions, lock files for co-authors, rename documents, move or copy them to another location, and delete the unnecessary files.
The documents stored in the Files app can be shared with other workspace users or via an external link, or used as a base for a new room.
Users can work with existing documents, spreadsheets, presentations, PDF files, and ebooks, as well as view diagrams, multimedia, and image files using the ONLYOFFICE Online Editors.
It is also possible to adjust the file management settings.
This article describes the work with the documents stored in the Files app. To learn how to manage the documents stored in rooms, refer to the Managing and editing documents in Rooms article.
Uploading files and folders
To upload a file,
- open the Files app and go to the folder where you want to upload your files,
- click the New button above the list of documents,
- select the
 Upload files option from the menu,
- choose the files you want to upload in the file manager window and click the Open button.
Or simply drag-and-drop a file or several selected files from your computer to the working area to upload them to your workspace even more easily. In the middle of the screen, a floating button appears with information about where the selected element will be placed. When the uploading process starts, the floating button moves to the right corner.
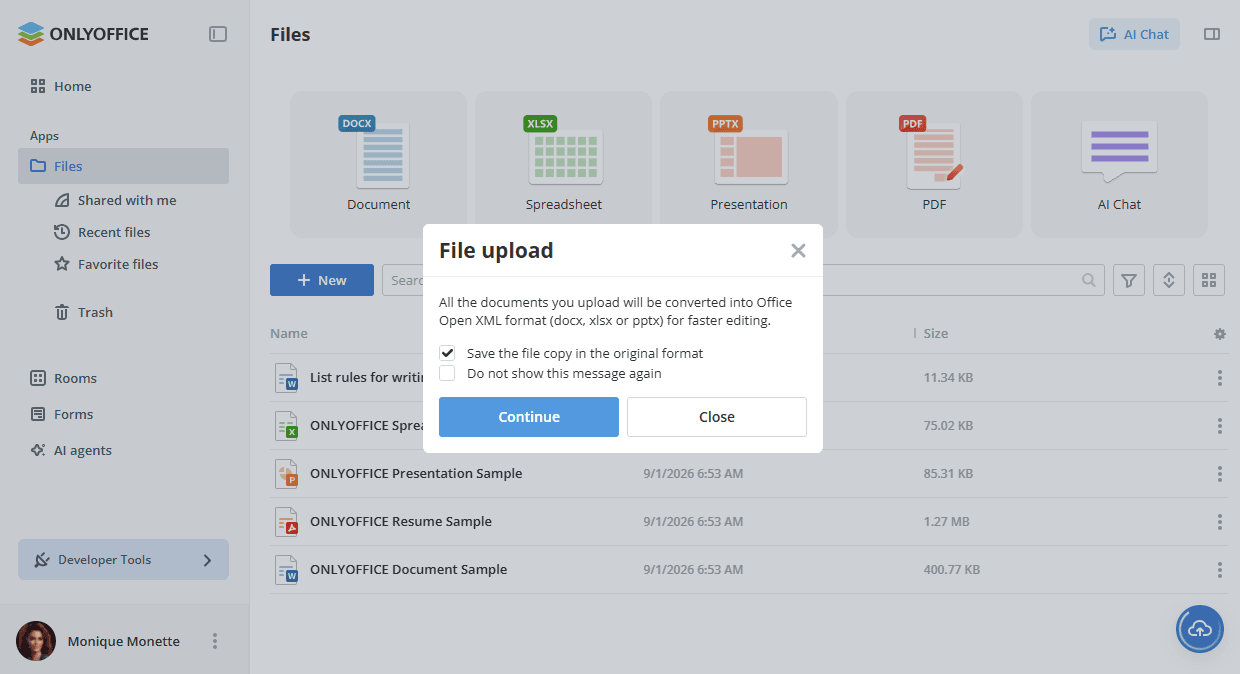
If the file format differs from Office Open XML, the file will be converted into the .docx/.xlsx/.pptx format for faster editing. The File upload window appears where you will be able to select whether you want to save both files (a file in its original format and a file in the Office Open XML format). If you do not need files in the original format, you can clear the Save the file copy in the original format checkbox. It will be taken into consideration during the next uploading operations, and a converted file will be added as a new version of the original file rather than as a new separate file. Select the Do not show this message again checkbox if you do not want this window to appear during the next uploads. Click Continue to start uploading, or Close to cancel it.
If an original file is protected with a password, the password will be required to convert the file. If you click the  Convert & Open icon to the right of the uploaded document in the file list, a new window will open where you need to enter a password.
If the file with the same name already exists in the folder, a copy of the file will be created by default.
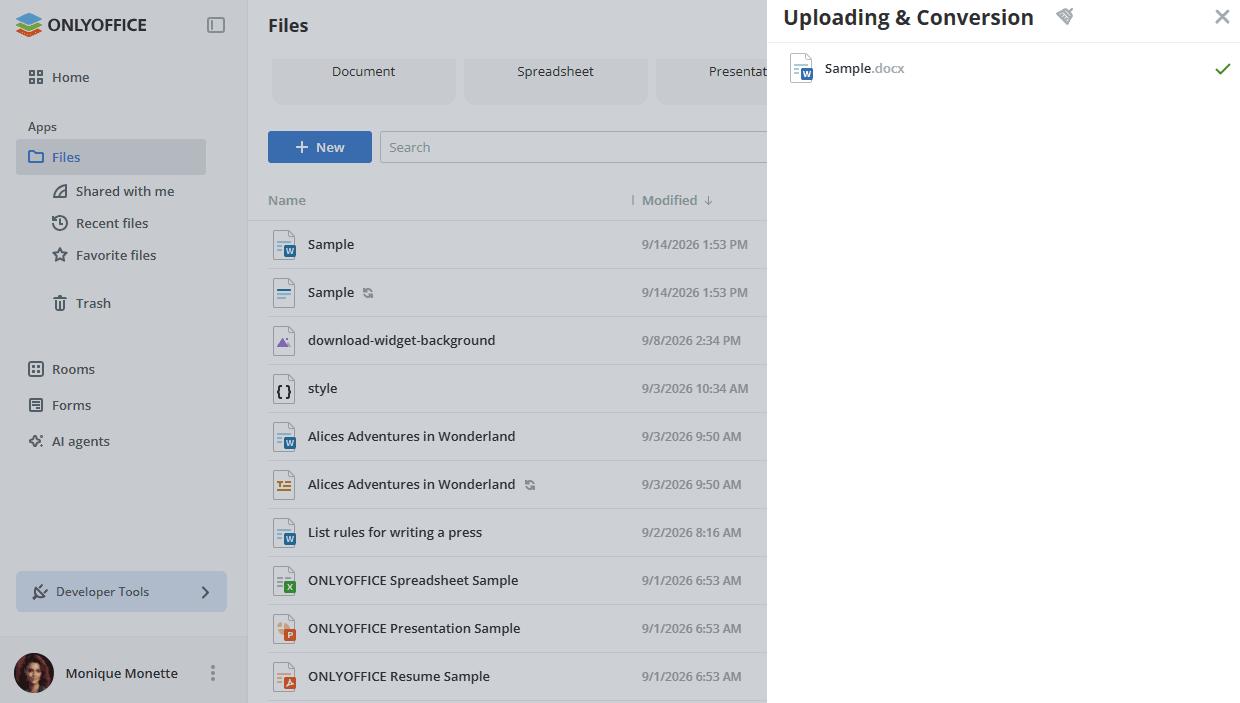
The current status of uploads and conversions can be found by clicking the  icon. The Uploading & Conversion panel will open. It displays documents that have already been uploaded and converted, as well as the ones that are still in the queue.
If an error occurs during the upload process (for example, due to a network failure, timeout, or internal server error), you can click Retry next to the necessary file to upload the file again.
To cancel uploading a file, click the  cross icon next to the file. To stop uploading all files at once, click the
 gray cross icon in the upper right corner. To clear the Uploading & Conversion panel, click the
 icon. The history of uploaded and converted documents will be deleted.
To upload a folder that contains nested subfolders and documents:
- click the New button above the list of documents,
- select the Upload folder option from the menu,
- choose the folder you want to upload in the file manager window and click the Open button.
This can also be done by dragging the necessary folder from the file manager window to the working area.
Creating new files and folders
To create new files or folders,
-
open the Files app and go to the folder where you want to create a new file,
-
click the New button above the list of documents, or right-click within the working area and select one of the following options:
 New document to create a new text document,
 New spreadsheet to create a new spreadsheet,
 New presentation to create a new presentation,
 PDF Form -> Blank to create a new blank
PDFform, or PDF Form -> From text file to create it on the base of a text file uploaded beforehand, New folder to create a new folder,
- More ->
 Draw.io to create a new diagram using the Draw.io plugin,
- More ->
 Markdown to create a new .md file using the Markdown plugin,
- More ->
 URL to create a new URL file using the URL plugin. URL files contain an external link and can be opened directly from the file list.
- Template gallery to create a file on the base of one of the ready-made templates.
-
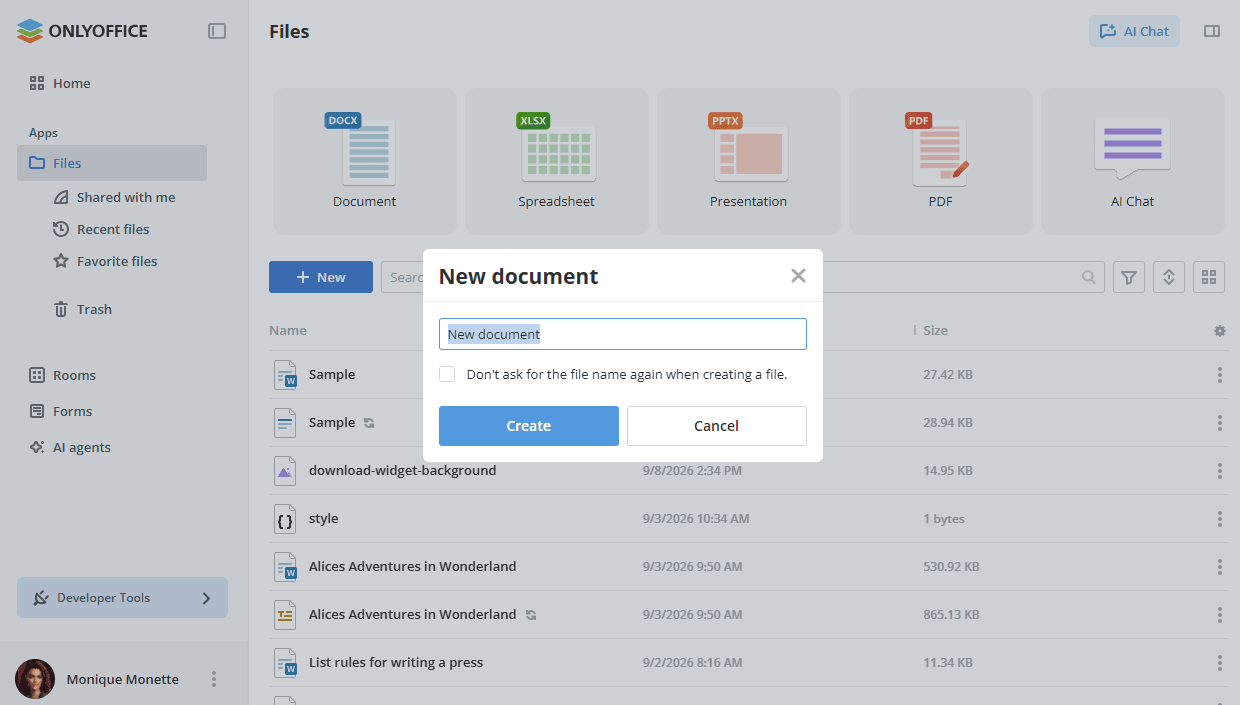
enter a name for your file or folder into the appropriate field and click the Create button.
noteif you do not want to enter the file name, you can select the Don't ask for the file name again when creating a file checkbox or use the corresponding option in the file management settings.
Managing documents
To quickly find a necessary document, make use of the Search options panel at the top of the document list.
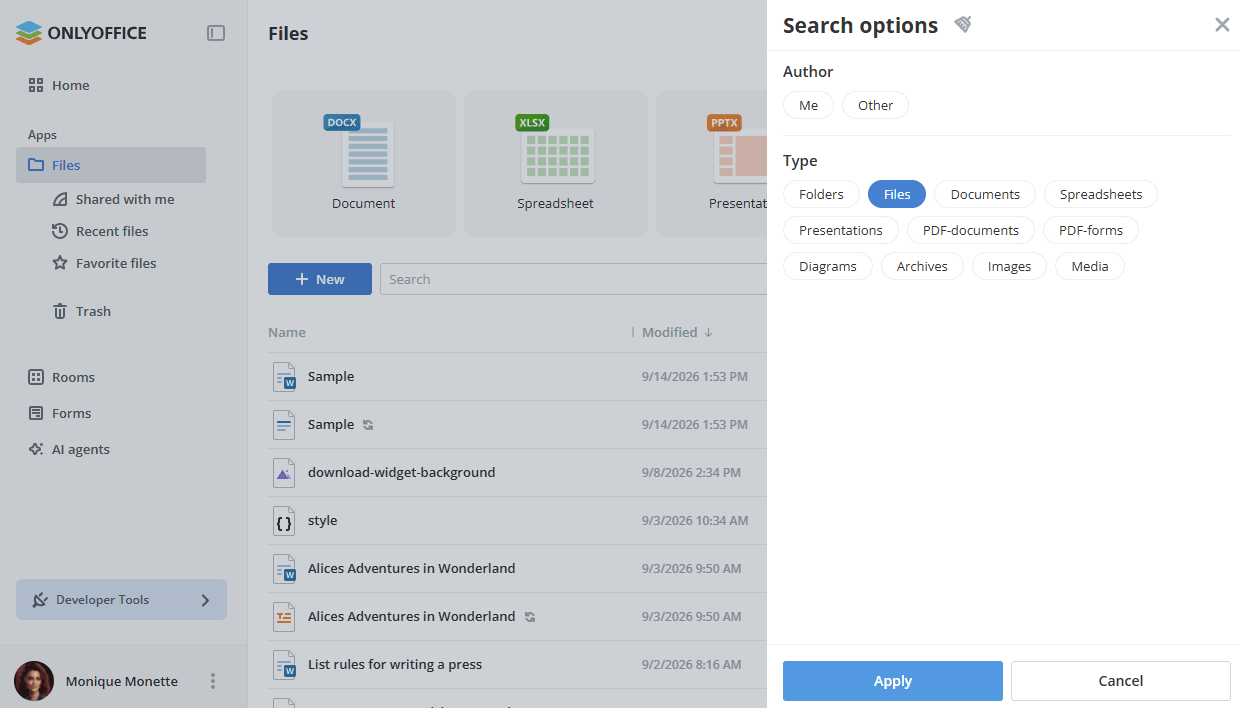
Click the  button to open the Search options panel, and specify the necessary search and filter parameters:
- To filter items by Author, click Me or use the Other option and select the necessary user from the list.
- To filter items by Type, choose one of the following options: Folders, Files, Documents, Spreadsheets, Presentations, PDF-documents, PDF-forms, Diagrams, Archives, Images, Media.
- Click the Apply button to apply filters, or Cancel to close the panel. To clear the filter, use the
 icon next to the panel title.
Enter a document title, entirely or partially, in the search field and press the Enter key to display the found item(s). If you want to go to the folder where the found file is located, right-click the file and use the  Open location option. To go to the parent folder that is one level up from the current folder, use the
 arrow.
Sort documents by parameters (Name, Last modified date, Size) using the  button. Click the arrow next to the selected parameter to change the sort order.
Use the  or
 buttons on the right to switch between the available display modes: Thumbnails view and Compact view. Thumbnails are not generated for connected third-party services.
The corresponding Thumbnails view display mode:
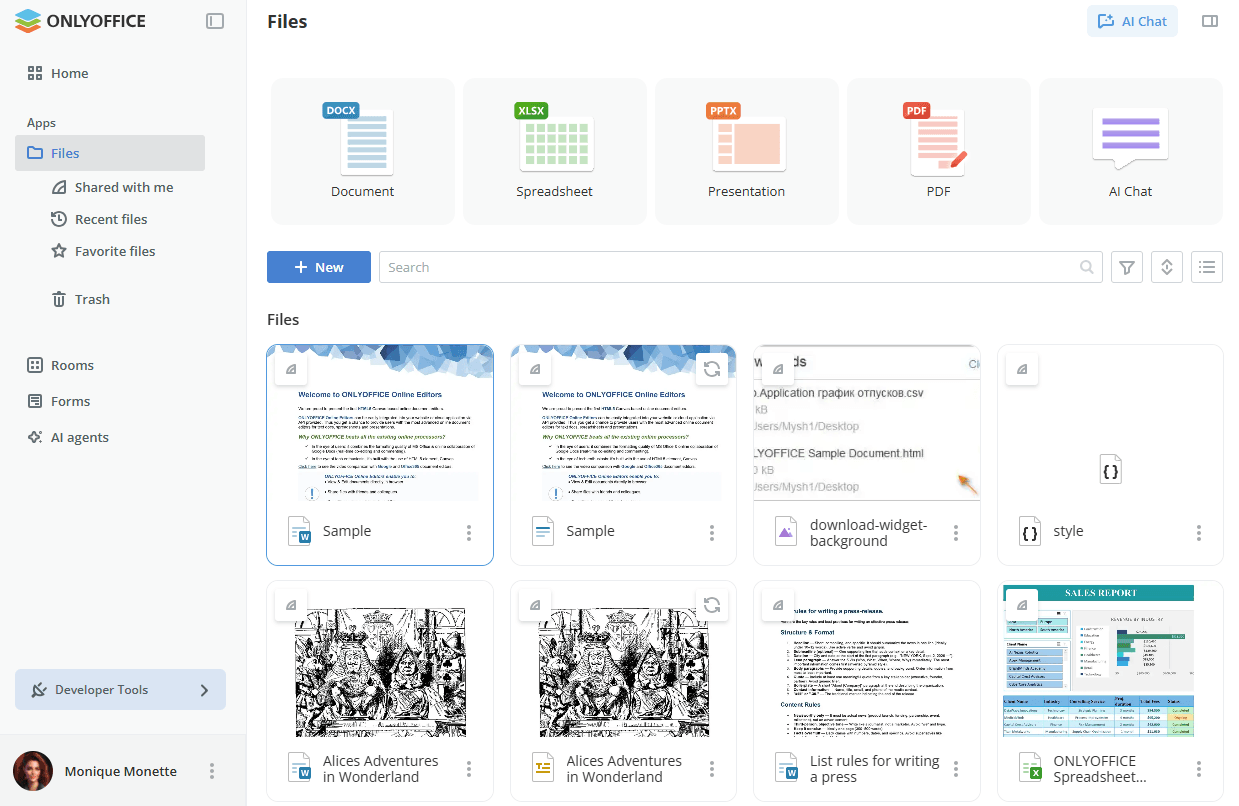
Use the  icon to display or hide the Author, Created, Modified, Size, Type columns in the document list (Compact view).
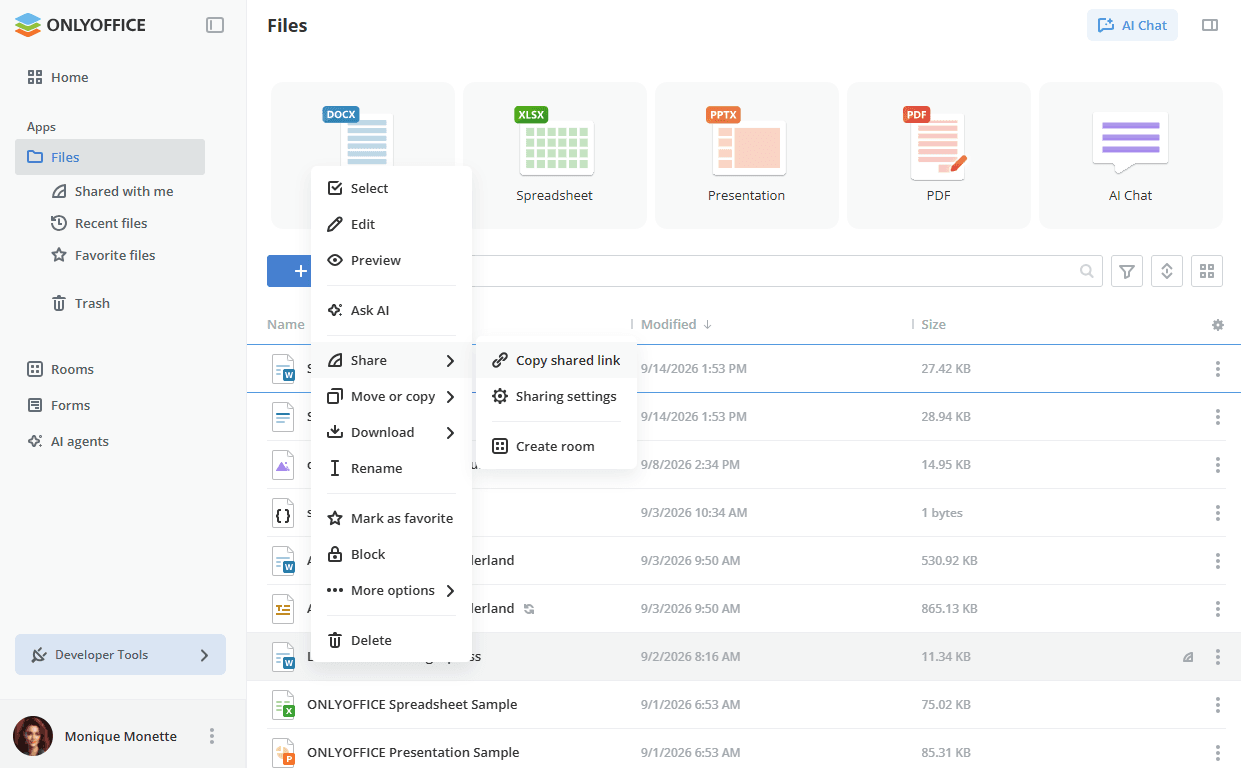
Using the context menu, you can perform the following operations with your documents:
-
 Select to select the file in the list.
-
 Edit to open the document for editing in a new tab.
-
Edit diagram (available for the
.drawiofiles) to open the diagram for editing using the Draw.io plugin. -
 Convert to PDF (available for the
.docx,.xlsx,.pptxfiles) to convert documents, spreadsheets, and presentations to PDF using the PDF-Converter plugin. -
 Convert to text (available for audio and video files) to convert speech from audio and video files into text using the Speech-to-text plugin.
-
 More options -> Edit/Preview markdown (available for the
.mdfiles) to open the file for editing/viewing using the Markdown plugin. -
 Preview to open the document in the Preview mode in a new tab.
-
 Ask AI to attach the document to a prompt in an AI chat. After clicking this menu item, the AI agents selection panel will be opened. Once selected, the agent will be opened in the chat tab, and the file will be attached to it. This option is available for all file formats that can be attached to the AI chat (
.txt,.docx,.xlsx,.csv,.pdf). -
 Share - this menu entry contains the following sub-entries:
 Copy shared link to get a link to the file for other workspace users or for anyone who knows the link.
 Sharing settings to open the sharing settings to provide access to the file via a link.
 Create room to create a new room on the base of the selected documents/folders. After creating the room, the selected files/folders will be copied to the created room.
-
More options - this menu entry contains the following sub-entries:
-
 File info to open the Info panel which contains the following tabs:
- Share - the links the file is shared via and the list of the users who have access to it. Use the Create and copy option to generate a new shared link.
- History - the recent changes made to the file, grouped by day.
- Details - the file preview and its properties: Owner, Type, File extension, Size, Modification date, Last modified by, Creation date, Versions, Comments. Use the Edit link below the comment to change it.
To open the same panel you can click the
 icon located in the top right corner.
-
 Show version history to open the version history list, where each version is described in detail: Version number, Date and time, Author, and Comments are listed. The
 menu in the version history list also allows you to Open the version for viewing, Edit comment for a particular version, Restore or Download the necessary version.
-
-
 Enable custom filter (available for the
.xlsxfiles) to enable the Custom filter option so that a user can view .xlsx files according to their own filter. However, other workspace users cannot add new or remove existing filters previously applied by the spreadsheet creator. In addition, the filters applied by a user with Custom filter permissions will be displayed for them only. The displayed filter results will remain unchanged for the others. When the Custom filter is enabled, the icon is displayed next to the file in the list.
-
Disable custom filter (available for the
.xlsxfiles) to disable the previously enabled Custom filter option. -
 Block/Unblock the file to block or unblock it for further editing by other users with the corresponding editing rights.
-
 Mark as favorite to add the file to the Favorite files section.
-
 Remove from favorites to remove a file from the Favorite files section.
-
 Open location (available in the Favorite files and Recent files sections) to switch to the section that contains this file.
-
 Download - this menu entry contains the following sub-entries:
-
Original format to download the file in the original format to your computer's hard disk drive.
-
 Download as to download the file in the selected format to your computer's hard disk drive.note
If several files are chosen for download, they will be packed in a .zip archive and saved onto your hard disk.
-
-
 Move or copy - this menu entry contains the following sub-entries:
 Move to another folder, room, or third-party storage. You can also create a new folder within the selected room by clicking the New folder button.
- Copy the file and move the created copy to the selected folder or room. You can also create a new folder within the selected location by clicking the New folder button.
 Duplicate the file in the current folder. Duplicated items have an index at the end of the name.
-
 Rename the file.
-
 Delete the file by moving it to Trash.
-
 Remove from list (available in the Recent files section) to remove the file from that list.
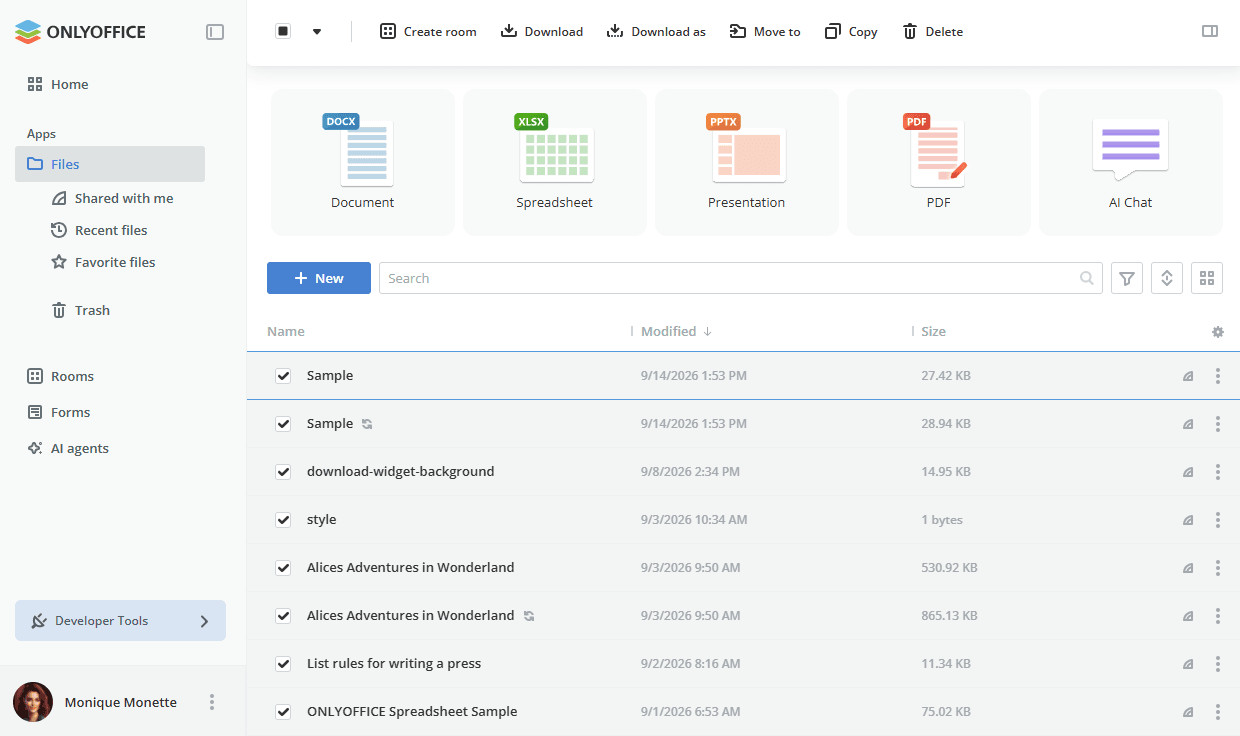
Group operations with files can be performed using buttons on the top or the context menu. To create a room from the selected files, download, move, copy, or delete several files at once,
- open the Files app by clicking the corresponding option at the left-side panel,
- hover over the file icon and select the checkboxes for the files you want to manage,
- click the needed button at the top depending on the operation you want to perform: Create room, Download, Download as, Move to, Copy, or Delete. The set of the buttons displayed depends on the operations available for the selected items.
Use the arrow next to the check box on the top panel to select the items by type at once: All, Images, Documents, Spreadsheets, Presentations, Files.
Using the Shared with me section
You can share separate files and folders stored in the Files app via a link, or individually with a certain workspace user. For more details, read this article.
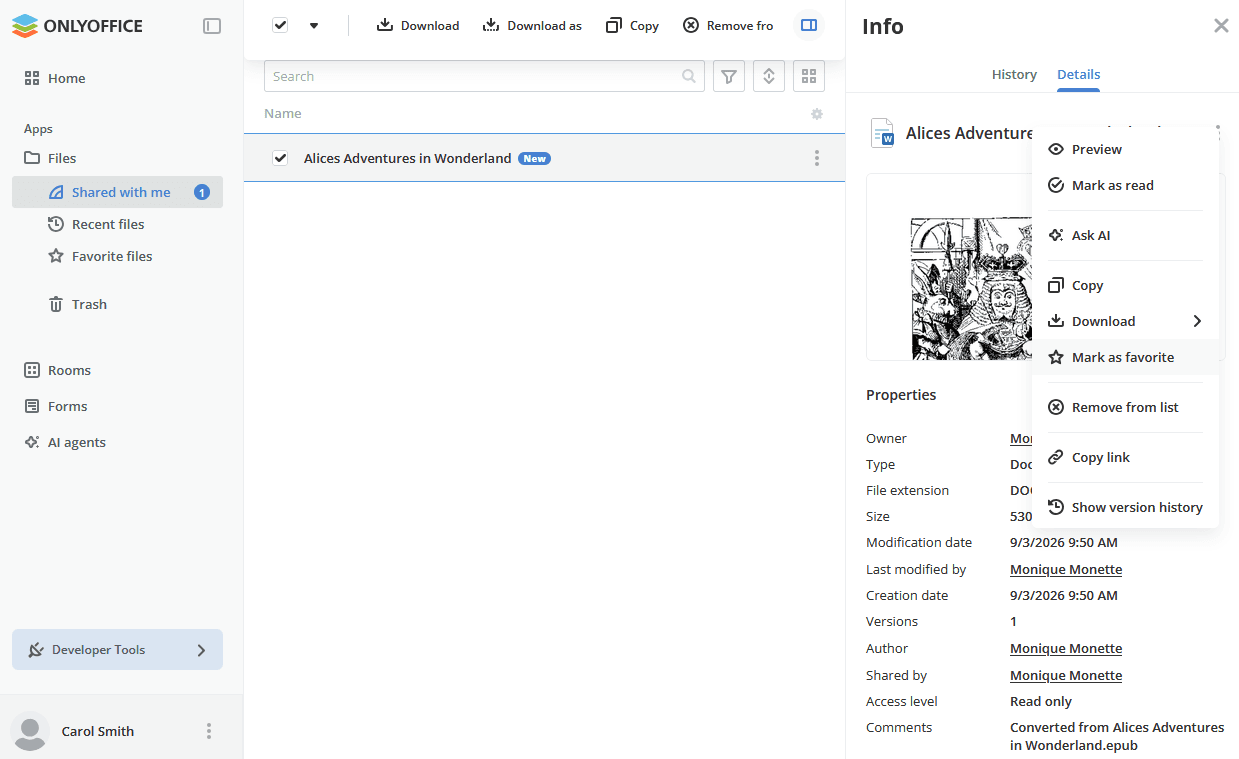
Files and folders shared with you by other workspace users from their Files app will be available in the Shared with me section. Files and folders shared via a link from rooms are not included in the Shared with me section.
The Access level column in the file list displays your permission level.
You can hide shared files and folders from the Shared with me list by clicking the Remove from list option in the context menu. In this case, your permissions in the Share panel will change to Deny Access.
If you get access to the same file or folder in multiple ways, a priority is applied based on the source:
- Personal rights are the strongest.
- Group rights are stronger than link rights.
- Link rights are the weakest.
For example, you are invited as a Viewer, but you also have a link with Full access. By following the link, you will have View only access.
If there are no personal rights, when you click on a link to a file, it will be displayed in the Shared with me section with the same rights that the link had. The permissions of the last opened link are remembered.
Adding documents to Favorite files
Each app has its own Recent files, Favorite files, and Trash sections on the left-side panel. In the Files app, the Favorite files section contains the files and folders you marked as favorites there. To add a file/folder to Favorite files:
- open the Files app,
- find the needed file/folder and click the icon next to it,
- select the Mark as favorite option.
OR
- open the needed document,
- click the
 Mark as favorite button in the upper right corner.
The file will be available in the Favorite files section and marked with the  icon in the file list.
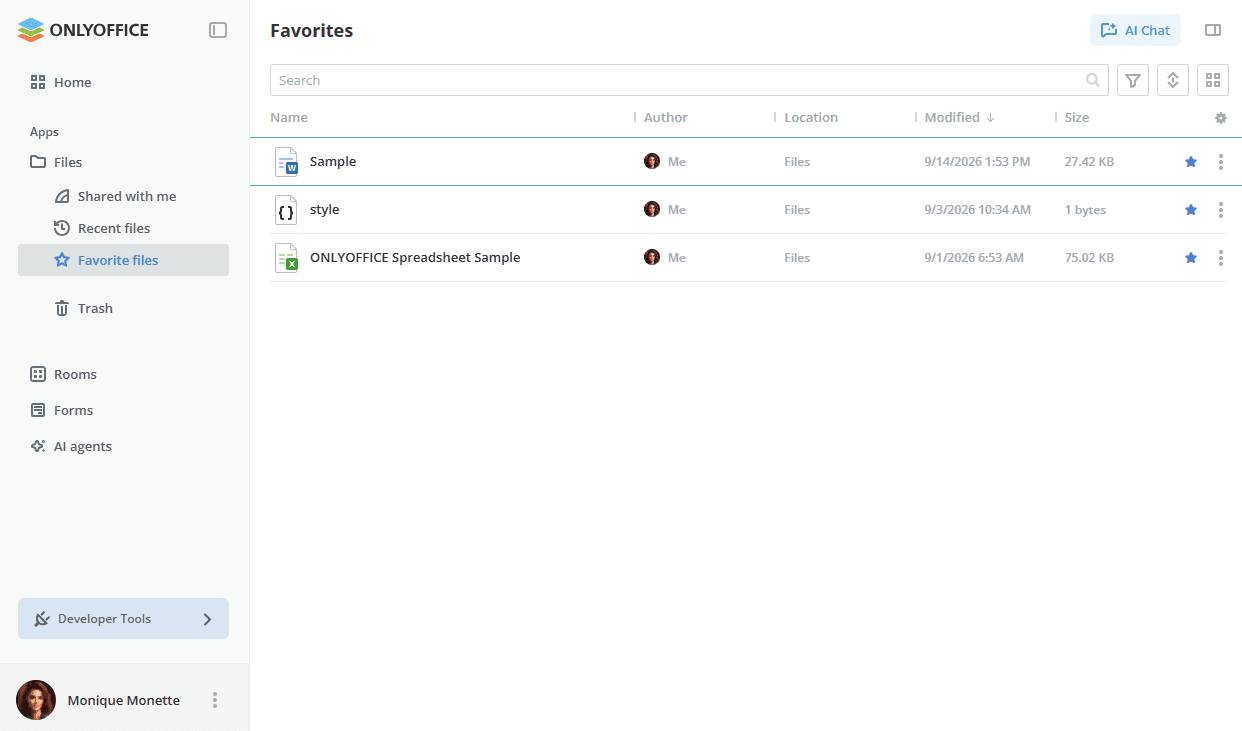
Within the Favorite files section, you can use the Open location option in the context menu to switch to the section that contains this file.
To remove an added file from Favorite files, use the Remove from favorites option in the context menu or click the icon next to the file name.
Using the Recent files section
The Recent files section lists the documents that you recently opened in the editor. It contains the latest 100 files, they are stored for 90 days.
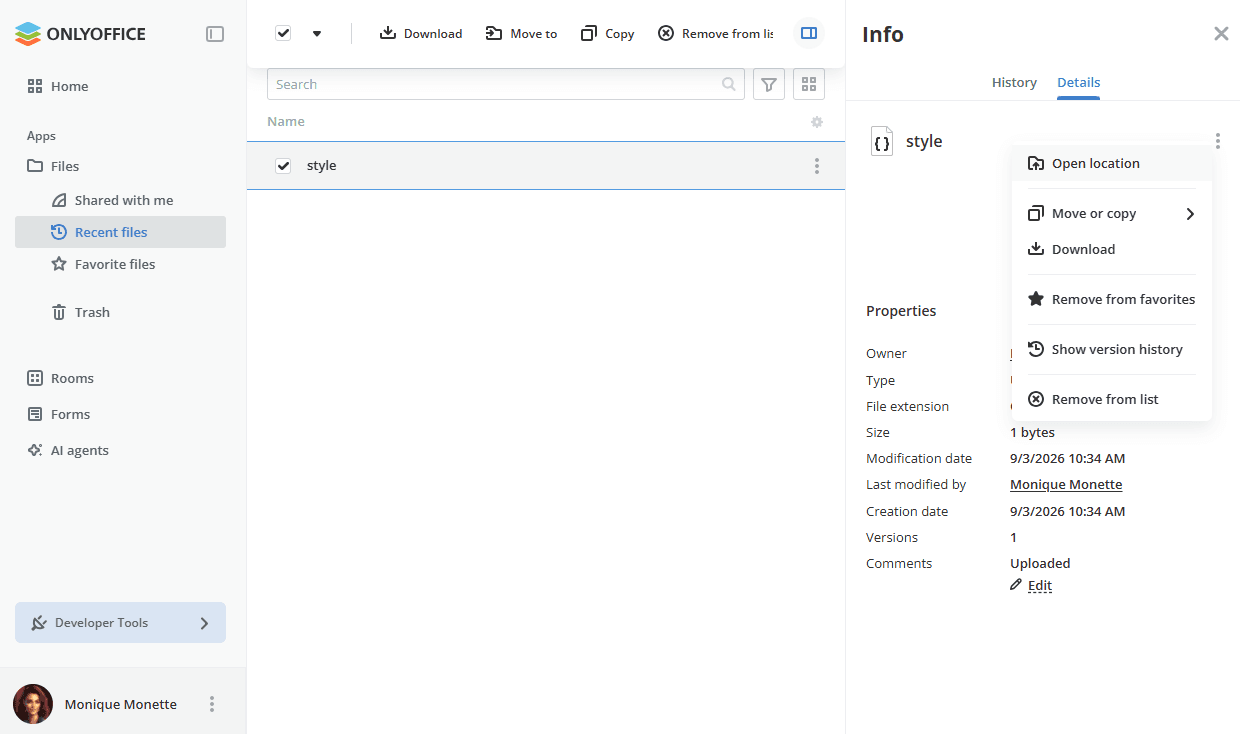
The context menu in the Recent files section has a limited number of items. You can perform the following actions: select the file, preview it, view its properties, such as info and version history, open its location (excepting files accessible by link), download the file, move or copy it, rename and remove the file from the list.
Viewing and editing documents
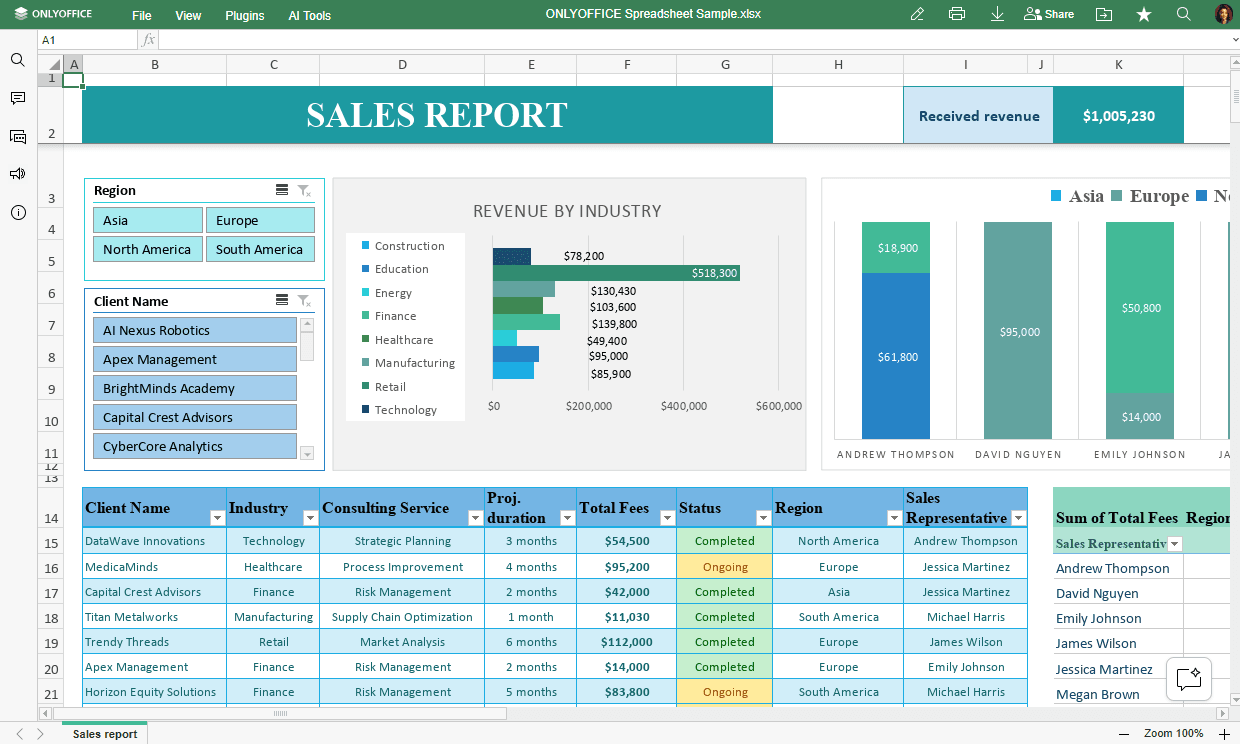
You can view and edit your text documents, spreadsheets, presentations, and PDF documents right in your workspace using the multi-functional ONLYOFFICE Online Editors.
You can also view:
- media files in the most popular formats, including
avi,mpg,mpeg,mp3,mp4,webm, etc. bmp,jpg,jpeg,png,gif,tif,tiff,webpimagesfb2,epubebooksvsdx,vssx,vstx,vsdm,vssm,vstmdiagrams
To edit a document, click its title or click the  icon next to it, select the Edit option, and it will be opened in a new tab of the Internet browser. If the file is currently being edited, you will see the colored pencil
 icon. To find out more about the editors' features, visit this page.
If the storage quota for a user has been reached, opening a document will launch it in view-only mode and a banner will be displayed to notify you that the quota has been exceeded. Additionally, if the quota is reached while a document is being edited and saved, a banner will appear in the editor notifying you of the quota limit.
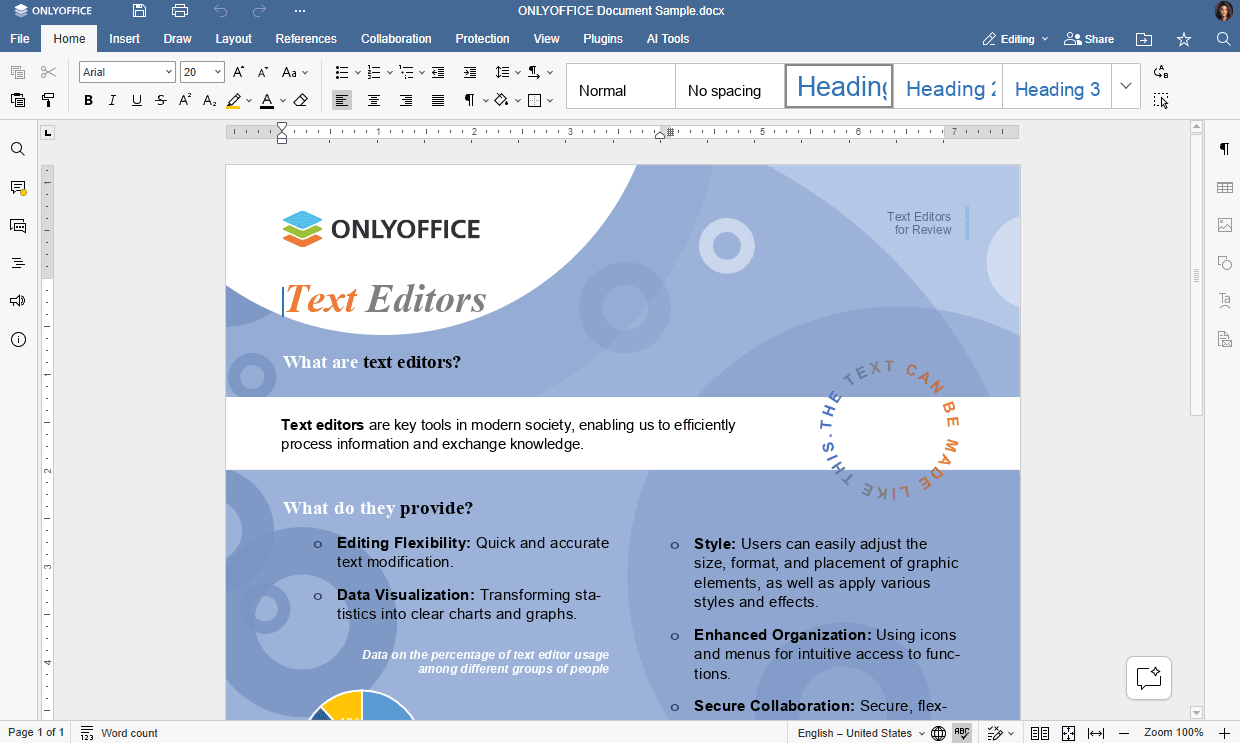
Once you edit a document, spreadsheet, or presentation and save the changes you made, both versions of your file will be available, so that you will be able to restore the previous one if necessary. To learn more about versions, refer to this article.
To view a file, click the icon next to it and select the Preview option. This will open the file with the corresponding ONLYOFFICE Viewer. Image files will open in the same window, while text files will be shown in a new tab of your Internet browser. The ONLYOFFICE Viewers offer standard tools to zoom in/out your files, adjust their size, navigate between their pages, download or print them.
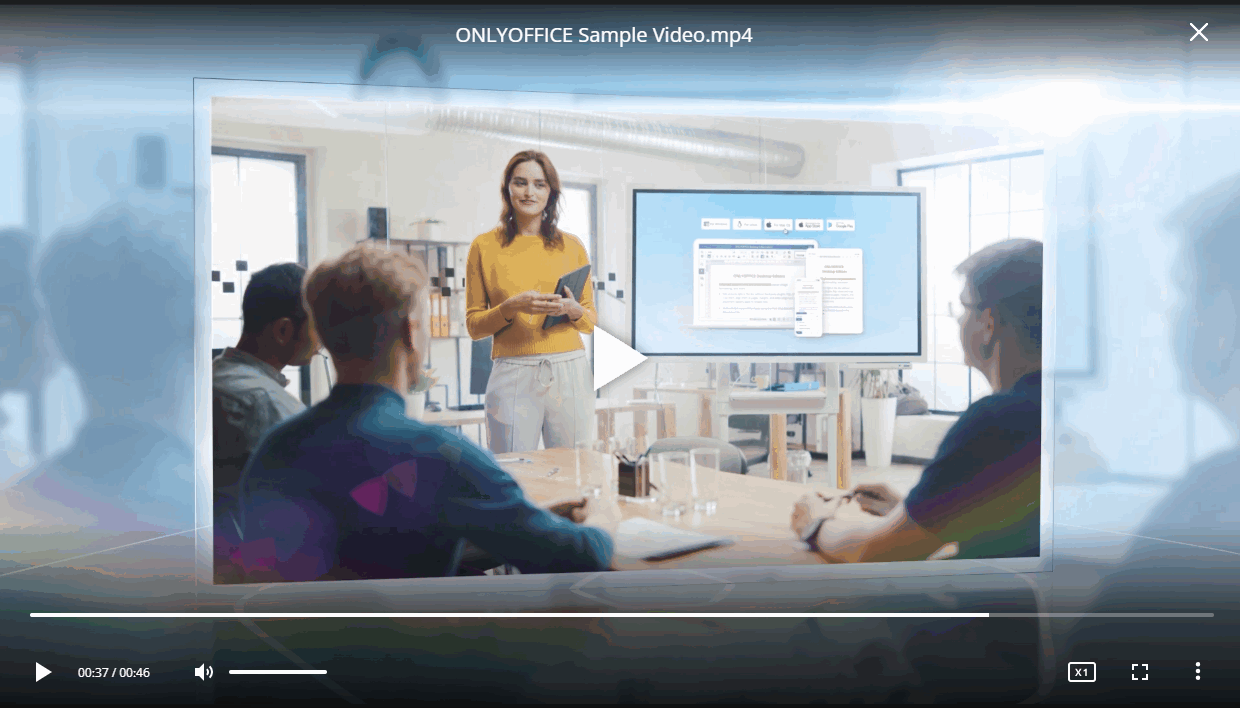
When viewing media files with the online viewer, you can use the corresponding buttons to start or pause the playback, adjust the volume level or switch to the full screen mode, go to the previous or next media file, download or delete the file.
When viewing image files with the online viewer, you can use the corresponding buttons to zoom in or zoom out the image, display the image actual size (if the image has been zoomed in or out), rotate the image clockwise or counterclockwise, go to the previous or next image, download or delete the file.
When viewing diagrams with the Diagram Viewer, you can navigate between pages, use zoom buttons, print or download the diagram. To learn more about the Diagram Viewer features, visit this page.