Working on documents securely in the Private Room
Introduction
The Private Room is designed to provide a secure environment for document editing and co-authoring.
The Private Room is a special section in the Documents module. Work in the Private Room is only available via ONLYOFFICE Desktop Editors.
Documents stored in the Private Room and data transferred during collaboration are encrypted with the AES-256 encryption algorithm to protect your data from unauthorized access.
The Private Room functionality is supported in the server version only, starting from Community Server v.11.0, Document Server v.5.5.4, and Control Panel v.2.9. The required version of Desktop Editors is v.5.6.
Step 1. Enable the Private Room settings in the Control Panel
The Private Room functionality is enabled by default in the Control Panel for the server version. The paid version 5.6 of Desktop Editors is also required for working with Private Rooms.
The full-access administrator or portal owner can disable or enable the Private Room in the Control Panel.
To access the Control Panel, sign in to your portal and click the Control Panel icon on the Start Page. Alternatively, you can go to the Portal Settings and select the Control Panel link in the left-side panel.
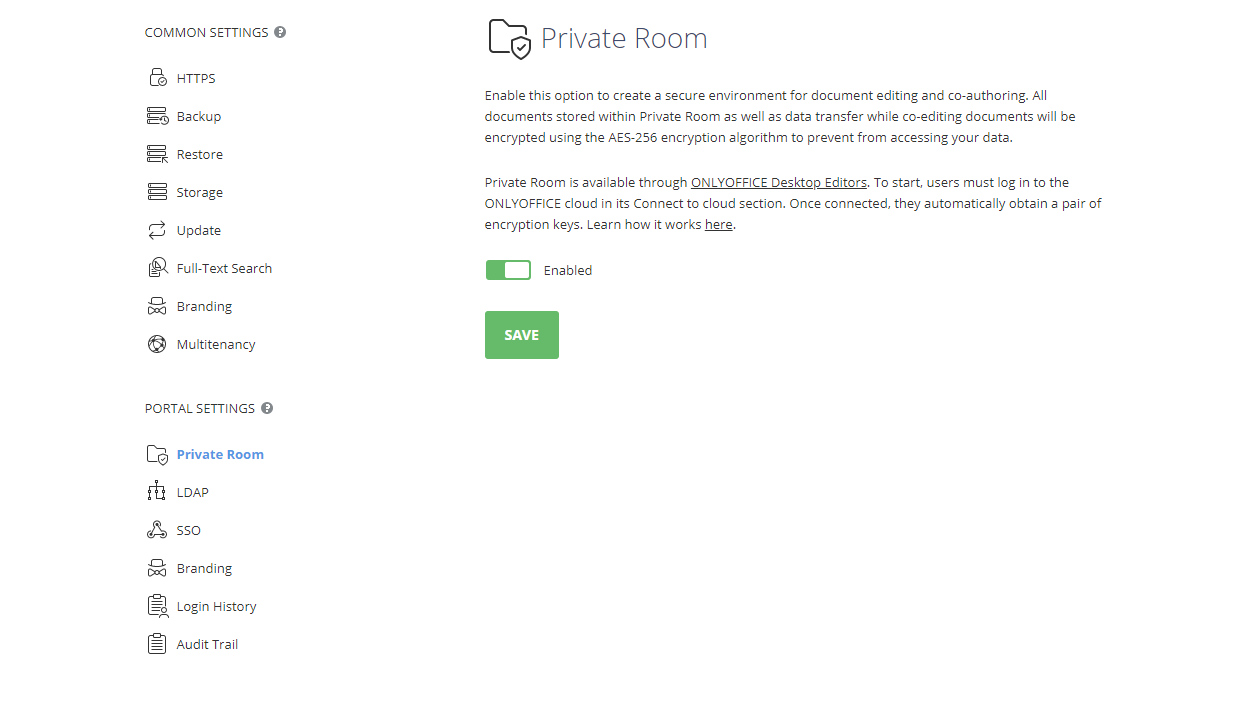
Go to the Private Room page in the PORTAL SETTINGS section of the Control Panel.
To disable or enable the Private Room, disable or enable the toggle and click SAVE. Private Rooms will be available for the current portal only.
Step 2. Connect to the ONLYOFFICE cloud via Desktop Editors
To start working in Private Rooms, users need to install the latest version of Desktop Editors with the Private Room support (version 5.6 or later).
If you try to open a document in the Private Room from a web browser, a new browser tab will open where you will be prompted to open or download Desktop Editors. If the application is already installed, click Open ONLYOFFICE Desktop in the browser pop-up window or click the Open ONLYOFFICE Desktop Editors button to launch Desktop Editors. If the application is not installed, click Download to download the latest version of Desktop Editors from our official site.
To connect to the ONLYOFFICE cloud:
- Launch Desktop Editors.
- In the main program window, select the Connect to cloud tab in the left sidebar.
- Click the ONLYOFFICE button.
- Specify your web office address in the new window.
- Click Connect now.
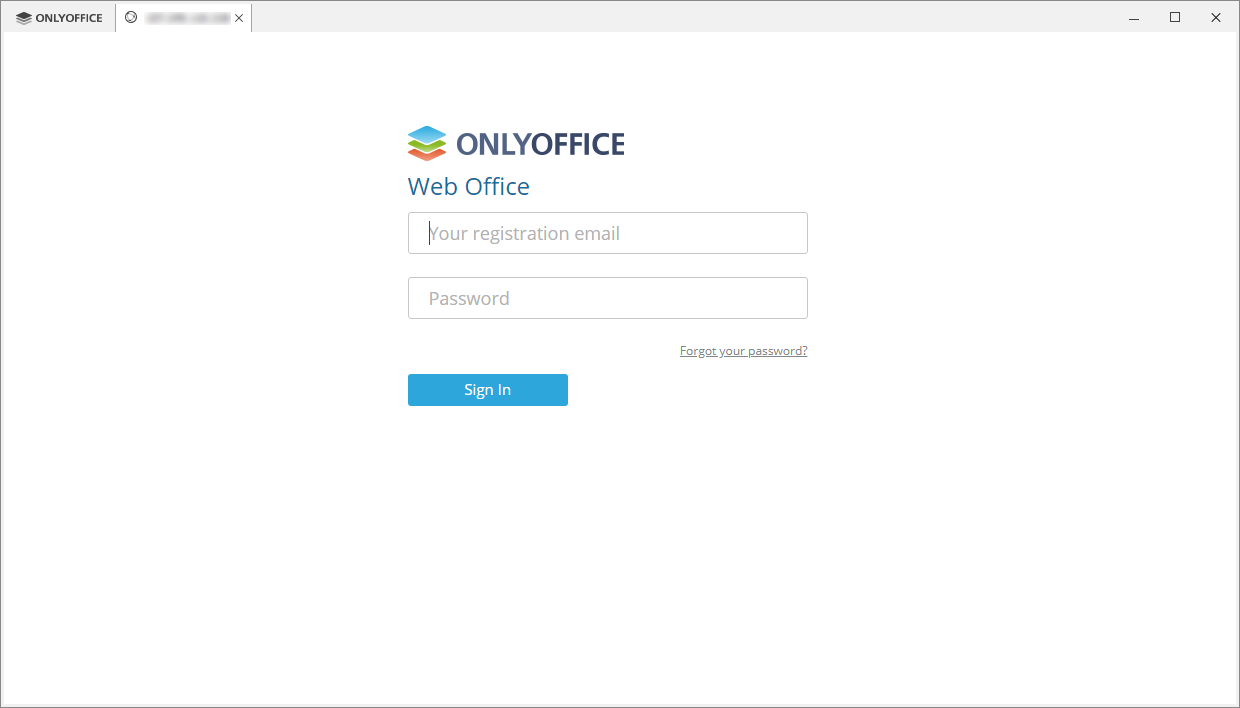
- On the sign-in page, specify the login and password used to access your cloud office account.
You cannot sign in to your account via Desktop Editors using SSO or third-party services when Private Rooms are enabled.
Technical details
View technical details
When the user connects to the ONLYOFFICE cloud in Desktop Editors for the first time after the Private Room has been enabled:
- Desktop Editors remember the login and password entered by the user on the authorization page.
- Desktop Editors automatically generate and remember the user’s public key and private key.
- The private key is encrypted with the user’s password.
- The public key and the encrypted private key are sent to the portal.
If a user connected to the ONLYOFFICE cloud via Desktop Editors before the Private Room was enabled in the Control Panel, the user must reconnect to the portal to use the Private Room.
When the user connects to the ONLYOFFICE cloud in Desktop Editors for the next time:
- Desktop Editors remember the entered user’s login and password.
- Desktop Editors verify and remember the user’s public key and the encrypted private key.
- The private key is decrypted with the user’s password.
Step 3. Store and manage documents in the Private Room
When users are connected to the ONLYOFFICE cloud via Desktop Editors, they can use the Private Room section of the Documents module to store documents and collaborate on them securely.
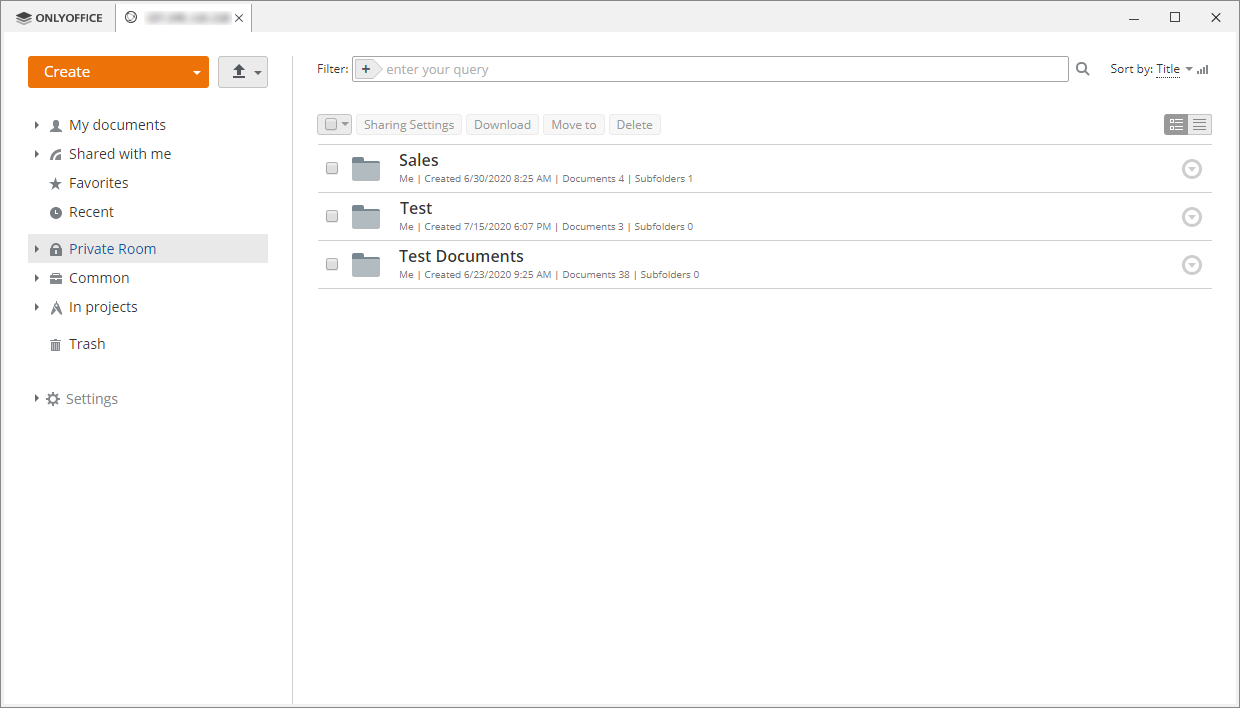
The Private Room of each user contains:
- folders and files created by the current user,
- files shared with the current user by other users from the Private Room.
Work in the Private Room and documents stored in it are only available when you connect to your ONLYOFFICE cloud via the Desktop Editors interface.
Within the Private Room, you can:
- create folders,
- create and upload files (
.docx,.xlsx,.pptx), - share documents with other portal users,
- co-edit documents.
All documents are encrypted once uploaded or created. All the documents stored in the Private Room are encrypted and marked with the  icon in the file list.
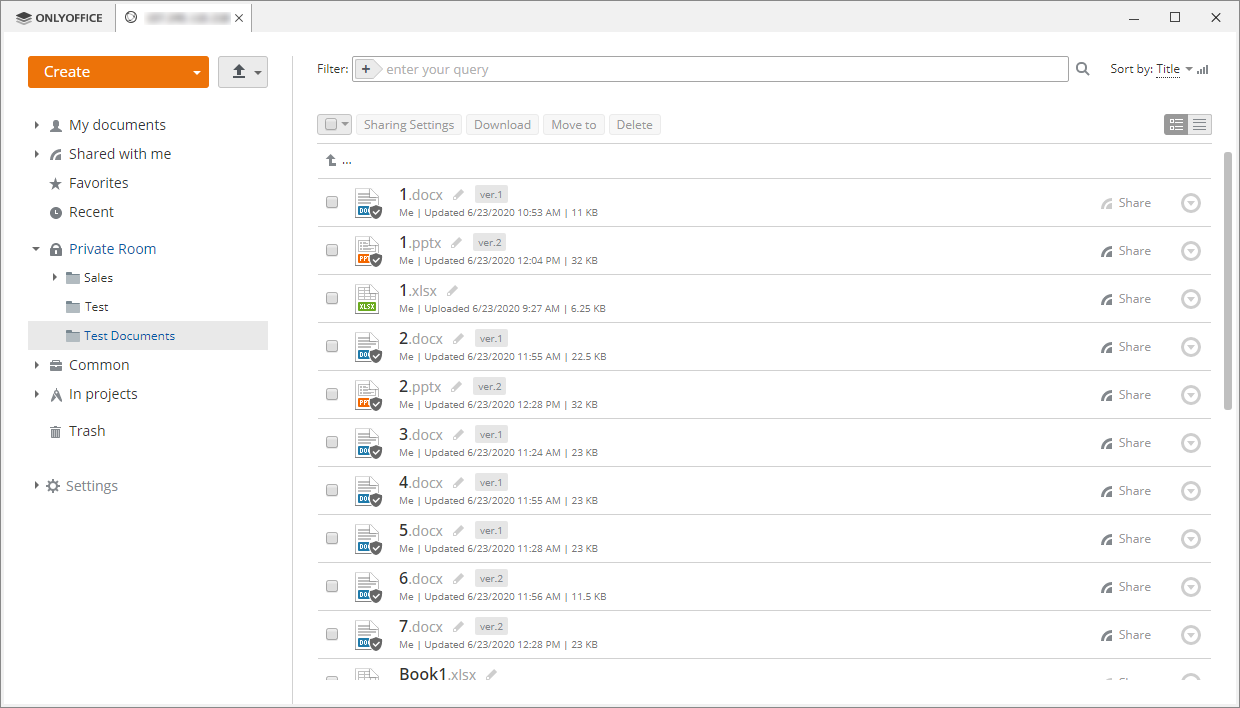
Due to the specificity of encryption, there are some restrictions on specific operations in the Private Room compared with other sections of the Documents module.
Uploading
- When uploading files, an existing file with the same name cannot be overwritten.
- You cannot upload files using the drag-and-drop method.
- You cannot upload folders.
Copying
- You cannot copy the files.
Moving
- You can move the files within the Private Room section only.
- You can move only your own items and cannot move items shared with you by other users.
- When moving files, an existing file with the same name cannot be overwritten.
Removing
- Files are removed permanently without passing through the Trash and cannot be restored.
Versioning
- You cannot restore previous versions of a file.
Sharing
- You can share files with users who have already obtained private and public keys.
- You can share files providing Full Access only.
- You cannot provide access to the file via an external link.
Technical details
View technical details
All the OOXML documents (.docx, .xlsx, .pptx) in the Private Room are encrypted with their own passwords.
Saving the file
- Once the file is edited and saved, Desktop Editors generate the document password.
- The file is encrypted with the generated document password.
- The portal provides a list of public keys of the users who have access to the file.
- The document password is encrypted with the public keys of all users who have access to the file.
- The pairs of the encrypted document passwords and public keys of all users who have access to the file are recorded to the unencrypted part of the file.
- The file is stored to the cloud.
Opening the file
- When a user opens the file, the file is downloaded in Desktop Editors.
- Desktop Editors take the encrypted document password corresponding to the public key of the current user from the unencrypted part of the file.
- The encrypted document password is decrypted with the private key of the current user.
- The document password is used to open the document.
Step 4. Share and co-edit documents in the Private Room
To share your files stored in the Private Room with other users:
-
Click the Share button to the right of the document you need.
-
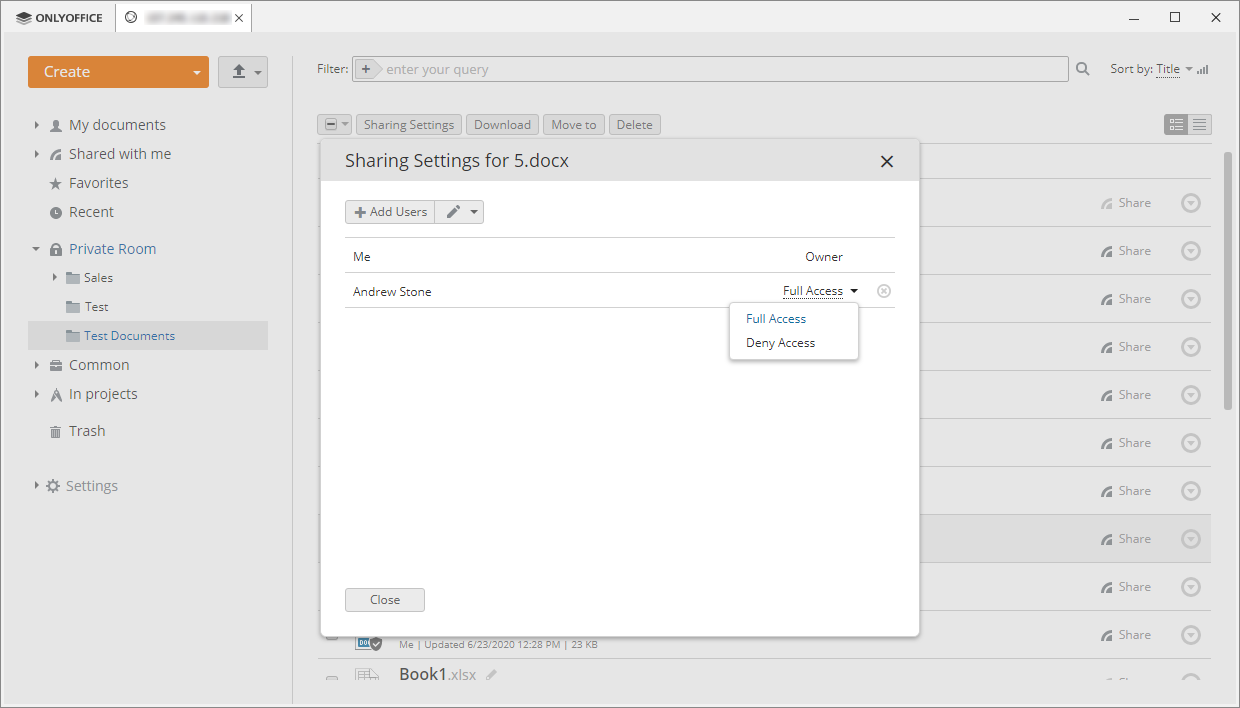
In the Sharing Settings window, click Add Users to open the user list, then select the users you want to share the document with and click Save.
noteYou can share the file with users who have already obtained private and public keys.
-
By default, Full Access is provided. If you want to block access previously granted to a user, select the Deny Access option from the drop-down list next to the user name.
-
Click Save at the bottom of the Sharing Settings window.
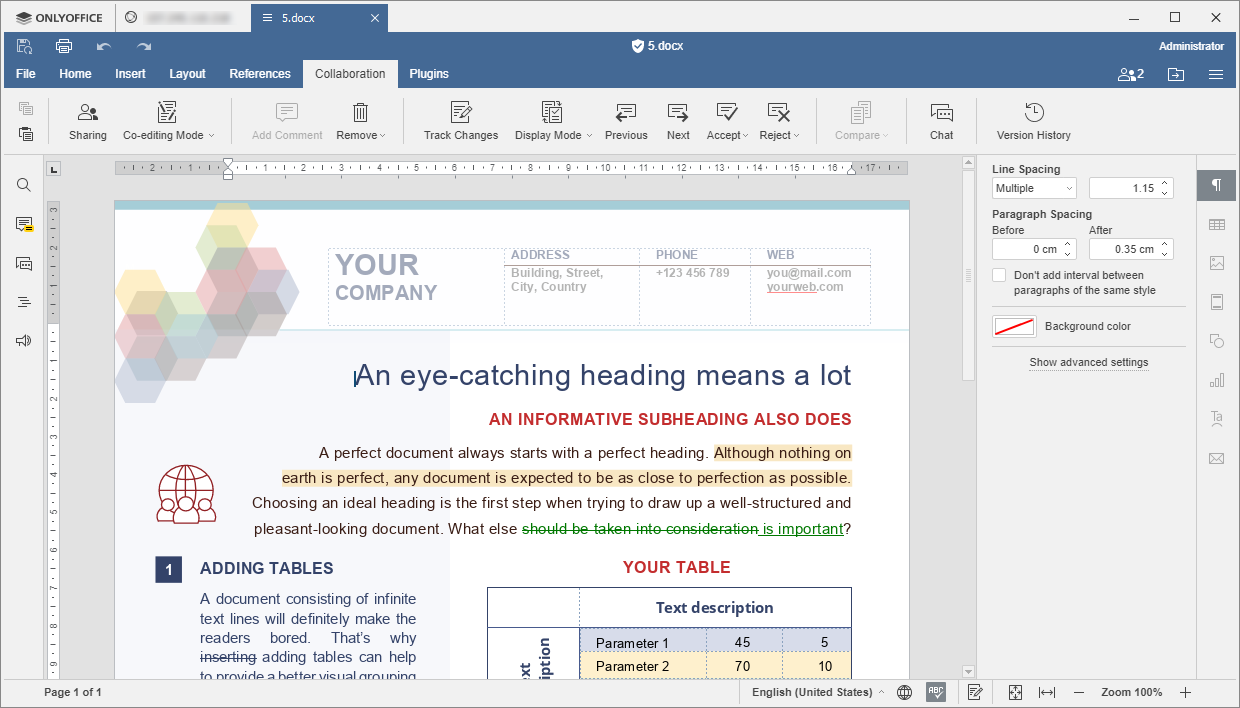
Now you can co-edit the file securely together with other users within the Private Room. When you work on the encrypted file, it is marked with the  icon in the editor header.
Technical details
View technical details
Opening the shared file
- When the user you shared the file with opens the file, the file is downloaded in Desktop Editors.
- Desktop Editors take the encrypted document password corresponding to the public key of the current user from the unencrypted part of the file.
- The encrypted document password is decrypted with the private key of the current user.
- The document password is used to open the document.
Saving the shared file
- Once the file is edited and saved, Desktop Editors generate the document password.
- The file is encrypted with the generated document password.
- The portal provides a list of public keys of the users who have access to the file.
- The document password is encrypted with the public keys of all users who have access to the file.
- The pairs of the encrypted document passwords and public keys of all users who have access to the file are recorded to the unencrypted part of the file.
- The file is stored to the cloud (as forcesave).