Protecting your documents with a password
Introduction
If you wish to store your local files securely, you can use the password protection feature available in ONLYOFFICE Desktop Editors. If you set a password, no one will be able to open the file without entering the password.
Using ONLYOFFICE Desktop Editors, you can set a password for your document, spreadsheet, or presentation, open password-protected files, or change or remove the password.
In the online presentation editor, the password protection feature is only available in the Protect section of the File tab. You can refer to the corresponding instructions.
Step 1. Protect a file with a password
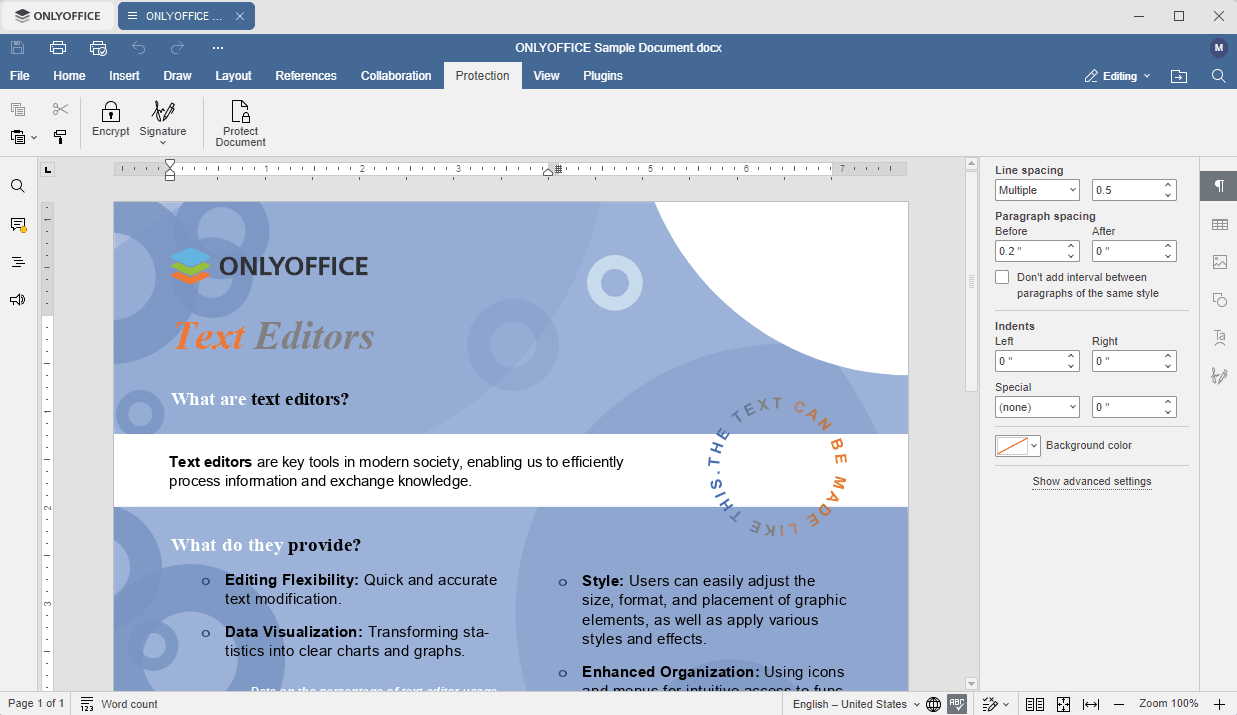
Create a new file or open an existing one using ONLYOFFICE Desktop Editors. Switch to the Protection tab at the top toolbar and click the  Encrypt icon.
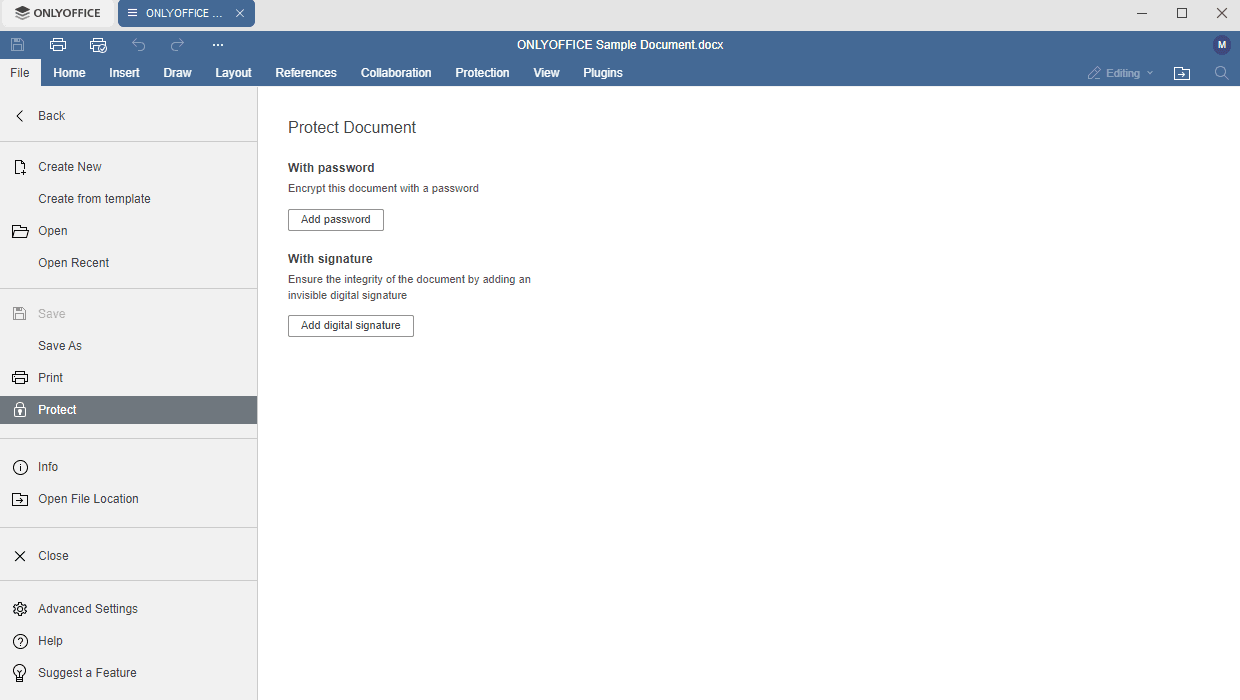
Alternatively, you can switch to the File tab at the top toolbar, open the Protect section on the left sidebar, and click the Add password button.
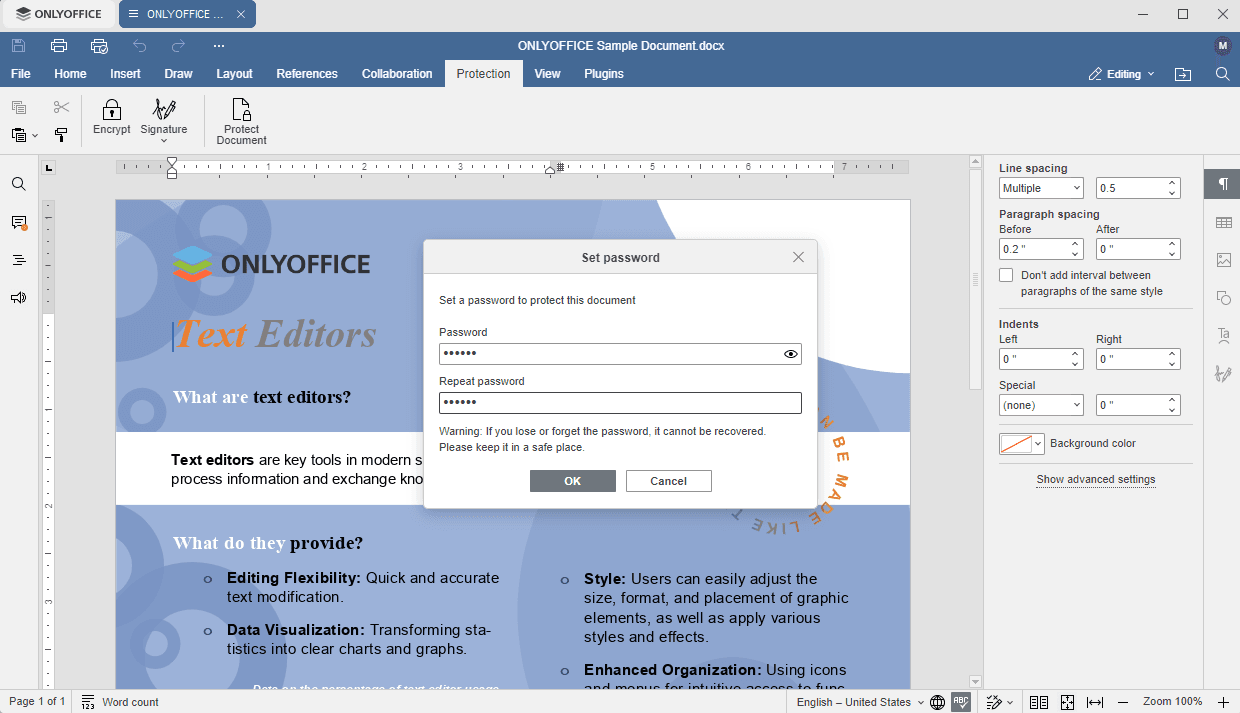
The Set password window opens. Specify the password you want to use to protect the file and repeat it in the corresponding fields. The password is case sensitive. When ready, click OK.
If you lose or forget the password, there is no possibility to restore or reset it and open the file. Please create a strong password that you can remember or keep a copy of the password in a safe place.
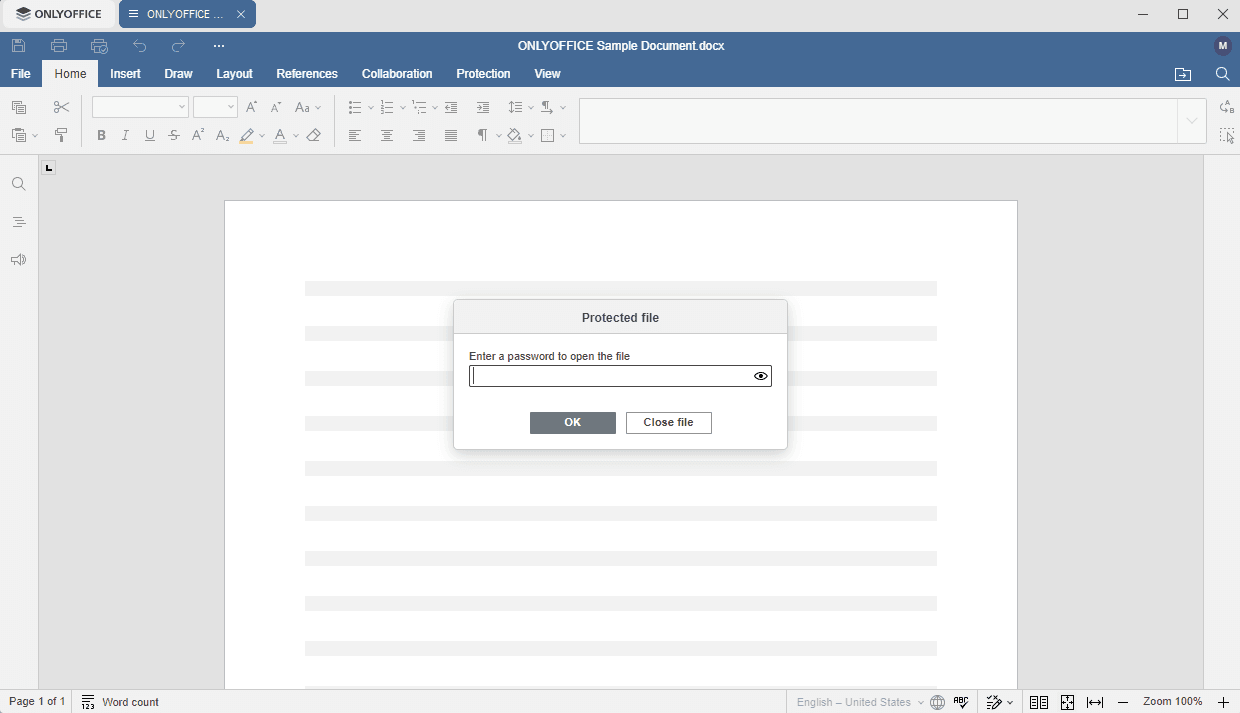
When you close the file and try to open it once again, you’ll be asked for a password. Enter the password and click OK to open the file.
Step 2. Change a password
Open the password-protected file using ONLYOFFICE Desktop Editors. You’ll be asked for a password. Enter the password and click OK.
Switch to the Protection tab at the top toolbar, click the Encrypt icon, and select the Change password option.
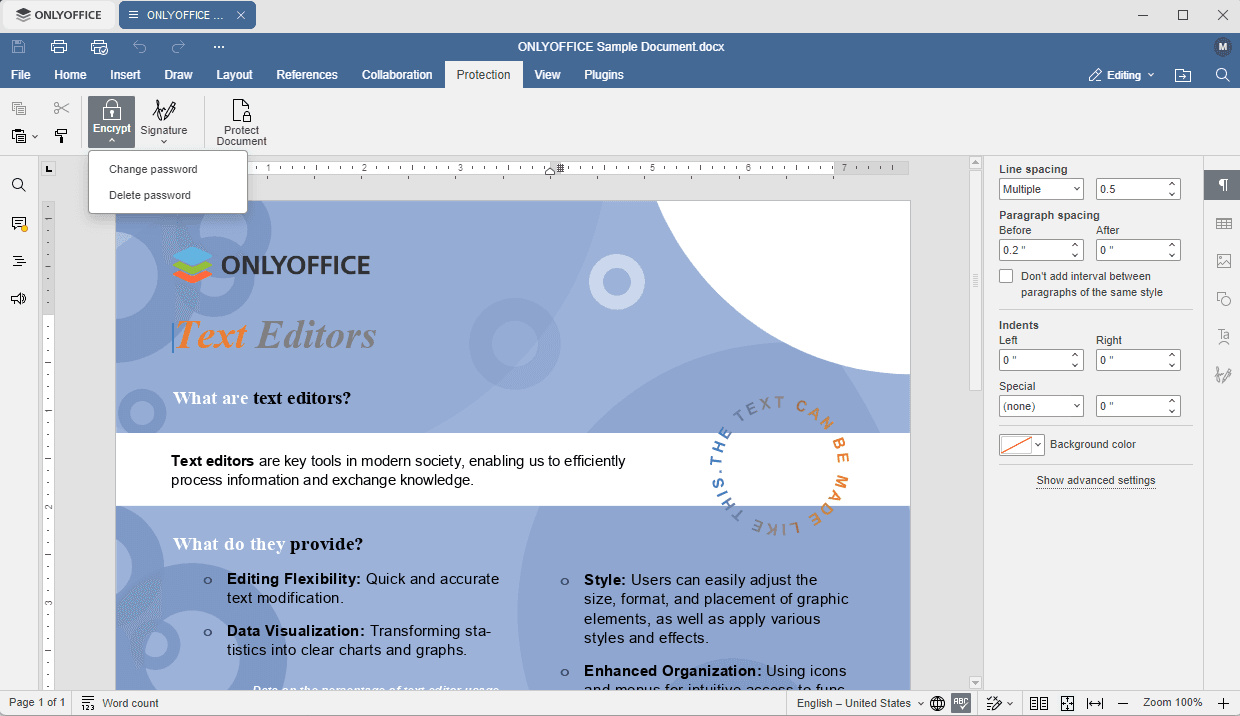
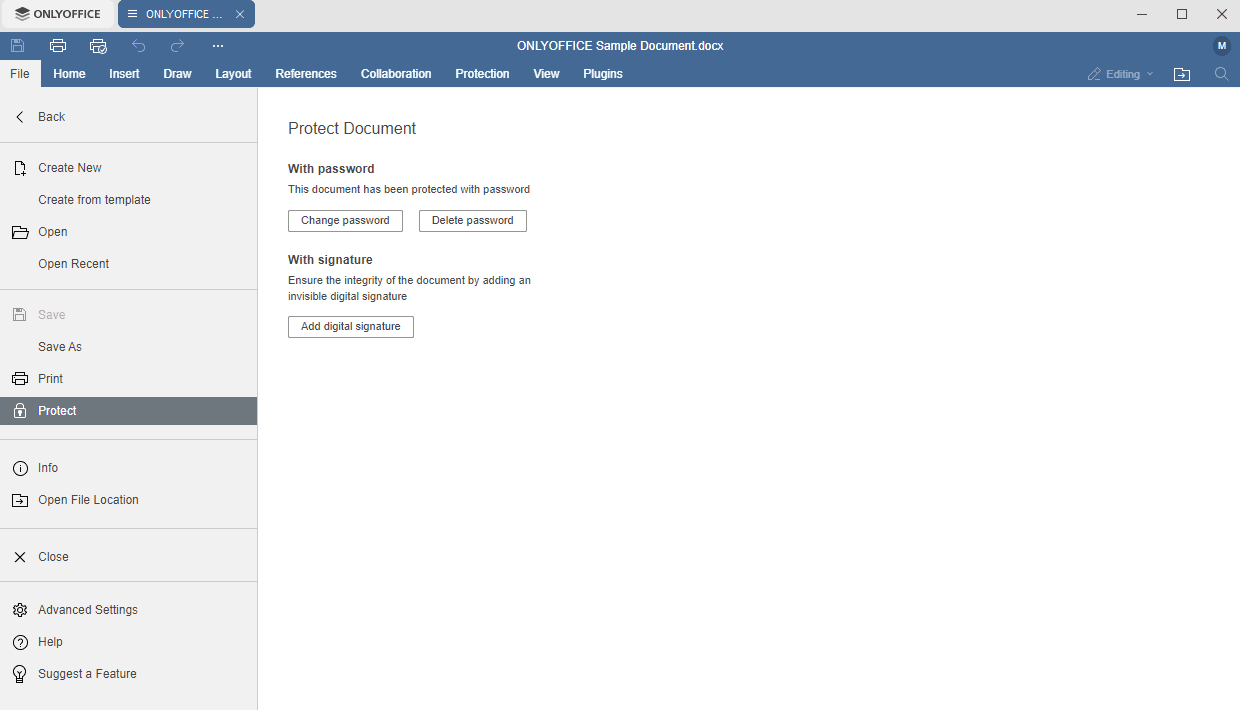
Alternatively, you can switch to the File tab at the top toolbar, open the Protect section on the left sidebar, and click the Change password button.
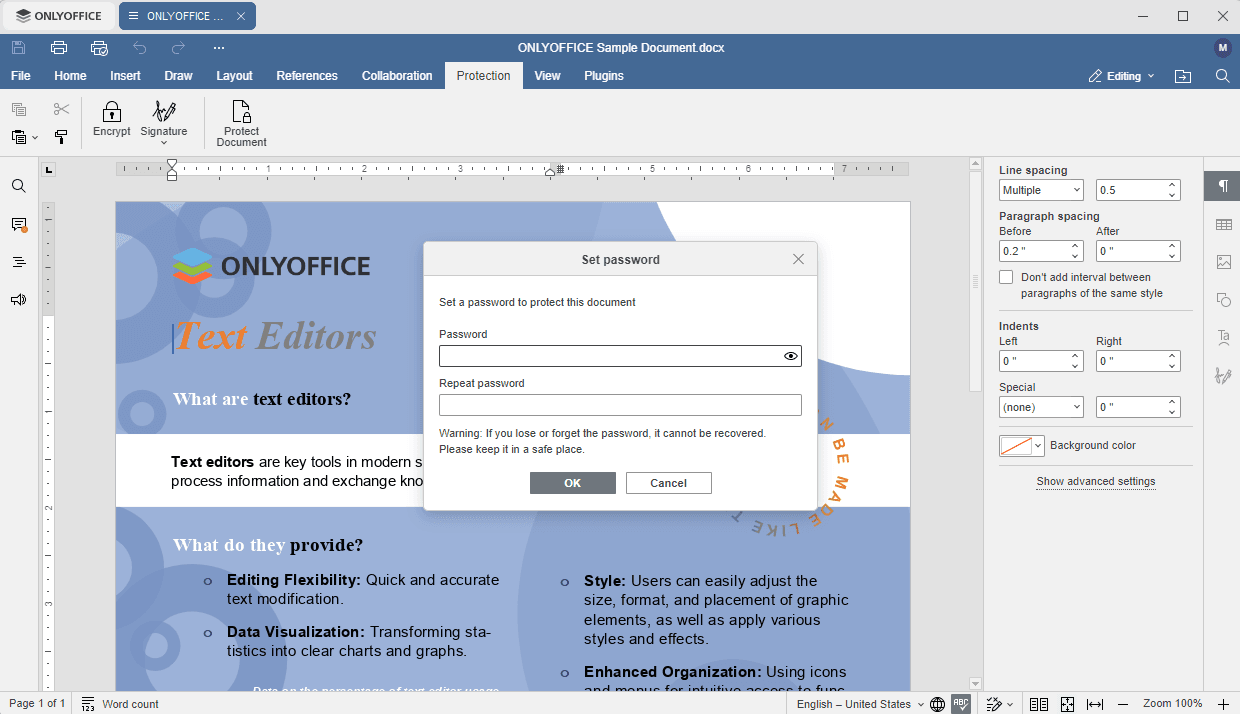
The Set password window opens. Specify a new password you want to use to protect the file and repeat it in the corresponding fields. When ready, click OK.
Step 3. Remove a password
Open the password-protected file using ONLYOFFICE Desktop Editors. You’ll be asked for a password. Enter the password and click OK.
Switch to the Protection tab at the top toolbar, click the Encrypt icon, and select the Delete password option.
Alternatively, you can switch to the File tab at the top toolbar, open the Protect section on the left sidebar, and click the Delete password button.
The password will be removed and the file will be saved.