Connecting GPT4All on Ubuntu
Artificial Intelligence has become a powerful tool for boosting productivity and efficiency. AI-based chatbots are trained to assist you in content writing, image generation, data processing, programming, information analysis, and many more.
This guide will show you how to enable AI-powered document editing on Ubuntu using the ONLYOFFICE Desktop Editors package for Linux, and GPT4All platform designed to run local AI models. This integration allows you to use any large language model provided by GPT4All and its capabilities right in your document, without having to launch the platform itself.
GPT4All is a free and open-source platform designed to respect data privacy while running AI models locally, without access to the Internet. The platform is compatible with various CPUs and provides access to more than 1000 open-source large language models (LLM), including Llama, Mistral and more.
Here is a quick overview of what you can do in ONLYOFFICE Desktop Editors using LLMs provided by GPT4All:
- Generate new text content and rewrite the existing one according to your needs;
- Improve your writing skills by finding synonyms and correcting spelling/grammar mistakes;
- Summarize large volumes of text information;
- Extract keywords for SEO purposes
- Find the answers to your questions;
- Translate and more.
Step 1. Install GPT4All
Install GPT4All using the official installer that you can download from the GPT4All website.
Once you have downloaded the installer, run it and follow the instructions provided by the installation wizard.
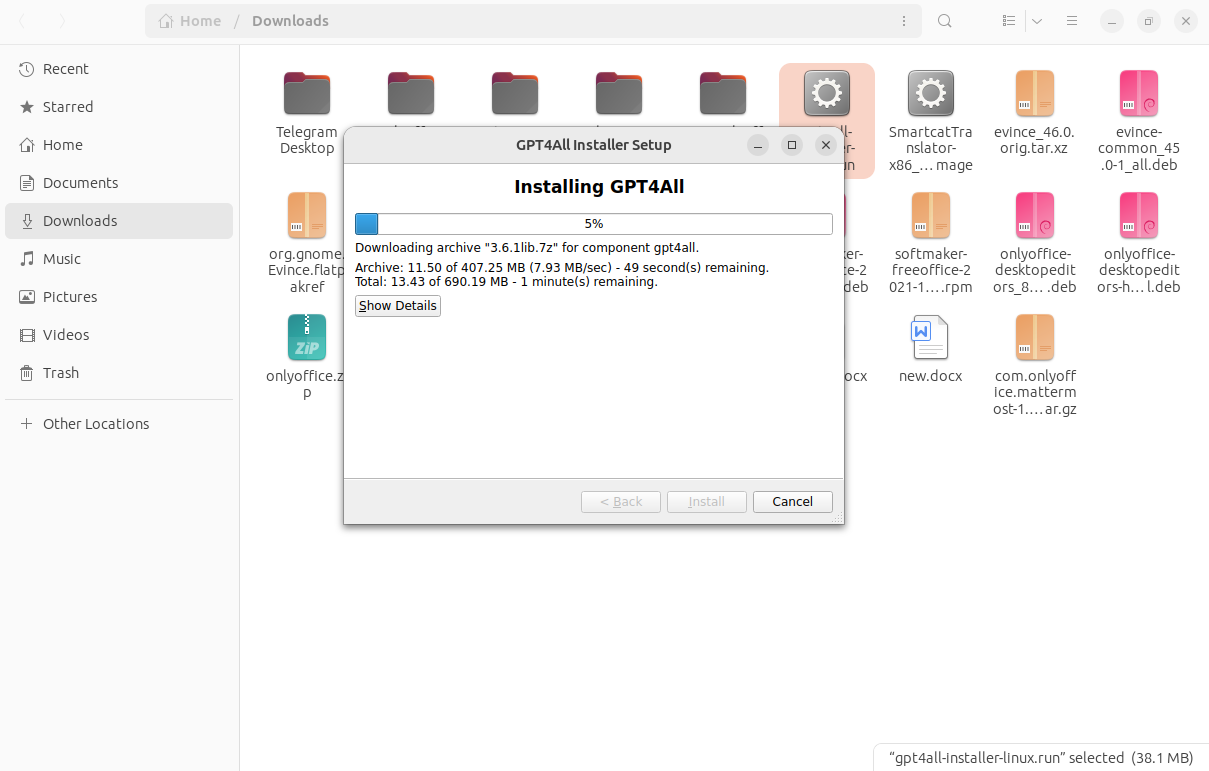
Please note that you might need to make the installer executable first by ticking the corresponding option in its properties.
Installing usually takes a few minutes. Click the Finish button to complete the installation.
Step 2. Run GPT4All and download the AI model
After installing GPT4All on your Ubuntu, you have to launch it and download one of the available LLMs.
-
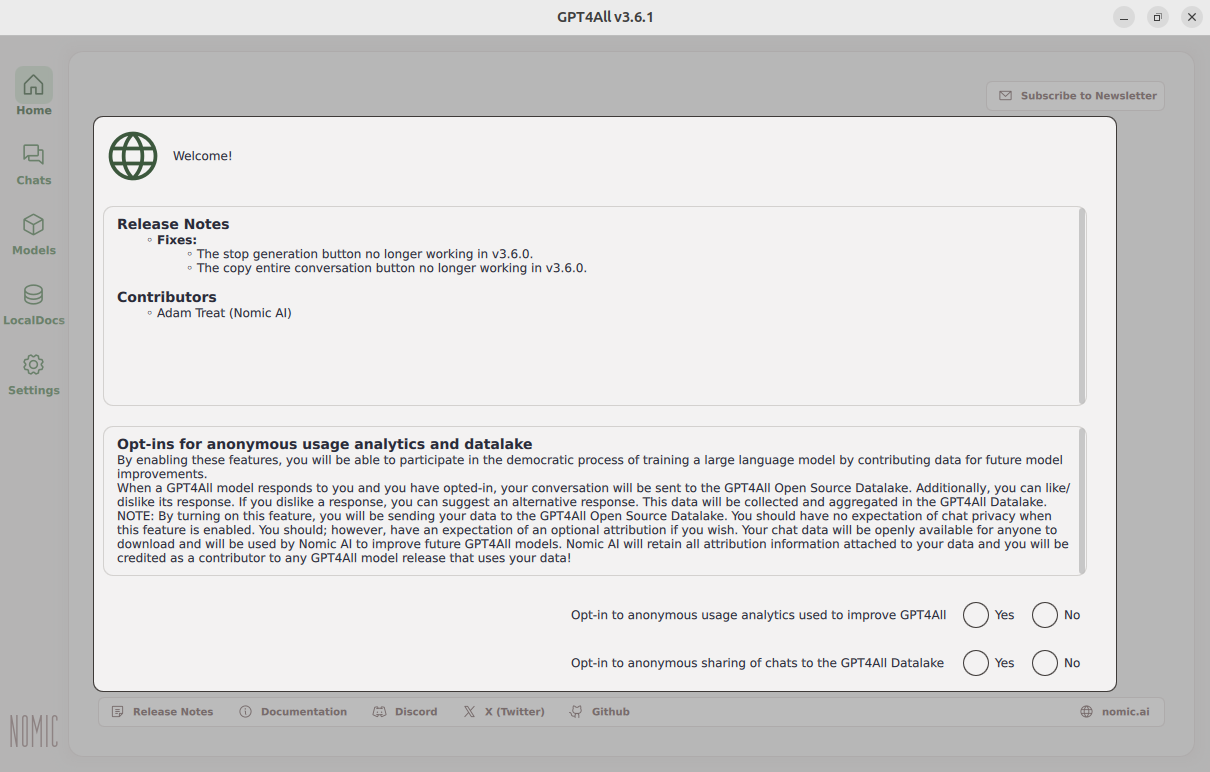
To do so, run the platform from the gpt4all folder on your device. When launching it for the first time, you will be invited to take part in anonymous usage analytics. If you choose not to participate, click No.
-
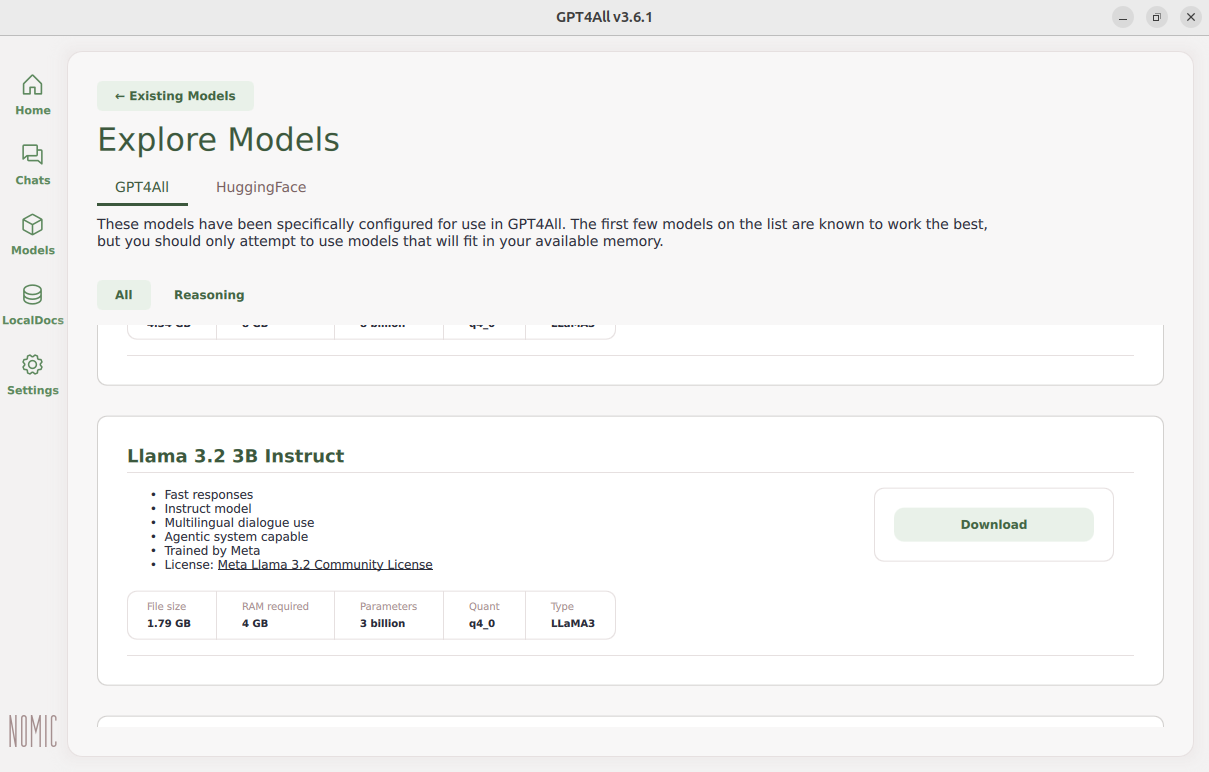
Go to the Models section and choose the model you would like to run locally.
notePlease note that some AI models have high RAM requirements and might need you to have an API key. If a model needs an API key, you can get it from the corresponding AI provider. In some cases, it’s not free so you need to choose wisely.
-
Choose the model of preference and click the Download button. The selected LLM will be downloaded to your device.
-
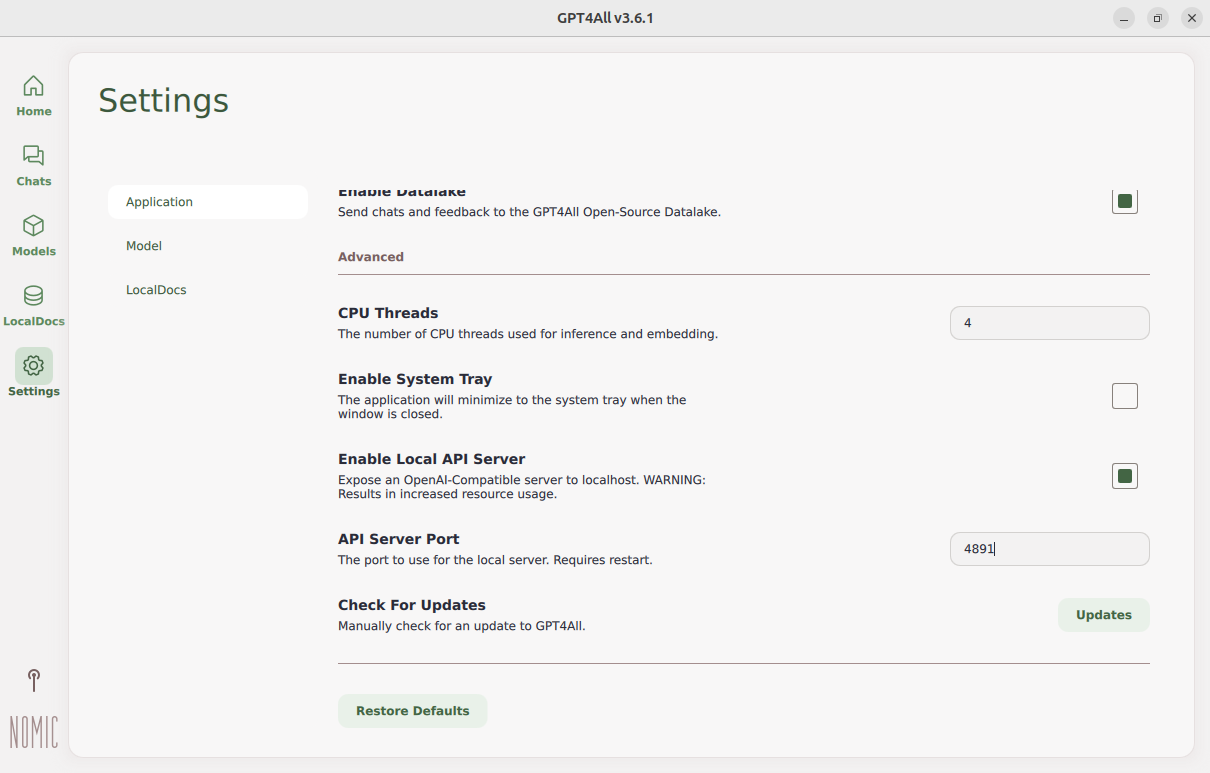
Go to the Settings section and activate the Enable Local API Server option. This option is required for successful integration with ONLYOFFICE Desktop Editors. Please, remember the API Server Port.
Step 3. Install the ONLYOFFICE AI Tools add-on
Please refer to this Tecmint guide to install ONLYOFFICE app on Ubuntu.
AI in ONLYOFFICE Desktop Editors is provided by the ONLYOFFICE AI Tools add-on. It is not installed from the Plugin Manager: in the Enterprise version, the add-on is supplied with the application and is available right after the installation, and in the Community version you install it from the application itself.
-
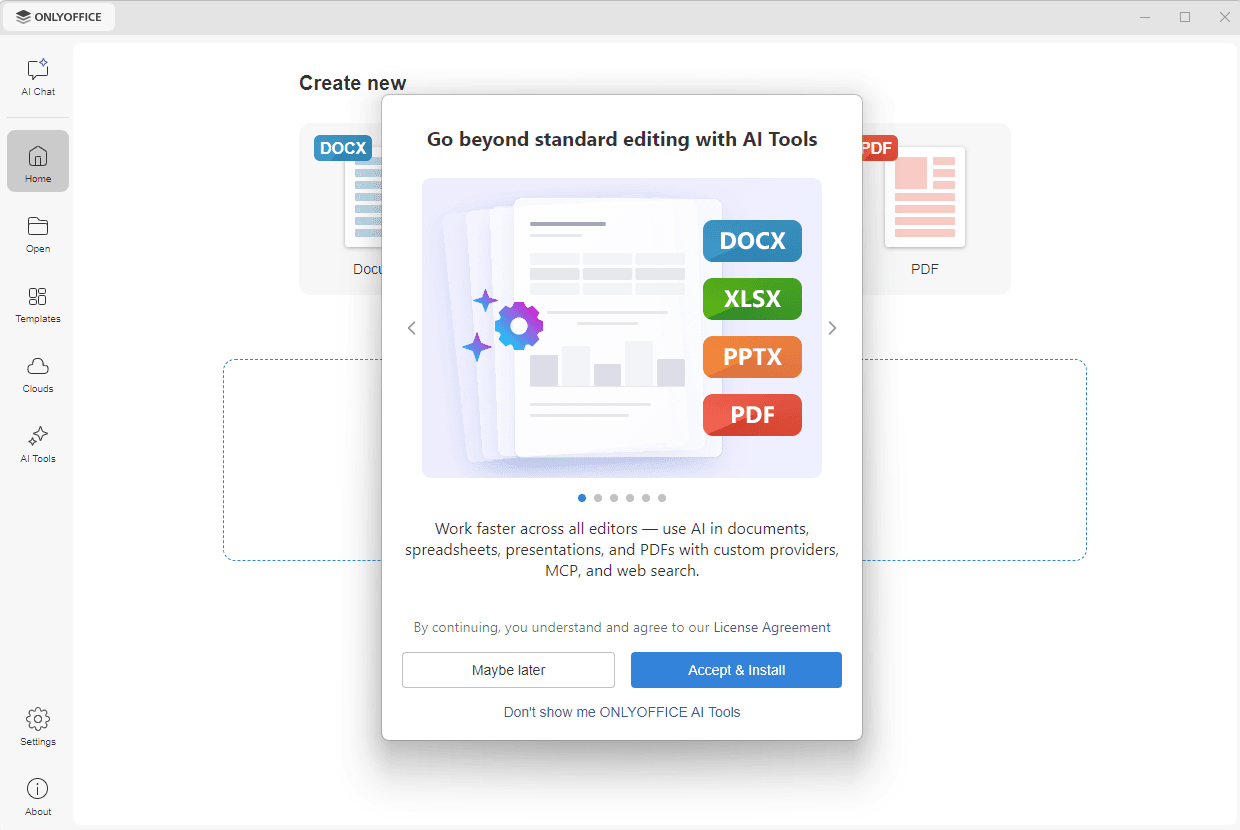
Launch the ONLYOFFICE Desktop Editors. In the Community version, the Go beyond standard editing with AI Tools window opens on start. Click Accept & Install to accept the License Agreement and install the add-on.
-
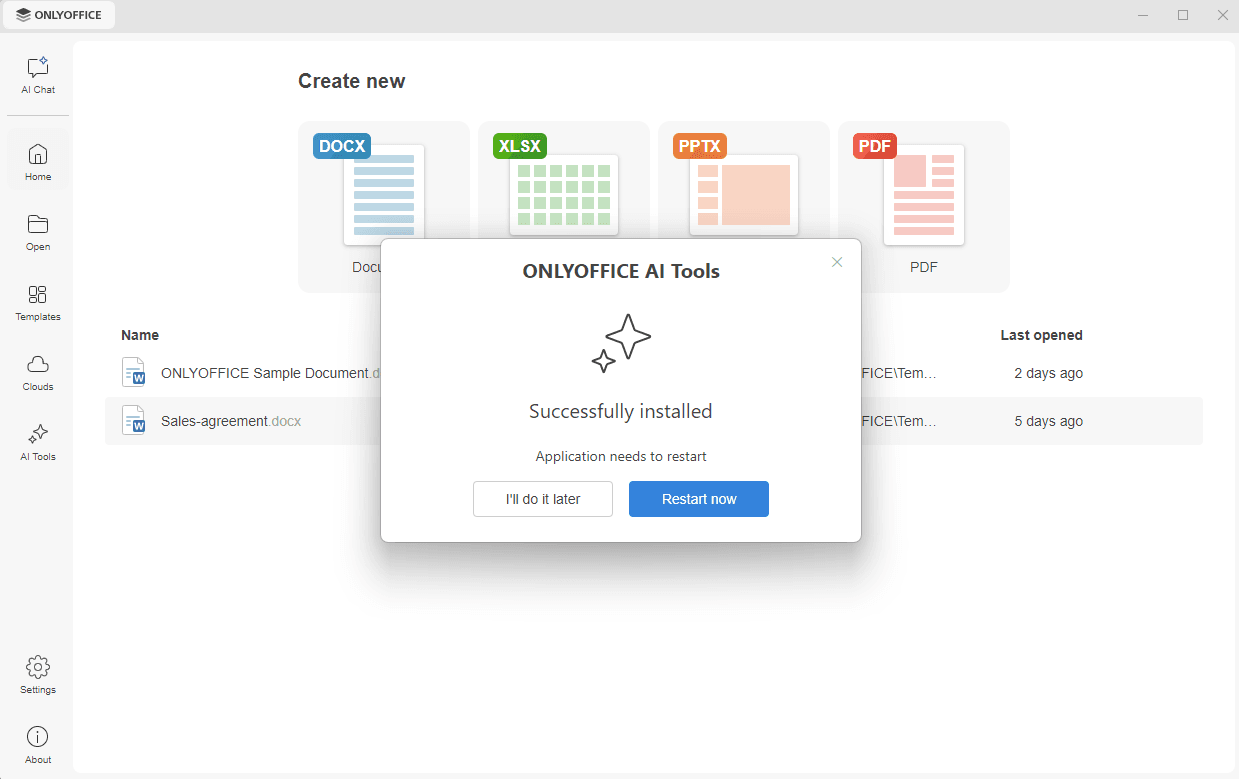
The download starts, and the Successfully installed message appears when it is complete. The application needs to be restarted for the add-on to become available: click Restart now to restart it immediately, or I'll do it later to restart it yourself afterward.
-
Make sure that AI features are enabled: go to the Settings tab at the bottom of the left navigation panel, switch the Enable AI features option on, and click Apply.
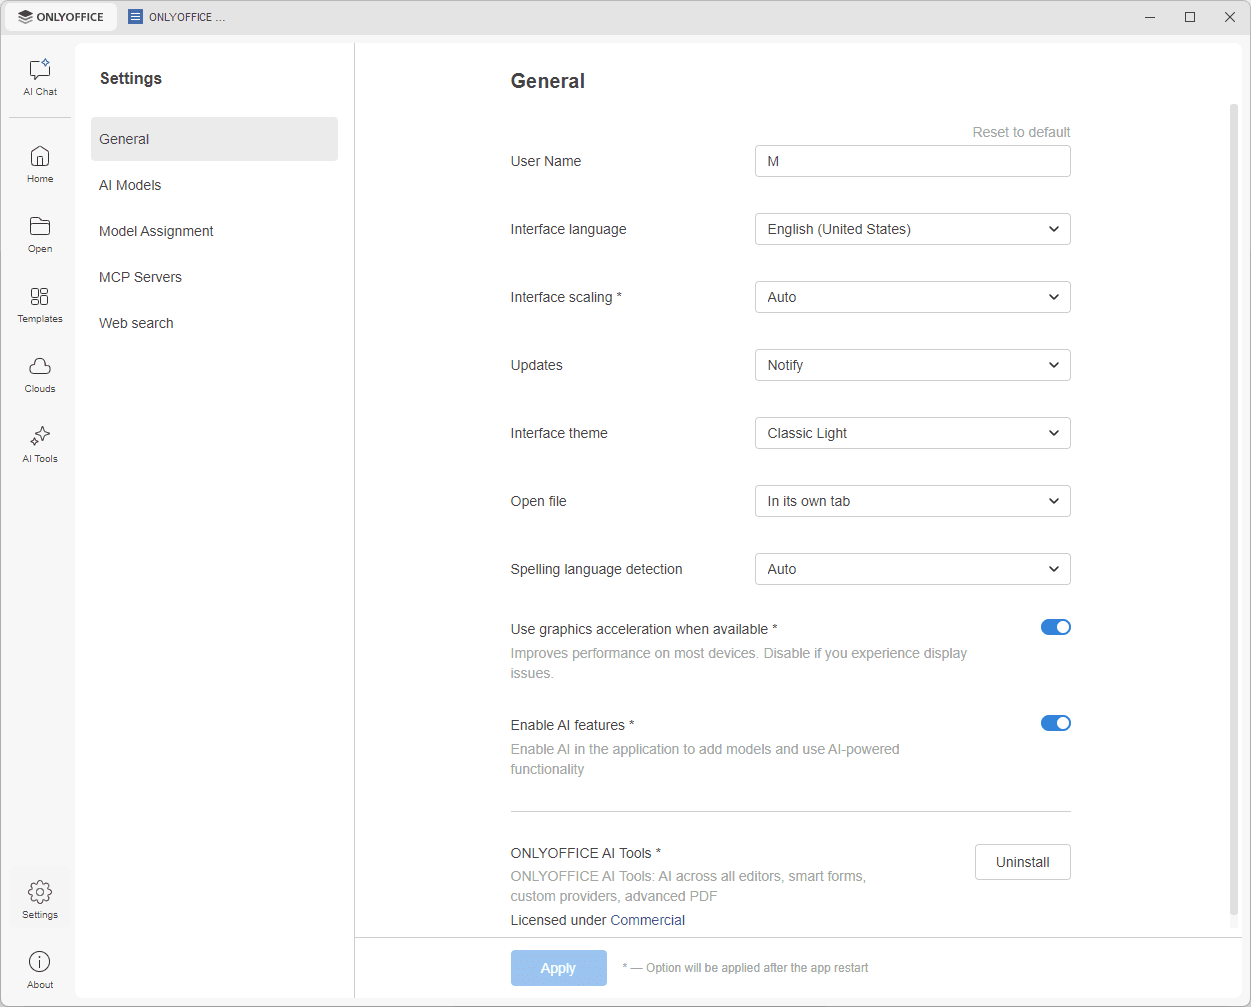
When the add-on is installed and AI features are enabled, the AI Chat and AI Tools tabs appear on the left navigation panel, and the Settings tab displays the AI Models, Model Assignment, MCP Servers, and Web search sections. The AI Models section is where you connect GPT4All in the next step.
If you have closed the installation window using the Don't show me ONLYOFFICE AI Tools option and then change your mind, switch the Enable AI features option on in the Settings tab. The AI Chat and AI Tools tabs are displayed again, and you can install the add-on.
Step 4. Add and configure the AI model from GPT4All
AI models are connected in the application settings, and not in a plugin window as before. The same Connect new AI Model form is also displayed in the AI Chat panel when you open it for the first time and no model has been added yet, so you can connect GPT4All from either place.
Make sure that GPT4All is running and that its local API server is enabled, as described in Step 2.
-
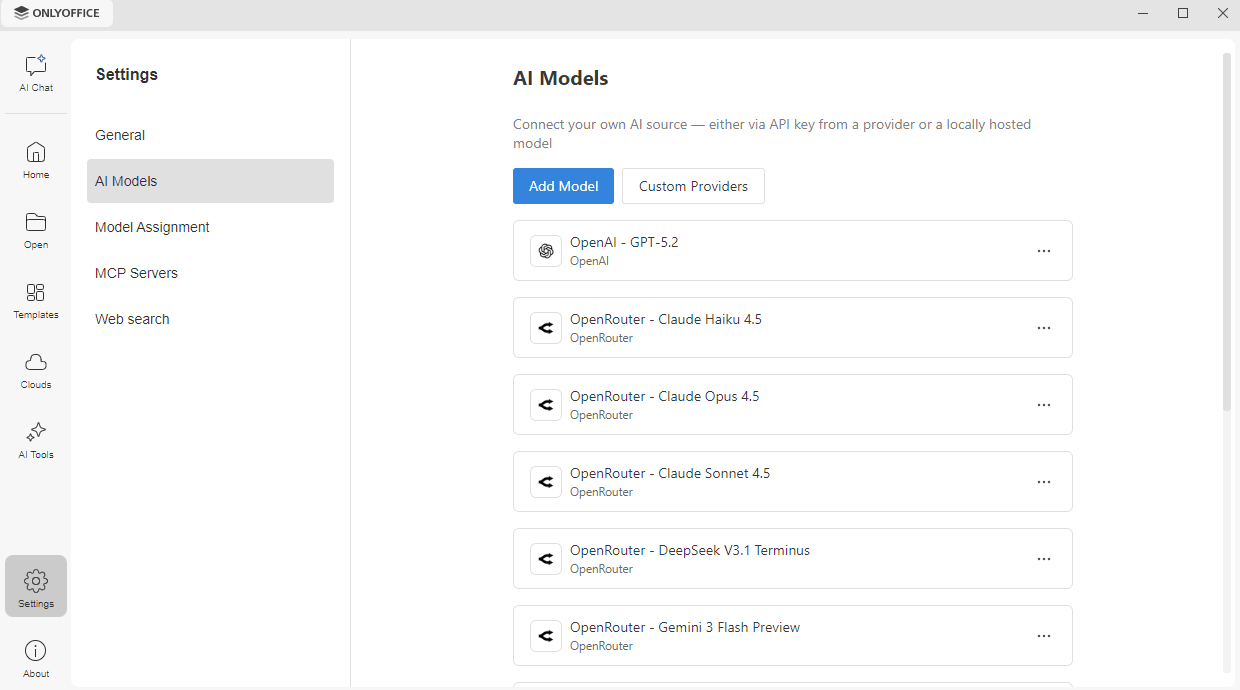
Go to the Settings tab on the left navigation panel, open the AI Models section, and click the Add Model button. The Connect new AI Model form opens.
 note
You can also click the AI Chat tab on the left navigation panel. If no model has been added yet, the Connect an AI Model to enable AI chat form opens right in the panel, with the same fields as below.
-
Choose GPT4All from the Provider drop-down list.
-
Leave the API key field empty: a model hosted locally by GPT4All does not require a key.
-
In the Base URL field, check the default endpoint. In our case, it is
http://localhost:4891/v1, where port 4891 corresponds to the API Server Port value from the GPT4All settings described in Step 2 in this guide. Specify another port if you have changed it. -
Choose the model you have downloaded in Step 2 from the Model drop-down list.
-
Type in the Profile name to recognize this model in the list.
-
Click the Add Model button to complete the setup, or Cancel to discard your changes.
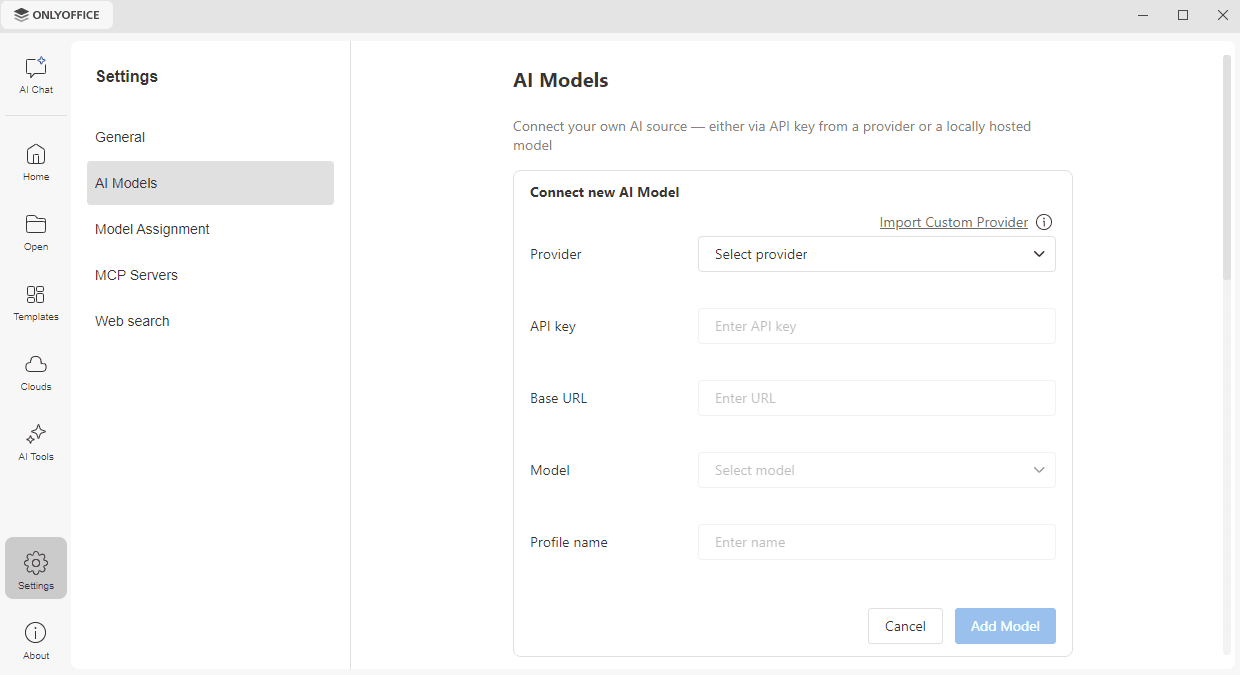
The model appears in the AI Models list, showing the profile name, the model, and the provider. Click the ... icon on the right of a model to Edit its settings or to Delete it.
Step 5. Start using the AI model when editing office files
Now you can use the selected LLM while working on text documents, spreadsheets, presentations, forms and PDF files.
Assigning the model to tasks
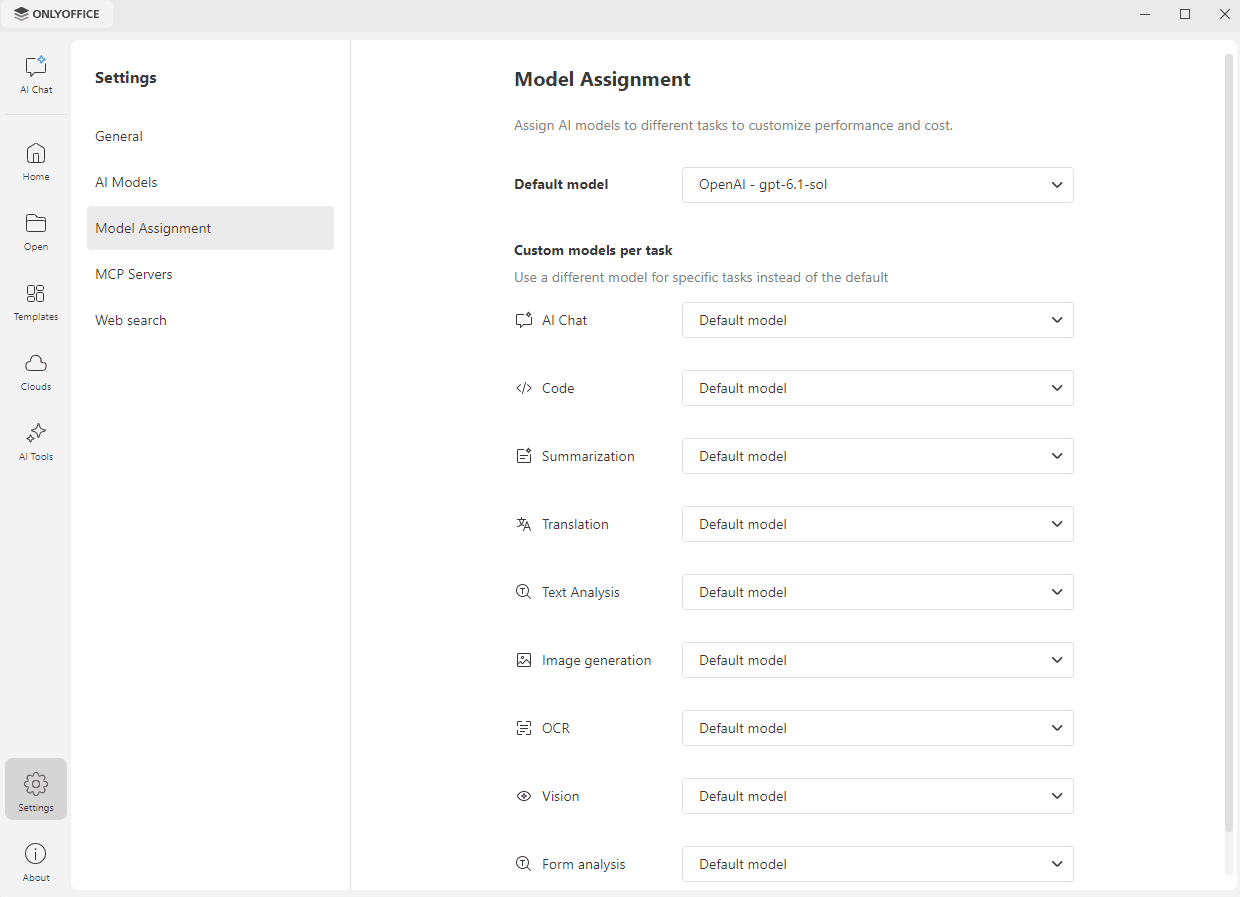
ONLYOFFICE Desktop Editors supports several AI models at the same time, so you can use a different one for each task. Go to the Settings tab on the left navigation panel and open the Model Assignment section.
- Choose the model you have added from the Default model drop-down list to use it for all the tasks.
- Under Custom models per task, use a different model for a specific task instead of the default one: AI Chat, Code, Summarization, Translation, Text Analysis, Image generation, OCR, Vision, or Form analysis. Leave Default model selected for a task to use the default model for it.
Using AI in the editors
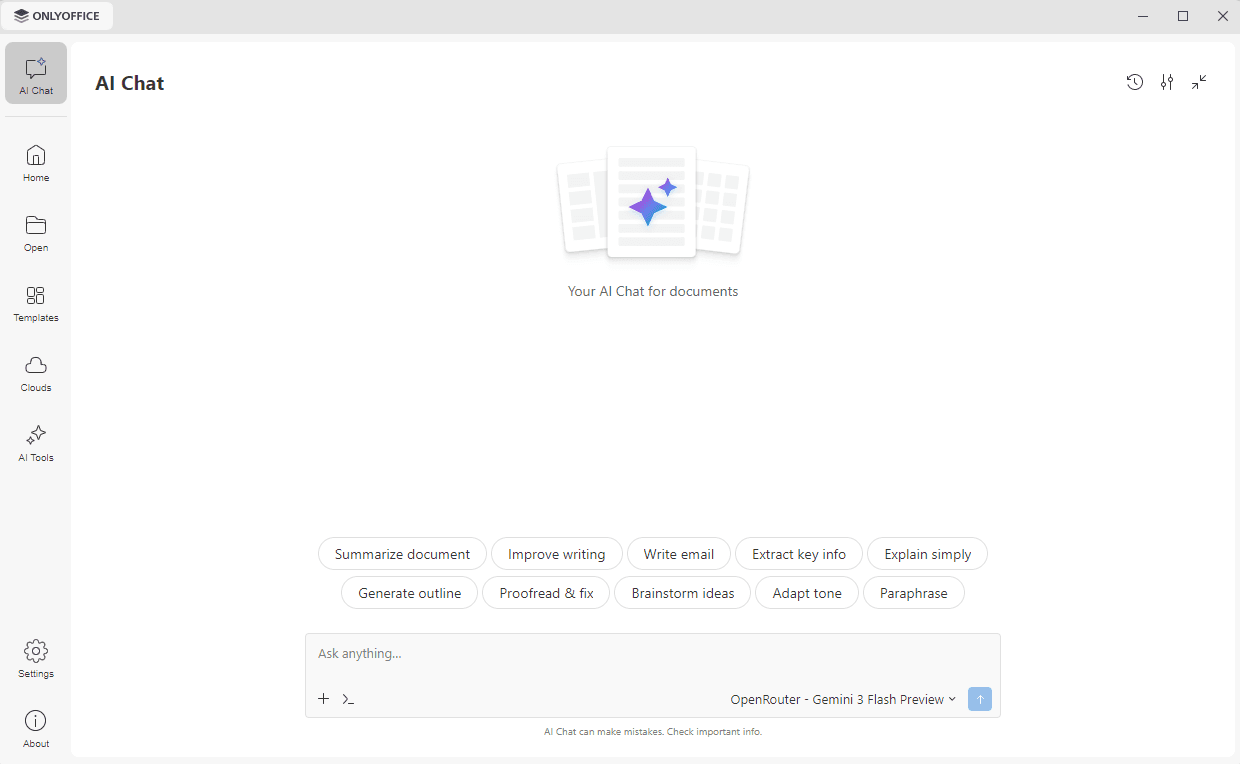
Open a file and use the AI Tools tab on the top toolbar, or the AI Chat icon on the right sidebar, to open the AI Chat panel. Enter your request in the Ask anything box, or click one of the suggested actions, such as Summarize document, Rewrite text, Proofread document, or Translate text. The model used for the current conversation is displayed in the lower right corner of the box, where you can switch to another one.
Since you are using a model added via GPT4All, all your requests are processed locally, and you don’t need to have an Internet connection. It may take some time for your request to be processed, as it depends on the performance of your device.