AI agent: Quick start
The ONLYOFFICE AI agent allows you to use AI features directly in ONLYOFFICE editors to speed up everyday tasks such as text generation, rewriting, formatting, translation, and content analysis.
If the AI Tools tab is not displayed on the top toolbar, go to the Plugins tab, click Background Plugins, and make sure the AI Tools switch is turned on.

Quick setup
Step 1. Connect an AI provider
- Go to the AI Tools tab and click Settings. The AI Settings window will open on the AI Models tab.
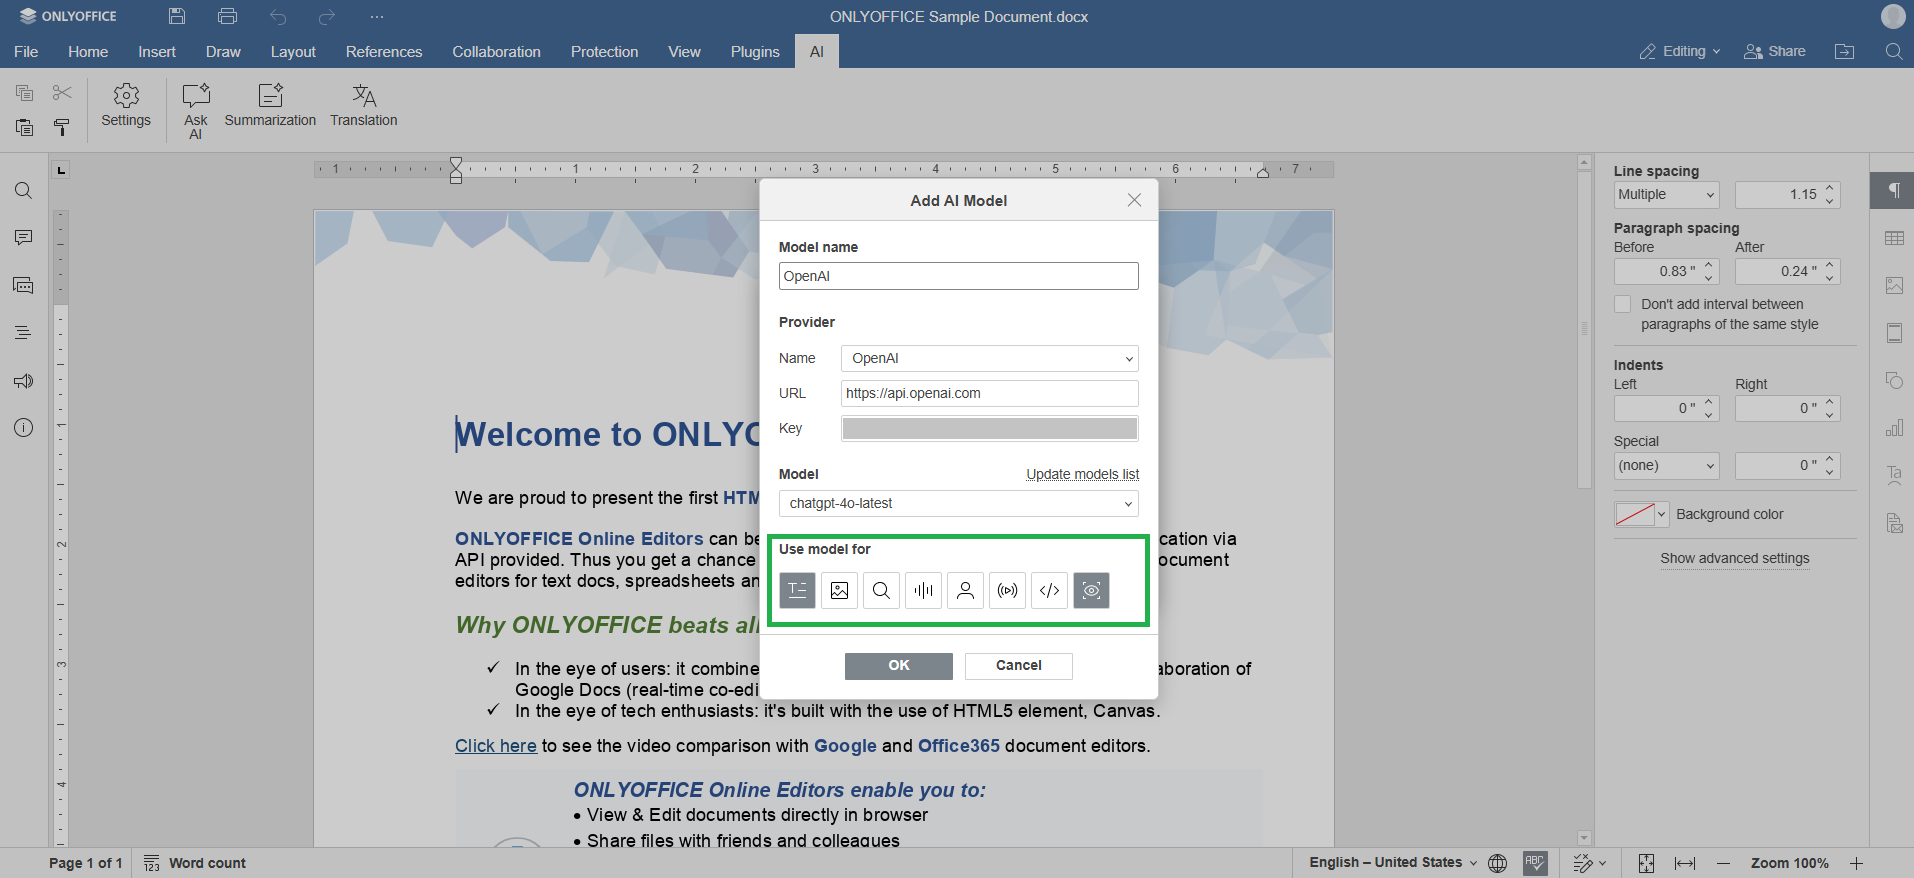
- In the AI Models tab, click Add Model.
- Select an AI provider from the Provider dropdown (for example, OpenAI, Anthropic, Google Gemini, or OpenRouter). Click Import Custom Provider to connect a provider that isn't listed (see Adding a custom AI provider).
- Enter your API key. If you use a local provider such as LM Studio or Ollama, enter the Base URL instead.
- Select a Model, enter a Profile name to identify the connection, and click Add Model.
- In the Model Assignment tab, assign different models to specific tasks — AI Chat, Code, Summarization, Translation, Text Analysis, Image generation, OCR, and Vision. Any task set to Default model uses the model selected above.
- In the MCP Servers tab (optional), click Edit configuration and enter your server configuration in JSON format under mcpServers, then click Save to make the server's tools available in AI chat.
- In the Web search tab (optional), select a Web Search Engine (for example, Exa) and enter its API key to allow the AI agent to retrieve real-time information from the web.
You can change providers, assigned models, MCP servers, or web search settings at any time from AI Tools → Settings.
If the API key is invalid, an error message appears under the API key field, and the Add Model button remains unavailable. Check the key and enter it again.
What you can do with the AI agent
Once configured, the AI agent can help you:
- Generate, rewrite, and expand text.
- Summarize documents and extract key information.
- Translate content and improve grammar.
- Analyze text for clarity, structure, and tone.
- Automate simple file and content workflows using AI agents.
Troubleshooting
Collapse all
-
Make sure the AI Tools plugin is enabled in the Background plugins. If you have just installed or updated the plugin, restart the editor.
-
Check that your API key is valid and that the selected AI provider is available. Network restrictions, firewall rules, or proxy settings may prevent the editor from connecting to the provider.
-
If you are using a local provider such as LM Studio or Ollama, confirm that the local AI service is running, reachable at the configured address, and not blocked by firewall rules.
-
This may occur when the AI provider is under high load or when the prompt is too large. Try simplifying the request or breaking it into smaller steps. For local providers, verify CPU, GPU, and memory availability.
-
AI responses depend on the selected model and the prompt. If the output does not meet expectations, try rephrasing the prompt or providing more context.