Manipulate objects on a slide
In the Presentation Editor, you can resize, move, rotate different objects on a slide manually using the special handles. You can also specify the dimensions and position of some objects exactly using the right sidebar or Advanced Settings window.
Note: the list of keyboard shortcuts that can be used when working with objects is available here.
Resize objects
To change the autoshape/image/chart/table/text box size, drag small squares situated on the object edges. To maintain the original proportions of the selected object while resizing, hold down the Shift key and drag one of the corner icons.
To specify the precise width and height of a chart, select it on a slide and use the Size section of the right sidebar that will be activated.
To specify the precise dimensions of an image or autoshape, right-click the necessary object on the slide and select the Image/Shape Advanced Settings option from the menu. Specify necessary values on the Size tab of the Advanced Settings window and press OK.
Reshape autoshapes
When modifying some shapes, for example Figured arrows or Callouts, the yellow diamond-shaped icon is also available. It allows adjusting some aspects of the shape, for example, the length of the head of an arrow.
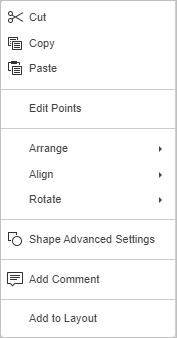
To reshape an autoshape, you can also use the Edit Points option from the context menu.
The Edit Points option is used to customize or to change the curvature of your shape.
-
To activate a shape’s editable anchor points, right-click the shape and choose Edit Points from the menu. The black squares that become active are the points where two lines meet, and the red line outlines the shape. Click and drag it to reposition the point, and to change the shape outline.
-
Once you click the anchor point, two blue lines with white squares at the ends will appear. These are Bezier handles that allow you to create and a curve and to change a curve’s smoothness.
-
As long as the anchor points are active, you can add and delete them:
- To add a point to a shape, hold Ctrl and click the position where you want to add an anchor point.
- To delete a point, hold Ctrl and click the unnecessary point.
Move objects
To alter the autoshape/image/chart/table/text box position, use the icon that appears after hovering your mouse cursor over the object. Drag the object to the necessary position without releasing the mouse button.
To move the object by the one-pixel increments, hold down the Ctrl key and use the keybord arrows.
To move the object strictly horizontally/vertically and prevent it from moving in a perpendicular direction, hold down the Shift key when dragging.
To specify the precise position of an image, right-click it on a slide and select the Image Advanced Settings option from the menu. Specify necessary values in the Position section of the Advanced Settings window and press OK.
Rotate objects
To manually rotate an autoshape/image/text box, hover the mouse cursor over the rotation handle and drag it clockwise or counterclockwise. To constrain the rotation angle to 15 degree increments, hold down the Shift key while rotating.
To rotate the object by 90 degrees counterclockwise/clockwise or flip the object horizontally/vertically, you can use the Rotation section of the right sidebar that will be activated once you select the necessary object. To open it, click the Shape settings or the Image settings icon to the right. Click one of the buttons:
- to rotate the object by 90 degrees counterclockwise
- to rotate the object by 90 degrees clockwise
- to flip the object horizontally (left to right)
- to flip the object vertically (upside down)
It's also possible to right-click the object, choose the Rotate option from the contextual menu and then use one of the available rotation options.
To rotate the object by an exactly specified angle, click the Show advanced settings link on the right sidebar and use the Rotation tab of the Advanced Settings window. Specify the necessary value measured in degrees in the Angle field and click OK.
Return to previous page