Save/print/download your presentation
-
operations with files
-
save files
-
Save, download, print your document
-
Save, print, download your presentation
-
Save, print, download your spreadsheet
-
Save, export, print your document
-
Save, export, print your spreadsheet
-
Save and export your presentation
-
Download and print your document
-
Download and print your spreadsheet
-
print files
-
Save, download, print your document
-
Save, print, download your presentation
-
Save, print, download your spreadsheet
-
Save, export, print your document
-
Save, export, print your spreadsheet
-
Print your presentation
-
Download and print your document
-
Download and print your spreadsheet
Saving
By default, the online Presentation Editor automatically saves your file every 2 seconds when you are working on it preventing your data loss if the program closes unexpectedly. If you co-edit the file in the Fast mode, the timer requests for updates 25 times a second and saves the changes if there are any. When the file is co-edited in the Strict mode, changes are automatically saved within 10-minute intervals. If you need, you can easily select the preferred co-editing mode or disable the Autosave feature on the Advanced Settings page.
To save your presentation manually in the current format and location,
- press the Save icon on the left side of the editor header, or
- use the Ctrl+S key combination, or
- click the File tab of the top toolbar and select the Save option.
In the desktop version, to prevent data loss if the program closes unexpectedly, you can turn on the Autorecover option on the Advanced Settings page.
In the desktop version, you can save the presentation under a different name, in a new location or format,
- click the File tab of the top toolbar,
- select the Save as option,
- choose one of the available formats depending on your needs: PPTX, ODP, PDF, PDF/A, PNG, JPG. You can also choose the Рresentation template (POTX or OTP) option.
Downloading
In the online version, you can download the resulting presentation onto the hard disk drive of your computer,
- click the File tab of the top toolbar,
- select the Download as option,
- choose one of the available formats depending on your needs: PPTX, PDF, ODP, POTX, PDF/A, OTP, PNG, JPG.
Saving a copy
In the online version, you can save a copy of the file on your portal,
- click the File tab of the top toolbar,
- select the Save Copy as option,
- choose one of the available formats depending on your needs: PPTX, PDF, ODP, POTX, PDF/A, OTP, PNG, JPG.
- select a location of the file on the portal and press Save.
Printing
To print out the current presentation,
- click the Print icon on the left side of the editor header, or
- use the Ctrl+P key combination, or
- click the File tab of the top toolbar and select the Print option.
The Firefox browser enables printing without downloading the document as a .pdf file first.
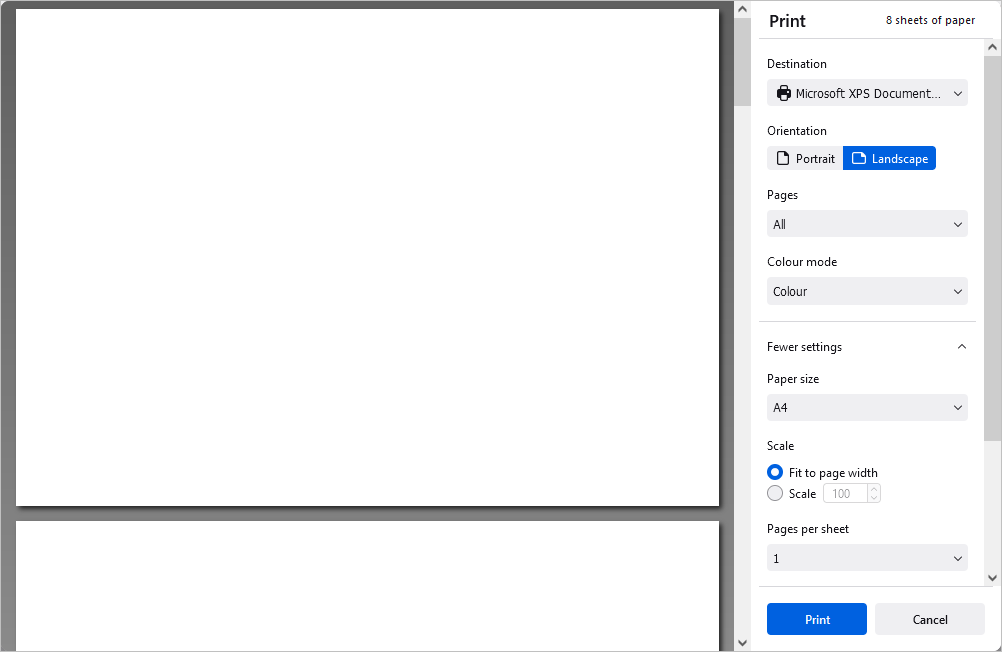
Adjust the following parameters in the Print window that opens:
In the desktop version, the available printing settings are Print range, number of Slides, Copies, Print sides, and Paper size. You can also print the file to PDF or use the Quick print button in the top toolbar to print the file on the last selected or default printer.
It's also possible to print the selected slides using the Print Selection option from the contextual menu both in the Edit and View modes (Right Mouse Button Click on the selected slides and choose option Print selection).
In the online version, a PDF file based on your presentation will be generated. You can open and print it out, or save onto the hard disk drive of your computer or a removable medium to print it out later. Some browsers (e.g. Chrome and Opera) support direct printing.
Return to previous page