Insert text objects
-
inserire oggetti
-
text art
-
formattazione casella di testo
-
formattare caratteri
-
Posta
-
Impostare il tipo, la dimensione e il colore del carattere
-
Impostare tipo di carattere, dimensione, stile e colore
-
Impostare il tipo, la dimensione e il colore del carattere
-
Applicare stili di decorazione dei caratteri
-
Aggiungere collegamenti ipertestuali
-
Impostare il tipo, la dimensione e il colore del carattere
-
Aggiungere collegamenti ipertestuali
-
Impostare il tipo, la dimensione e il colore del carattere
-
Applicare stili di decorazione dei caratteri
-
Aggiungere collegamenti ipertestuali
-
Impostare il tipo, la dimensione e il colore del carattere
-
Applicare stili di decorazione dei caratteri
-
Aggiungere collegamenti ipertestuali
-
Impostare il tipo, la dimensione e il colore del carattere
-
Aggiungere collegamenti ipertestuali
-
Impostare il tipo, la dimensione e il colore del carattere
-
Applicare stili di decorazione dei caratteri
-
Aggiungere collegamenti ipertestuali
-
Impostare il tipo, la dimensione e il colore del carattere
-
Applicare stili di decorazione dei caratteri
-
Aggiungere collegamenti ipertestuali
-
Impostare il tipo, la dimensione e il colore del carattere
-
Aggiungere collegamenti ipertestuali
-
Impostare il tipo, la dimensione e il colore del carattere
-
Applicare stili di decorazione dei caratteri
-
Impostare il tipo, la dimensione e il colore del carattere
-
Applicare stili di decorazione dei caratteri
-
Aggiungere collegamenti ipertestuali
-
Impostare il tipo, la dimensione e il colore del carattere
-
Aggiungere collegamenti ipertestuali
-
Impostare il tipo, la dimensione e il colore del carattere
-
Applicare stili di decorazione dei caratteri
-
Aggiungere collegamenti ipertestuali
-
allineare testo
-
stile di caratteri
-
Impostare il tipo, la dimensione e il colore del carattere
-
Applicare stili di decorazione dei caratteri
-
Impostare il tipo, la dimensione e il colore del carattere
-
Applicare stili di decorazione dei caratteri
-
Impostare il tipo, la dimensione e il colore del carattere
-
Impostare il tipo, la dimensione e il colore del carattere
-
Applicare stili di decorazione dei caratteri
-
Impostare il tipo, la dimensione e il colore del carattere
-
Applicare stili di decorazione dei caratteri
-
Impostare il tipo, la dimensione e il colore del carattere
-
Impostare il tipo, la dimensione e il colore del carattere
-
Applicare stili di decorazione dei caratteri
-
Impostare il tipo, la dimensione e il colore del carattere
-
Applicare stili di decorazione dei caratteri
-
Impostare il tipo, la dimensione e il colore del carattere
-
Impostare il tipo, la dimensione e il colore del carattere
-
Applicare stili di decorazione dei caratteri
-
rientro del testo
-
interlinea
To draw attention to a specific part of the spreadsheet, you can insert a text box (a rectangular frame that allows to enter text within it) or a Text Art object (a text box with a predefined font style and color that allows to apply some text effects).
Add a text object
You can add a text object anywhere on the worksheet. To do that:
- switch to the Insert tab of the top toolbar,
- select the necessary text object type:
- click outside of the text object to apply the changes and return to the worksheet.
The text within the text object is a part of the latter (when you move or rotate the text object, the text moves or rotates with it).
As an inserted text object represents a rectangular frame with text in it (Text Art objects have invisible text box borders by default) and this frame is a common autoshape, you can change both the shape and text properties.
To delete the added text object, click on the text box border and press the Delete key on the keyboard. The text within the text box will also be deleted.
Format a text box
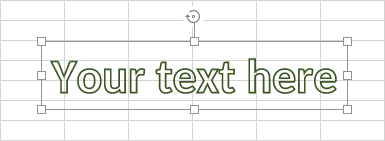
Select the text box clicking on its border to be able to change its properties. When the text box is selected, its borders are displayed as solid (not dashed) lines.
- to manually resize, move, rotate the text box use the special handles on the edges of the shape.
- to edit the text box fill, stroke, replace the rectangular box with a different shape, or access the shape advanced settings, click the Shape settings icon on the right sidebar and use the corresponding options.
- to arrange text boxes as related to other objects, align several text boxes as related to each other, rotate or flip a text box, right-click on the text box border and use the contextual menu options. To learn more on how to arrange and align objects you can refer to this page.
- to create columns of text within the text box, right-click on the text box border, click the Shape Advanced Settings option and switch to the Columns tab in the Shape - Advanced Settings window.
Format the text within the text box
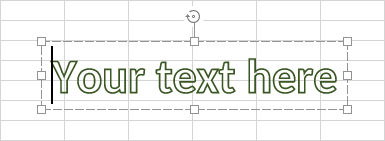
Click the text within the text box to be able to change its properties. When the text is selected, the text box borders are displayed as dashed lines.
Note: it's also possible to change text formatting when the text box (not the text itself) is selected. In such a case, any changes will be applied to all the text within the text box. Some font formatting options (font type, size, color and decoration styles) can be applied to a previously selected portion of the text separately.
Adjust paragraph advanced settings
Change the advanced settings of the paragraph (you can adjust paragraph indents and tab stops for the multi-line text within the text box and apply some font formatting settings). Put the cursor within the paragraph you need - the Text settings tab will be activated at the right sidebar. Click the Show advanced settings link. It's also possible to right-click the text in a text box and use the Text advanced settings item from the contextual menu. The paragraph properties window will be opened:
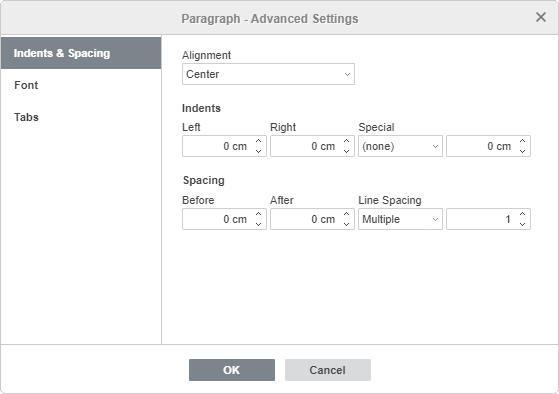
The Indents & Spacing tab allows to:
- change the alignment type for the paragraph text,
-
change the paragraph indents as related to internal margins of the text box,
- Left - set the paragraph offset from the left internal margin of the text box specifying the necessary numeric value,
- Right - set the paragraph offset from the right internal margin of the text box specifying the necessary numeric value,
- Special - set an indent for the first line of the paragraph: select the corresponding menu item ((none), First line, Hanging) and change the default numeric value specified for First Line or Hanging,
- change the paragraph line spacing.
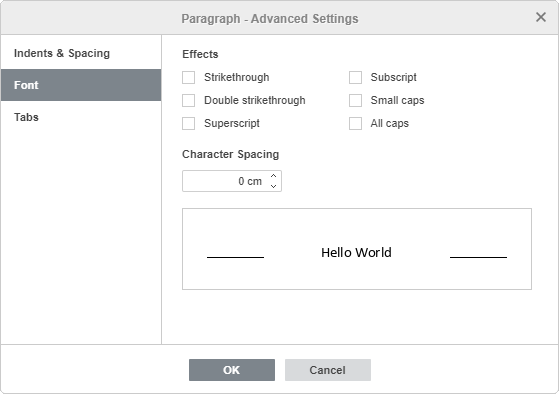
The Font tab contains the following parameters:
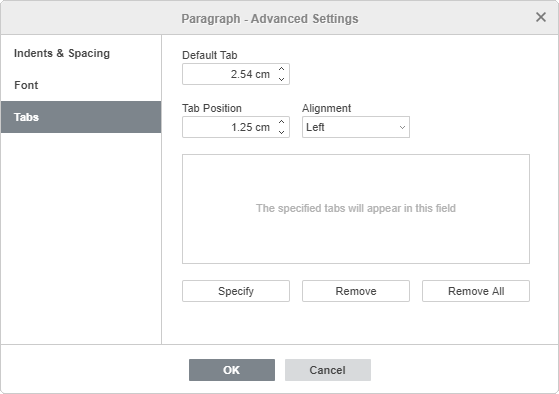
The Tab tab allows to change tab stops i.e. the position the cursor advances to when you press the Tab key on the keyboard.
Edit a Text Art style
Select a text object and click the Text Art settings icon on the right sidebar.
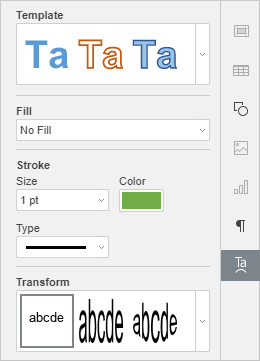
- Change the applied text style selecting a new Template from the gallery. You can also change the basic style additionally by selecting a different font type, size etc.
- Change the font fill and stroke. The available options are the same as the ones for autoshapes.
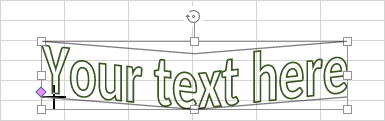
- Apply a text effect by selecting the necessary text transformation type from the Transform gallery. You can adjust the degree of the text distortion by dragging the pink diamond-shaped handle.
Alla pagina precedente