Manage cells, rows, and columns
You can insert blank cells above or to the left of the selected cell on a worksheet. You can also insert an entire row above the selected one or a column to the left of the selected column. To make it easy to view a large amount of information, you can hide some rows or columns and display them again. It's also possible to specify a certain row height and column width.
Insert cells, rows, columns
To insert a blank cell to the left of the selected cell:
- right-click the cell to the left of which you wish to insert a new one,
- click the Insert cells icon situated at the Home tab of the top toolbar or select the Insert item from the right-click menu and use the Shift cells right option.
The program will shift the selected cell to the right to insert a blank one.
To insert a blank cell above the selected cell:
- right-click the cell above which you wish to insert a new one,
- click the Insert cells icon situated at the Home tab of the top toolbar or select the Insert item from the right-click menu and use the Shift cells down option.
The program will shift the selected cell down to insert a blank one.
To insert an entire row:
- select either the whole row by clicking its heading or a cell in the row above which you wish to insert a new one,
Note: to insert multiple rows, select the same number of rows as you wish to insert.
- click the Insert cells icon situated at the Home tab of the top toolbar and use the Entire row option,
or right-click the selected cell, select the Insert item from the right-click menu, then choose the Entire row option,
or right-click the selected row(s) and use the Insert Top option from the right-click menu.
The program will shift the selected row down to insert a blank one.
To insert an entire column:
- select either the whole column by clicking its heading or a cell in the column to the left of which you wish to insert a new one,
Note: to insert multiple columns, select the same number of columns as you wish to insert.
- click the Insert cells icon situated at the Home tab of the top toolbar and use the Entire column option,
or right-click the selected cell, select the Insert item from the right-click menu, then choose the Entire column option,
or right-click the selected column(s) and use the Insert Left option from the right-click menu.
The program will shift the selected column to the right to insert a blank one.
Hide and show rows and columns
To hide a row or column:
- select rows or columns you wish to hide,
- right-click the selected rows or columns and use the Hide option from the right-click menu.
To display hidden rows or columns, select visible rows above and below the hidden rows or visible columns to the left and to the right of the hidden columns, right-click them and use the Show option from the right-click menu.
Change column width and row height
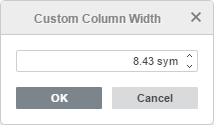
The column width determines how many characters with default formatting can be displayed in the column cell. The default value is set to 8.43 symbols. To change it:
- select columns you wish to change,
- right-click the selected columns and use the Set Column Width option from the right-click menu,
- choose one of the available options:
- select the Auto Fit Column Width option to automatically adjust the width of each column according to its content, or
-
select the Custom Column Width option and specify a new value from 0 to 255 in the Custom Column Width window, then click OK.
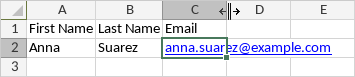
To change the width of a single column manually, move the mouse cursor over the right border of the column heading so that the cursor turns into the bidirectional arrow . Drag the border to the left or right to set a custom width or double-click the mouse to automatically change the column width according to its content.
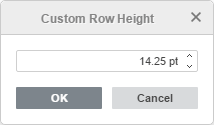
The default row height value is 14.25 points. To change it:
- select rows you wish to change,
- right-click the selected rows and use the Set Row Height option from the right-click menu,
- choose one of the available options:
- select the Auto Fit Row Height option to automatically adjust the height of each row according to its content, or
-
select the Custom Row Height option and specify a new value from 0 to 408.75 in the Custom Row Height window, then click OK.
To change the height of a single row manually, drag the bottom border of the row heading.
Delete cells, rows, columns
To delete an unnecessary cell, row, or column:
- select cells, rows, or columns you wish to delete,
- click the Delete cells icon situated at the Home tab of the top toolbar or select the Delete item from the right-click menu and select the appropriate option:
if you use the Shift cells left option a cell to the right of the deleted one will be moved to the left;
if you use the Shift cells up option a cell below the deleted one will be moved up;
if you use the Entire row option a row below the selected one will be moved up;
if you use the Entire column option a column to the right of the deleted one will be moved to the left;
You can always restore the deleted data using the Undo icon at the top toolbar.
Alla pagina precedente